Best Persian Kotlet Recipe: Easy Step-by-Step Instructions
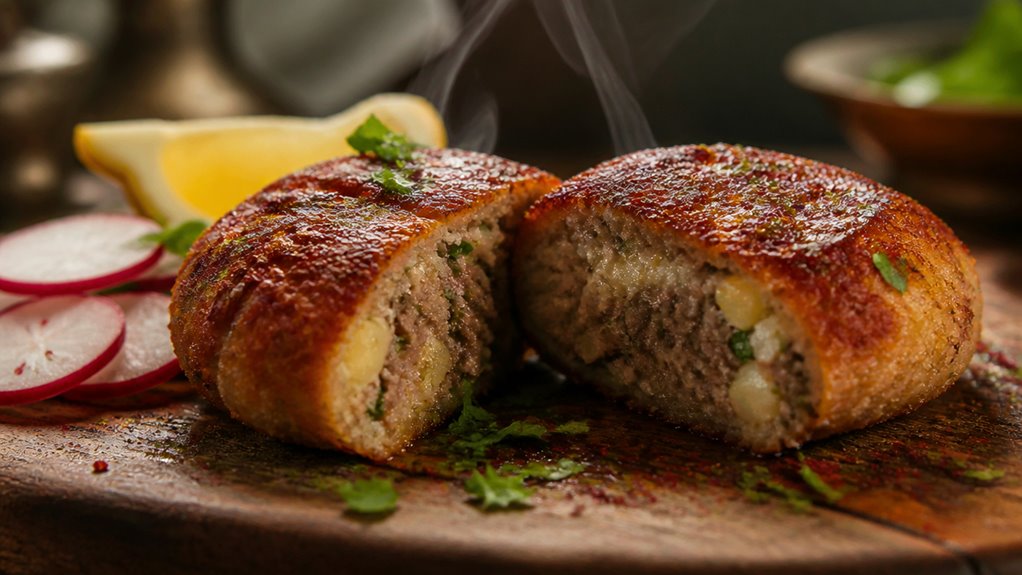
To make the best Persian kotlet, start with tender boiled potatoes and finely grated, drained onions mixed into seasoned ground beef or lamb.
Add eggs and spices like turmeric and advieh for rich flavor, then gently shape the mixture into small oval patties.
Shallow fry them until golden and crispy on both sides, then serve with warm pita, fresh herbs, and pickles.
Want to master perfect texture, cooking techniques, and delicious serving ideas? There’s more to discover ahead.
Key Takeaways
- Use ground beef or lamb mixed with boiled mashed potatoes and grated, drained onions for moist, flavorful kotlet patties.
- Season with turmeric, black pepper, salt, and optional advieh or cumin for authentic Persian aroma and taste.
- Shape small, uniform oval patties with eggs to bind, then shallow fry until golden and crispy on both sides.
- Serve kotlet with fresh herbs, pickled cucumbers, creamy yogurt, and warm pita or lavash bread for a traditional experience.
- Store cooled kotlet in airtight containers in the fridge up to three days or freeze tightly wrapped for longer preservation.
Persian Kotlet Recipe Ingredients and Frying Times
| Recipe Detail | Information |
|---|---|
| Recipe Type | Persian Kotlet |
| Main Protein | Ground beef or lamb |
| Potatoes | Boiled and mashed |
| Onion | Finely grated and well-drained |
| Binding Ingredients | Eggs; breadcrumbs if needed |
| Main Seasonings | Turmeric, black pepper, salt |
| Optional Seasonings | Advieh or cumin |
| Shape | Small oval or teardrop patties |
| Cooking Method | Shallow frying |
| Frying Time | About 4–5 minutes per side |
| Oil | Neutral, high-smoke-point oil |
| Texture Goal | Golden, crispy exterior with a dense, tender center |
| Serving Ideas | Fresh herbs, pickled cucumbers, torshi, pita or lavash |
| Refrigerator Storage | Up to 3 days |
| Freezer Storage | Up to 2–3 months |
Choosing Ingredients and Seasonings for Authentic Kotlet

When you’re choosing ingredients for authentic Persian kotlet, the key is balancing flavors and textures that bring the dish to life.
Choosing the right ingredients is essential to capture the authentic flavors and textures of Persian kotlet.
Start with quality ground beef or lamb; the meat’s richness forms the dish’s heart. You’ll want tender potatoes, either boiled or grated, to bind everything smoothly.
Fresh onions add a subtle sweetness, but be sure to drain them well to avoid sogginess. Eggs help hold the mixture together, giving you that perfect patty shape.
For seasoning, don’t be shy with turmeric, black pepper, and salt; these basics build a warm, earthy backbone.
If you’re feeling adventurous, a pinch of advieh or cumin adds fragrant depth. The right balance of spices and fresh ingredients guarantees each bite bursts with authentic Persian charm.
Nespresso decaf capsules are sealed in aluminum to protect aroma and freshness, making them a convenient recycling option for eco-conscious kitchens.
Preparing Potatoes and Onions for Perfect Kotlet
Although potatoes and onions might seem simple, preparing them correctly is essential to achieving the perfect kotlet texture and flavor. Start by boiling potatoes until tender, then mash them smoothly. This creates the ideal base.
For onions, grate them finely and squeeze out excess moisture to avoid soggy patties. Balancing moisture is key; too wet and your kotlet falls apart, too dry and it crumbles.
Freeze any extra prepared patties tightly wrapped to preserve freshness for later use. Freezer storage
| Step | Tip |
|---|---|
| Boil potatoes | Until fork-tender |
| Mash potatoes | Smooth, no lumps |
| Grate onions | Fine texture |
| Squeeze onions | Remove excess liquid |
| Combine gently | Avoid overmixing |
With these steps, you’ll get that dense, perfectly cohesive mixture that fries up golden and delicious every time.
Mixing and Shaping Kotlet Patties Like a Pro
Now that you’ve prepared your potatoes and onions just right, it’s time to bring everything together by mixing and shaping the kotlet patties.
Use your hands to combine the ground meat, mashed potatoes, grated onion, eggs, and spices thoroughly. Knead gently but firmly until the mixture feels cohesive and slightly sticky. That’s your cue that it’s ready to shape.
Keep your hands damp to prevent sticking and form small ovals or teardrop shapes, pressing them just enough to hold firm.
Here’s how to mix and shape like a pro:
Knead the mixture for 3-5 minutes to activate binding.
Use damp hands to shape patties evenly.
Keep patties uniform in size for even cooking later.
This hands-on method guarantees perfect kotlet every time. Hanger steak has a butcher’s personal cut reputation for intense beefy flavor and tenderness, so if you choose to use it in place of other meats, trim the central sinew before grinding or chopping.
How to Shallow Fry Kotlet for Even Browning?
To achieve that perfect golden crust on your kotlet, start by heating a shallow layer of oil in a skillet over medium heat. You want enough oil to coat the bottom generously but not so much that the patties are swimming.
Once the oil shimmers, gently lay your shaped kotlets in the pan, spacing them apart to prevent sticking and crowding. Let them cook undisturbed for about 4-5 minutes; that patience pays off with a beautifully even browning.
Flip carefully using a thin spatula, then fry the other side until equally golden and crisp. If needed, press the patties lightly with the spatula to ensure even contact with the pan.
Drain on paper towels to remove excess oil, and you’ll have that irresistible crispy exterior every time. Stand mixers provide consistent mixing for batters and kneading dough, essential for baked goods and ensuring even mixing and aeration for superior results, which can be helpful when preparing dough-based fillings for kotlet.
Achieving the Perfect Kotlet Texture and Flavor
To achieve that perfect kotlet texture, mastering moisture control is key. Seriously, squeezing out the onion juice and balancing the moisture from the potatoes can make a world of difference. Trust me, it’s worth the effort!
Now, let’s talk about flavor. Adding spices like turmeric and cumin? Game-changer. These little additions really wake up the taste and keep each bite exciting. So, let’s dive into how these simple tweaks can transform your patties from just good to truly unforgettable! A helpful tip is to keep fillings centered and sealed when shaping patties to prevent leaks and ensure even cooking, especially with moist fillings.
Moisture Control Techniques
When crafting the perfect kotlet, mastering moisture control is your secret weapon for achieving that ideal dense yet tender texture.
Too much liquid from onions or potatoes can make your patties soggy and prone to falling apart. You want just the right balance to hold everything together without dryness. Here’s how you nail it:
Squeeze grated onion firmly to remove excess juice before mixing with other ingredients.
Use boiled, slightly mashed potatoes rather than watery ones, ensuring they’re not overcooked.
Adjust the mix by adding breadcrumbs if it feels too wet, or a little extra potato if it’s too dry.
Knead gently but thoroughly to distribute moisture evenly and aid binding, which also helps retain protein and texture during cooking.
Flavor-Enhancing Ingredients
Dialing up the flavor in your kotlet starts with choosing the right ingredients that bring both depth and balance.
You want turmeric’s warm earthiness paired with a hint of black pepper’s subtle heat to awaken your taste buds.
Don’t underestimate the magic of grated onion, well-drained to avoid sogginess but bursting with natural sweetness.
Fresh herbs like parsley or cilantro add bright, herbaceous notes that cut through the richness.
A touch of advieh or cumin lends that signature Persian aroma, making each bite unforgettable.
Eggs and potatoes aren’t just binders; they soak up these flavors, creating a harmonious blend.
As you mix everything by hand, you’ll feel the texture come together, promising a kotlet that’s not only well-formed but irresistibly flavorful.
For commercial kitchens or busy hosts, choose durable tools and equipment with sturdy metal components to maintain consistency and ease cleanup.
Serving Kotlet With Traditional Persian Sides
Although kotlet shines on its own, pairing it with traditional Persian sides elevates the experience.
This brings vibrant flavors and textures to your plate. You’ll love how these accompaniments balance the rich, savory patties, adding freshness and crunch that make every bite memorable.
Try these classic sides to complete your kotlet meal:
Fresh herbs (sabzi khordan): A mix of parsley, mint, tarragon, and basil adds an invigorating, aromatic contrast.
Pickled cucumbers and torshi: These tangy, slightly sour pickles cut through the richness and brighten the dish.
Lavash or pita bread: Soft, warm bread lets you wrap the kotlet and sides into a delicious handheld treat.
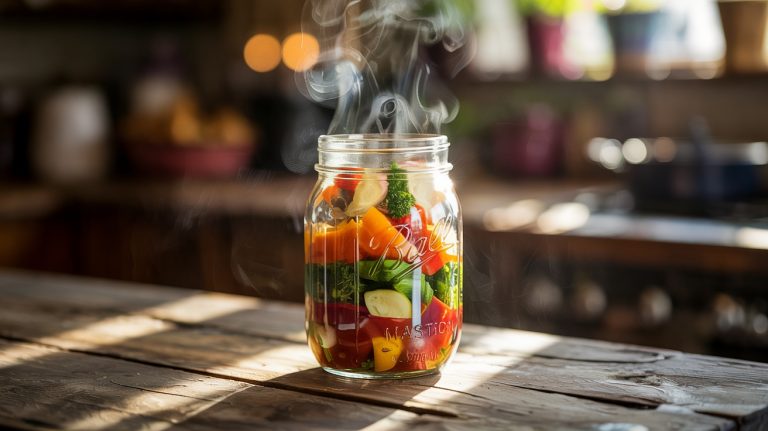
Serving kotlet this way invites you to savor every flavor and texture with each forkful. For longer-lasting accompaniments, consider storing extra herbs and pickles in airtight mason jars in a cool, dark place to maintain freshness.
How to Store and Enjoy Leftover Kotlet?
Since kotlet holds its flavor and texture well, storing leftovers can be a real treat for your next meal. Let the patties cool completely before placing them in an airtight container.
Refrigerate for up to three days to keep them fresh.
When you’re ready to enjoy them again, reheat gently in a skillet over medium heat to restore that crispy golden crust. Avoid microwaving, which can make them soggy.
If you prefer cold kotlet, slice and serve with fresh herbs, pickled cucumbers, or a spread of creamy yogurt for a quick, satisfying snack. You can even tuck them into warm pita or lavash bread for a delicious sandwich on the go.
Leftover kotlet is versatile, so don’t hesitate to get creative with your next meal!
For longer storage of accompanying sauces or condiments, consider using wide mouth glass jars to ensure an airtight seal and easier filling.
Frequently Asked Questions
Can I Make Kotlet Vegetarian Without Meat?
Yes, you can definitely make kotlet vegetarian without meat!
Just swap the ground meat for a hearty mix of mashed potatoes, grated cauliflower, or cooked lentils to keep that dense, shapeable texture.
Add your usual spices, grated onion (well-drained), and eggs or a vegan binder to hold it all together.
Fry them golden brown in oil, and you’ll have delicious, meat-free kotlets that are just as satisfying and flavorful.
What Oil Is Best for Frying Kotlet?
Think of oil as your frying stage’s spotlight. It needs to shine just right to make kotlet golden and crisp.
You’ll want to use a neutral oil with a high smoke point, like vegetable, canola, or sunflower oil. These oils handle medium heat without burning, letting your patties brown beautifully.
Avoid heavy or strongly flavored oils; you want the kotlet’s spices to take center stage, not the oil’s taste.
How Long Can Kotlet Be Frozen?
You can freeze kotlet for up to 2 to 3 months without sacrificing much flavor or texture.
Just make sure to let them cool completely before wrapping them tightly in plastic wrap or placing them in an airtight container.
When you’re ready, thaw them overnight in the fridge and reheat gently to keep them moist and tender.
Freezing this way keeps your kotlet ready for a quick, delicious meal anytime.
Can Kotlet Be Baked Instead of Fried?
You don’t need a time machine to know that yes, you can bake kotlet instead of frying it.
Baking’s a great option if you want a lighter, less oily version. Just shape your patties, place them on a greased tray, and bake at 375°F (190°C) for about 25-30 minutes, flipping halfway.
You’ll get a golden crust with a tender inside, keeping that classic kotlet flavor without the extra grease.
Are There Gluten-Free Variations of Kotlet?
Yes, you can absolutely make gluten-free kotlet! Just skip breadcrumbs or substitute them with gluten-free alternatives like crushed rice crackers, almond flour, or gluten-free oats.
You might also rely more on potatoes and eggs to bind the mixture. Remember to keep the onion juice well-drained to avoid sogginess.
This way, you’ll enjoy that classic kotlet texture and flavor without worrying about gluten, making it perfect for sensitive diets.
The Secret to Flavorful and Crispy Persian Kotlet
Now that you’ve mastered mixing, molding, and frying your flavorful kotlet, you’re set to savor sensational bites bursting with balanced spices.
Remember, the secret is in selecting superb seasonings and shaping each patty with care.
Whether you serve it with traditional sides or store leftovers for later, your Persian kotlet will consistently charm and comfort.
So, keep cooking confidently and let your kitchen creations continue enthralling your taste buds!