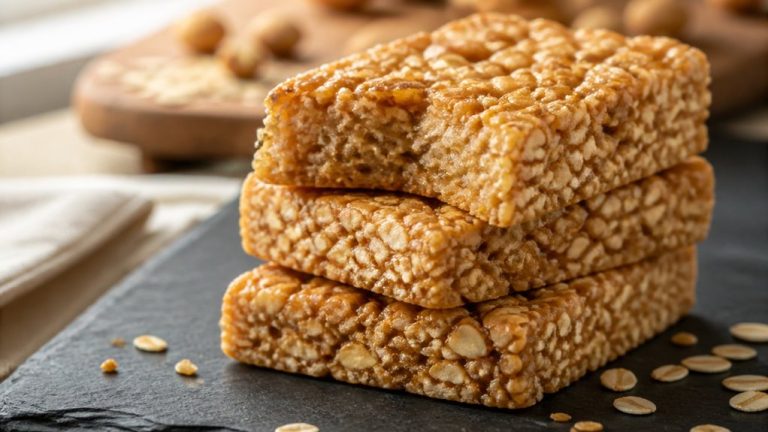

Easy Peanut Brittle Recipe With Brown Sugar: Sweet and Crunchy
You can make irresistibly crisp peanut brittle using brown sugar, corn syrup, water, and raw peanuts.
Cook the syrup in a heavy pan until it reaches 300°F. Then stir in peanuts and toast them just right.
Off heat, add butter and baking soda for richness and lightness.
Pour onto a lined sheet, spread thin, and let it cool fully for that perfect snap.
With simple tools and careful timing, you’ll master a glossy, crunchy treat and discover tips to avoid common pitfalls.
Key Takeaways
- Use 1 cup packed brown sugar for a rich, caramel-like flavor in your peanut brittle.
- Cook sugar, corn syrup, and water to 300°F–310°F (hard-crack stage) for a crisp, glassy finish.
- Stir in 2 cups raw peanuts at 280°F, then add butter and baking soda off heat for a light, crunchy texture.
- Pour syrup immediately onto a lined baking sheet and spread thin with a spatula for even crispness.
- Let brittle cool completely at room temperature before breaking for perfect snap and texture.
Homemade Peanut Brittle Recipe: Quick Recipe Table for a Crisp, Crunchy Treat
| Recipe Detail | Information |
|---|---|
| Main Term | Easy Peanut Brittle Recipe With Brown Sugar |
| Recipe Type | Homemade candy, sweet and crunchy peanut brittle |
| Ingredients | 1 cup packed brown sugar, 1/2 cup corn syrup, 1/2 cup water, 1/4 cup butter, 2 cups raw Spanish peanuts, a pinch of salt, baking soda |
| Preparation Method | Cook brown sugar, corn syrup, and water until the syrup reaches the hard-crack stage. Add peanuts at about 280°F and cook until toasted. Remove from heat, stir in butter and baking soda, then pour onto a lined baking sheet and spread thin. |
| Cooking Temperature | 300°F to 310°F for the hard-crack stage |
| Peanut Addition Temperature | About 280°F |
| Cooking Time | Not specified. Cook until the syrup reaches the required temperature and the peanuts are toasted. |
| Doneness | The brittle should cool completely and have a crisp, glassy finish that snaps when broken. |
| Equipment | Heavy-bottomed saucepan, candy thermometer, baking sheet, parchment paper or silicone mat, whisk, spatula, wet pastry brush, timer |
| Cooling Time | About 1 hour, or until completely cooled to room temperature |
| Storage | Store in an airtight container in a cool, dry place. Layer pieces between parchment paper. Avoid refrigeration. |
| Freezing | Up to 6 months, wrapped tightly and sealed in an airtight container or freezer bag |
| Serving Suggestions | Break into bite-sized pieces and enjoy as a sweet, crunchy treat. |
| Important Tips | Use corn syrup to help prevent crystallization. Avoid stirring once the syrup boils. Brush down sugar crystals from the pan sides. Add butter and baking soda off heat. Pour and spread quickly before the mixture hardens. |
Gather Ingredients for Brown Sugar Peanut Brittle

Before you plunge into making your brown sugar peanut brittle, gather all the ingredients you’ll need to create that perfect batch. Start with one cup of packed brown sugar, which gives the brittle its rich, caramel-like flavor.
Add half a cup of corn syrup and half a cup of water. These keep your candy smooth and prevent crystallization. Don’t forget a quarter cup of butter to enrich the taste and help with spreading.
Grab two cups of raw Spanish peanuts; their crunch is essential. Sprinkle in a pinch of salt to balance sweetness. If your recipe calls for it, have baking soda ready. It aerates the brittle, making it lighter.
Once you have these on hand, you’ll be set to cook up a delicious, golden-amber treat! Dehydration techniques can concentrate flavors and alter texture, so consider controlled drying methods like low-temperature dehydration if you plan to experiment with shelf-stable chocolate or nut components.
Prepare Equipment and Workspace for Candy Making
While your ingredients are ready, setting up your equipment and workspace properly is just as essential to making perfect peanut brittle.
Start by lining a sturdy baking sheet with parchment paper or a silicone mat. This prevents sticking and helps the brittle release smoothly.
Grab a heavy-bottomed saucepan to cook your syrup evenly without scorching. Keep a whisk, spatula, and heat-resistant gloves nearby; you’ll need to move quickly once the candy reaches the right temperature.
Clear your countertop to create plenty of space for pouring and spreading the hot mixture fast before it hardens. Also, have a timer and candy thermometer ready; they’re your best friends for precision.
Preparing your gear carefully sets the stage for a smooth, stress-free candy-making adventure. For cleanup, plan to dissolve any sticky residue quickly using boiling water to prevent hardening and simplify removal.
Make Sugar Syrup Without Crystals
To whip up a smooth sugar syrup without those annoying crystals, it’s important to keep an eye on the sides of your pan. As you cook, just grab a brush and wipe away any sugar buildup—this little move can really help!
Oh, and here’s a tip: adding corn syrup not only sweetens things up but also works wonders in preventing those pesky crystals from forming. With these simple steps in your back pocket, your syrup will stay glossy and perfect for making peanut brittle every single time! Additionally, using glycerin or glucose can help inhibit crystallization and improve texture stability.
Preventing Sugar Crystallization
If you want your peanut brittle to have a smooth, glassy finish instead of a gritty mess, you’ve got to keep sugar crystals from forming during syrup cooking. Start by stirring sugar, corn syrup, and water until fully dissolved over medium heat. Avoid stirring once the syrup boils to prevent crystals.
Use a wet pastry brush to wash down sugar crystals clinging to the pan sides. Adding a bit of corn syrup or an acid like lemon juice helps stop crystallization too. Ensure proper ventilation and avoid overheating your cookware to prevent scorching and unintended caramelization from affecting texture, especially when using prolonged heat overheating protection.
| Tip | Why It Works | When to Use |
|---|---|---|
| Stir until dissolved | Prevents early crystal formation | Before boiling begins |
| No stirring while boiling | Avoids triggering crystallization | During syrup boiling |
| Brush pan sides | Removes stray crystals | While boiling |
| Add corn syrup or acid | Interferes with crystal growth | At syrup start or before boil |
Using Corn Syrup Benefits
Keeping sugar crystals at bay sets the stage for smooth, glossy peanut brittle, and that’s where corn syrup truly shines.
When you add corn syrup to your sugar mixture, it interrupts the crystallization process, helping the syrup stay silky and clear instead of grainy.
This means your brittle will have that perfect glassy finish and melt-in-your-mouth texture you’re aiming for.
Corn syrup’s unique sugars bind with the sucrose, preventing those pesky crystals from forming as you cook.
Plus, it adds a subtle sweetness without overpowering the rich brown sugar flavor.
Using corn syrup gives you more control, so your candy won’t seize up or become gritty.
Trust me, it’s a small addition that makes a huge difference in crafting flawless peanut brittle every time.
Dehydrator sheets can also be used safely at high temperatures in appliances like ovens when their heat limits are followed, making them a useful tool for drying some candy components heat-resistant up to 428°F.
Cleaning Pan Sides
When sugar crystals cling stubbornly to your pan’s sides, they threaten to ruin the smooth texture of your syrup and ultimately your peanut brittle.
To keep your syrup crystal-free, grab a damp pastry brush and gently sweep down the pan’s edges while the mixture simmers. This simple step dissolves any stray sugar granules before they cause trouble.
Avoid stirring the syrup directly, which can encourage crystallization. Instead, trust the gentle swirling motion of your pan to mix ingredients evenly.
Keeping your pan sides clean means your syrup stays silky, glossy, and ready to transform into perfectly crunchy brittle. This small but vital trick guarantees every batch turns out beautifully smooth, letting the rich, caramelized flavor shine through without any gritty surprises.
Add Peanuts and Cook to the Right Temperature
Stir the peanuts into the bubbling syrup once it reaches about 280°F, the soft-crack stage, to make sure they toast perfectly without burning.
You’ll notice the syrup thickening and turning a rich amber color as the peanuts soak up the heat, releasing their toasty aroma.
Keep the mixture cooking just long enough to develop that deep, nutty flavor without risking bitterness.
Watch the temperature closely with a candy thermometer for precise timing.
Stir gently but continuously to coat every peanut evenly.
Avoid rushing; this stage builds the brittle’s signature crunch and flavor.
For safer handling and consistent heat retention while working with hot sugar, consider using a deep cast iron pan to maintain even temperatures and reduce hotspots.
Add Butter and Baking Soda for Better Texture
Once your peanuts are perfectly toasted and the syrup reaches that rich amber hue, it’s time to enrich the mixture with butter and baking soda.
Adding butter at this stage smooths the brittle, giving it a luscious, melt-in-your-mouth quality. Meanwhile, baking soda reacts with the syrup, creating tiny air bubbles that lighten the texture and make your brittle crisp yet tender.
Here’s a quick look at what these ingredients do:
| Ingredient | Role in Texture |
|---|---|
| Butter | Adds richness, smoothness |
| Baking Soda | Aerates, lightens brittle |
| Timing | Stir in off heat, quickly |
| Effect | Creates crisp, airy brittle |
This step transforms your candy, making it irresistibly crunchy and delightfully airy. Be sure to store finished brittle in a dry place to prevent moisture from softening it and causing rust formation.
Pour and Spread Your Peanut Brittle Quickly
Don’t hesitate; pour your hot peanut brittle syrup straight onto the prepared baking sheet and spread it out quickly while it’s still fluid. Timing is everything here; if you wait too long, the candy will harden and become tough to shape.
Pour your hot peanut brittle syrup immediately and spread quickly before it hardens—timing is everything!
Use a spatula or the back of a spoon to spread it thin and even, capturing that perfect crispness. Remember, speed is key!
Work swiftly to avoid lumps and uneven thickness. Keep your tools ready before pouring to move smoothly.
Spread the brittle to your preferred thickness for texture control. This step feels a bit like a race against time, but trust me, your quick hands will pay off with beautifully glossy, golden peanut brittle that sets just right. Boiling water can help dissolve hardened candy if any syrup sticks to your pan after spreading boiling water.
Cool and Break Your Brown Sugar Peanut Brittle
Let your peanut brittle cool completely for about an hour. This step is key if you want that perfect crisp snap!
When it’s finally time to break it up, find a sturdy surface and apply gentle pressure. You’ll get those satisfying chunks without all the crumbling.
Oh, and don’t forget to store your brittle in an airtight container. That way, it’ll stay fresh and crunchy for weeks. Enjoy!
Store in a cool, dry place to prevent moisture buildup and keep the brittle crisp.
Cooling Duration Importance
Although the peanut brittle looks tempting fresh off the baking sheet, you’ll want to give it time to cool completely to achieve that perfect snap.
Cooling lets the sugar harden fully, locking in that delightful crunch you crave.
If you try to break it too soon, the brittle can be sticky or bendable, losing its satisfying texture.
Here’s why patience during cooling matters:
It allows the brittle to set evenly, preventing soft spots.
The flavor deepens as the sugar cools and crystallizes.
Cooling at room temperature avoids moisture buildup that can make brittle sticky.
Trust me, waiting an hour or so isn’t just about tradition.
It’s the key to that irresistible, crisp bite you’ll want to savor every time.
Consider placing it on a clean, dry rack to cool to help prevent moisture buildup and ensure even hardening for optimal texture cooling at room temperature.
Breaking Techniques Tips
Once your peanut brittle has cooled to room temperature and hardened, it’s time to break it into those perfect, bite-sized pieces you’ll love snacking on.
To do this, gently lift the brittle from the parchment or silicone mat and place it on a sturdy surface. Use a rolling pin or the back of a heavy knife to tap firmly, breaking the brittle into irregular chunks.
Avoid smashing too hard to prevent tiny shards that can be tricky to eat. If you prefer more uniform pieces, score the brittle lightly with a knife before it fully hardens.
Proper Storage Methods
After your brown sugar peanut brittle cools completely and you’ve broken it into perfect pieces, storing it properly is key to preserving that satisfying crunch and rich caramel flavor. You want to keep moisture and humidity at bay, so your brittle stays crisp and fresh for weeks.
Here’s how you can do that effortlessly:
Use an airtight container to block out air and prevent softening.
Layer pieces between parchment paper to stop them from sticking together.
Store the container in a cool, dry place away from direct sunlight.
Store Peanut Brittle to Keep It Fresh and Crisp
You’ll want to store peanut brittle carefully to keep it fresh and crisp for as long as possible.
Once your brittle cools completely to room temperature, break it into pieces and place them in an airtight container. This seal keeps out moisture, which can quickly turn your brittle soft and chewy rather than delightfully crunchy.
Break cooled brittle into pieces and store in an airtight container to keep it crisp and moisture-free.
Avoid storing it in the fridge, as humidity can ruin the texture. Instead, keep the container in a cool, dry place like a pantry.
If you live somewhere humid, adding a small packet of silica gel or a pinch of uncooked rice wrapped in cheesecloth can help absorb excess moisture.
With these simple steps, your peanut brittle will stay perfectly crisp and ready to enjoy for weeks!
Troubleshoot Common Peanut Brittle Problems
If your peanut brittle ends up grainy or sticky, it’s likely that sugar crystallization snuck in while you were cooking. Trust me, getting that perfect, crisp texture is all about keeping a close eye on your candy thermometer and timing each step just right.
And hey, don’t forget about the heat! To avoid any bitter or burnt flavors, you really want to monitor the temperature from start to finish. It makes a world of difference!
Preventing Sugar Crystallization
When making peanut brittle, preventing sugar crystallization is key to achieving that perfect smooth and crunchy texture you crave. If sugar crystals form prematurely, your brittle can turn grainy or dull instead of glossy and crisp. You can avoid this by carefully controlling your syrup and using ingredients that help keep it stable.
Here’s how to stop sugar crystals from ruining your batch:
Use corn syrup, which interferes with crystallization and keeps the syrup smooth. Brush down sugar crystals from the pan’s sides with a wet pastry brush to prevent them from seeding new crystals. Stir gently and only when the sugar is fully dissolved. Vigorous stirring can encourage crystals to form early.
With these tips, you’ll enjoy peanut brittle that’s perfectly glossy and irresistibly crunchy every time.
Achieving Perfect Brittle Texture
Although peanut brittle may seem straightforward, achieving that perfect crisp, glassy texture can challenge even experienced cooks.
You need to watch the temperature closely; cook the syrup to the hard-crack stage around 300°F to 310°F for that satisfying snap.
Undercooking leaves it chewy, while overcooking risks burning.
When you stir in baking soda and butter just after removing the pan from heat, it aerates and enriches the brittle, giving it a lighter crunch and richer flavor.
Pour the hot mixture quickly onto a prepared sheet, spreading it thin before it hardens, or it’ll be thick and tough.
Patience helps too; let it cool completely for that ideal brittle break.
With these steps, you’ll enjoy a glossy, crunchy treat every time.
Avoiding Burnt Flavor
Nailing the perfect brittle texture means keeping a close eye on your syrup’s temperature. Pushing it too far can quickly lead to a burnt flavor that spoils the whole batch.
To avoid this, monitor the heat closely, especially as the syrup nears the hard-crack stage around 300°F. Using a heavy-bottomed pan helps distribute heat evenly, preventing hot spots that cause burning.
Remove the mixture from heat promptly once it hits the right temperature and stir in butter and baking soda quickly to stop cooking.
Here’s how to keep that sweet, caramelized flavor flawless:
- Use a reliable candy thermometer for precise temperature control.
- Stir gently to avoid sugar crystals forming on the pan edges.
- Work swiftly when pouring and spreading the brittle before it hardens.
Prevent Common Texture Issues in Peanut Brittle
To achieve that perfect crisp snap in your peanut brittle, you’ll want to master a few key texture tricks before you even start cooking.
First, precise temperature control is essential; aim for the hard-crack stage, around 300°F to 310°F, so your brittle sets firm without turning chewy.
Use a heavy-bottomed pan and keep stirring gently to prevent scorching, which can ruin texture.
Don’t skip the butter and baking soda; butter enriches flavor and aids spreadability, while baking soda lightens the brittle, creating a delicate crunch.
Pour and spread the syrup quickly on a lined sheet to avoid premature hardening.
Finally, cool your brittle fully at room temperature in a dry spot to keep it crisp.
Follow these steps, and your brittle will snap beautifully every time.
Frequently Asked Questions
Can I Substitute Raw Peanuts With Roasted or Salted Peanuts?
You can definitely substitute raw peanuts with roasted or salted ones in your brittle.
Using roasted peanuts boosts the nutty flavor, making your brittle richer and more intense.
Salted peanuts add a savory contrast, enhancing the sweet-salty balance.
Just remember, salted nuts might require adjusting added salt in the recipe to avoid over-salting.
Also, roasted nuts are drier, so your brittle might be crunchier and more flavorful overall.
How Do I Adjust the Recipe for High-Altitude Cooking?
At high altitudes, water boils below 212°F. You’ll need to increase your cooking temperature by about 5 to 15°F to reach the proper candy stage.
For peanut brittle, aim for around 310°F instead of 300°F to guarantee crispness. Also, reduce water slightly to help the syrup thicken faster.
Keep a close eye on texture and temperature. High altitude can turn your brittle chewy if you don’t adjust carefully!
Is It Possible to Make Peanut Brittle Without Corn Syrup?
Yes, you can make peanut brittle without corn syrup, but you’ll want to be careful to prevent crystallization.
Try substituting with honey or golden syrup for a similar smooth texture and sweetness.
You’ll need to watch your sugar temperature closely since corn syrup helps keep the sugar syrup stable.
Without it, stirring gently and using a candy thermometer becomes even more essential to get that perfect crisp, glossy brittle you’re aiming for.
Can I Add Other Nuts or Seeds to This Brittle Recipe?
Yes, you can definitely add other nuts or seeds to your brittle! Almonds, cashews, pecans, or even sunflower seeds work beautifully, bringing unique crunch and flavor.
Just toss them in when you add the peanuts, so they toast evenly. Mixing different nuts creates a delightful texture and taste contrast.
Keep an eye on cooking time since some nuts roast faster, and enjoy your personalized, nutty brittle masterpiece!
How Long Does Peanut Brittle Last if Frozen?
Peanut brittle lasts like a hidden treasure in the freezer for up to six months.
To keep it crisp and delicious, wrap it tightly in plastic wrap, then seal it in an airtight container or freezer bag.
When you’re ready to enjoy, just let it thaw at room temperature.
Avoid moisture, or it’ll lose its crunch.
Freezing locks in that sweet, caramelized snap, so you can savor it long after making it.
How to Make Perfectly Crisp Peanut Brittle
You’ve transformed simple brown sugar and peanuts into a golden, crackling masterpiece.
Sweet and nutty, smooth yet crisp, each bite snaps with satisfying crunch, melting into warm caramel warmth.
Remember, patience and care turn sticky syrup into crisp delight, just as quiet moments make sweet memories.
Store it right, and your homemade brittle will stay fresh, ready to surprise your taste buds again and again.
Enjoy every crackle!