How to Clean a Grinder: Simple Steps for Optimal Results
To clean your grinder, start by disassembling it completely. Use a small brush to remove loose debris before soaking all parts in isopropyl alcohol for 30 minutes.
After soaking, scrub the pieces with a toothbrush, paying attention to the teeth and screens. Rinse everything thoroughly with warm water to eliminate any residue or cleaning agents.
Allow the parts to dry completely before reassembling. For best results, clean your grinder every 5-10 uses and perform a deep clean monthly.
This routine not only maintains efficiency but also enhances your smoking experience—there’s plenty more to explore about upkeep techniques.
Key Takeaways
- Disassemble the grinder and use a small brush to remove loose material and residue before cleaning.
- Soak the disassembled parts in isopropyl alcohol for 30 minutes to effectively dissolve plant residue.
- Scrub each component with a brush to remove remaining residue, focusing on teeth and screens.
- Rinse thoroughly with warm water after soaking and scrubbing to ensure no cleaning agents remain.
- Allow all parts to dry completely before reassembling to maintain optimal performance and prevent mold growth.
Steps to Clean Your Grinder: A Complete Guide
To quickly clean your grinder, you’ll need some essential supplies and a step-by-step process.
Essential Cleaning Supplies Needed
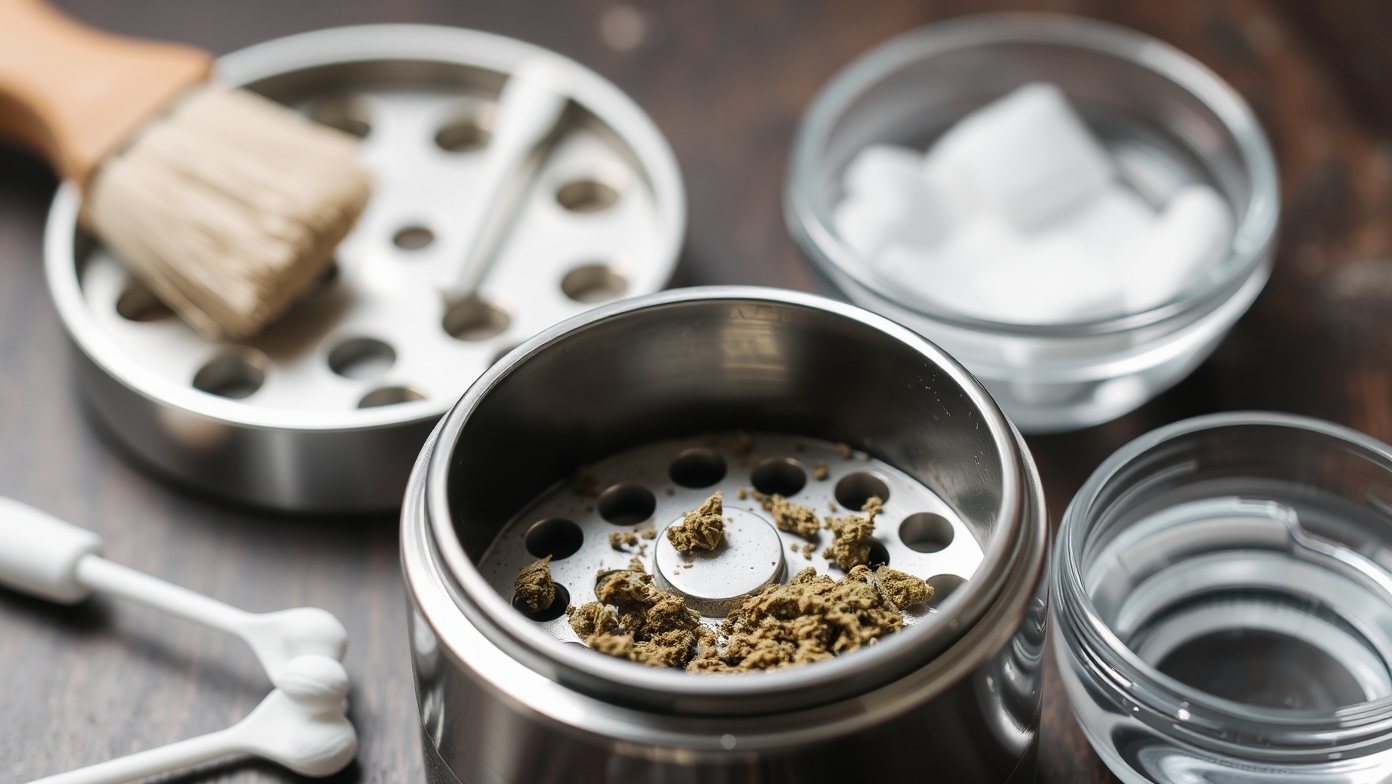
Gathering the right supplies is essential for efficiently cleaning your grinder. Start with isopropyl alcohol, preferably 91% or higher, as it effectively dissolves plant matter and residue.
You’ll also need a small brush, like an old toothbrush, for scrubbing and a toothpick for scraping stubborn bits.
Next, prepare some soapy water for an initial rinse to help loosen any remaining debris. When it’s time to dry, have paper towels or a microfiber cloth on hand to ensure your grinder is completely clean before use.
A Ziplock bag is useful for soaking removable parts of the grinder in the isopropyl alcohol, as this allows for thorough cleaning of those hard-to-reach areas.
Make sure you have clean water available for rinsing the grinder thoroughly after soaking and scrubbing; this avoids any residual taste that could affect your next grind.
To keep everything organized and catch valuable kief, use a rolling tray or a large paper plate.
Step-by-Step Quick Process
With your cleaning supplies gathered, you’re ready to tackle the quick cleaning process of your grinder.
First, disassemble the grinder into all its components: the lid, grinding chamber, and any kief collection chambers, if applicable. This step is essential for effective cleaning.
Next, take a small brush, like a toothbrush or paintbrush, and gently scrub away any loose plant material and residue from the grinder’s teeth and surfaces. This will help loosen any stubborn debris.
Now, soak the disassembled parts in isopropyl alcohol (preferably 91% or higher) for about 30 minutes. This soaking process will effectively dissolve sticky residue that’s accumulated over time.
After soaking, rinse your grinder components thoroughly with warm water.
Make certain to remove all traces of alcohol and any remaining plant matter to guarantee a clean surface.
Deep Cleaning Method for Your Grinder
Cleaning a grinder deeply ensures it’s free from stubborn residue and ready for ideal use. To achieve this, follow these methodical steps:
- Disassemble the Grinder: Take apart the grinder completely, ensuring you remove all parts, including any screens. This access allows for thorough cleaning.
- Freeze the Parts: Place the disassembled parts in the freezer for about 30 minutes. This step helps loosen stubborn residue, making it easier to scrape off with a toothpick or brush.
- Soak and Scrub: After freezing, soak the components in isopropyl alcohol (preferably 91% or higher) for 30 minutes to 1 hour. This effectively dissolves sticky plant residues.
Once soaking is complete, scrub the pieces with a stiff brush to remove any remaining residue.
Grinder Maintenance Tips
To keep your grinder in top shape, follow these essential maintenance instructions:
Cleaning Frequency Guidelines
For ideal performance, you should clean your grinder after every 5-10 uses to prevent residue buildup that can compromise both its efficiency and the flavor of your herbs.
Regular maintenance is key to guaranteeing consistent grinding and minimizing the risk of mold and bacteria growth.
Consider the following cleaning frequency guidelines:
- After Every 5-10 Uses: This routine cleaning helps maintain airflow and efficiency, guaranteeing your grinder operates at its best.
- Monthly Deep Cleaning: If you use your grinder frequently, deep clean it once a month, especially if it’s a multi-chamber grinder that collects kief.
- Inspect for Wear and Tear: During each cleaning session, check your grinder thoroughly for any signs of damage. Identifying potential issues early can prevent performance problems down the line.
Storage Recommendations
Proper storage of your grinder is essential for maintaining its functionality and longevity. To prevent moisture buildup, store your grinder in a cool, dry place.
Excess moisture can lead to mold and bacteria growth, which could compromise the quality of your materials.
When not in use, keep your grinder in a dedicated storage container or bag. This protects it from dust and physical damage, guaranteeing that it remains in peak condition. Avoid overfilling your grinder, as this can lead to clogging and hinder smooth grinding.
Additionally, choose a grinder with removable screens, as they’re easier to clean and maintain. Regularly inspect the grinder for signs of wear and tear, particularly on the teeth and screens. This proactive approach will help you catch any issues early on, allowing you to address them before they affect performance.
Wear and Tear Monitoring
Keeping your grinder in ideal condition requires regular wear and tear monitoring. This practice guarantees that your grinder performs at its best and remains effective for your needs. Here are three key areas to focus on:
- Inspect for Dullness: Regularly check the teeth of your grinder. If they’re dull or showing signs of wear and tear, it’s time for a replacement to maintain grinding efficiency.
- Evaluate Grinding Consistency: Monitor how evenly your materials are grinding. If you notice clumping or uneven results, this could signal a need for grinder cleaning or maintenance.
- Check for Clogs: For multi-chamber grinders, verify the screens aren’t clogged up with plant material or damaged. Clogged screens impede kief collection and overall functionality.
Additionally, make certain all parts fit securely. Gaps can lead to inefficient grinding and loss of material.
Frequently Asked Questions
What Is the Easiest Way to Clean a Grinder?
To clean a grinder easily, start by disassembling the parts.
Soak them in isopropyl alcohol (91% or higher) for about 30 minutes to an hour, which will help dissolve any residue.
After soaking, scrub the teeth and screens with a small brush.
Rinse everything thoroughly with hot water, then let all components dry completely on a towel before reassembling.
What Do You Use to Clean the Grinder?
To clean your grinder effectively, you’ll want to use isopropyl alcohol, ideally 91% or higher, for metal grinders.
For plastic or acrylic, stick with dishwashing liquid.
Grab a small brush, like a toothbrush, to scrub the teeth and screens. A toothpick or multi-tool can help dislodge stubborn residue.
Consider using a resealable bag to soak the parts in your chosen cleaner, ensuring everything’s rinsed and dried thoroughly before putting it back together.
How to Get Resin Out of a Grinder?
So, you’ve got a resin-coated grinder, huh? It’s practically a modern art piece!
To tackle this sticky situation, disassemble the grinder and pop it in the freezer for about 30 minutes—this hardens the resin, making it easier to scrape out.
Then, soak the parts in isopropyl alcohol for 30 minutes. Use a soft brush afterward to scrub away any stubborn bits, rinse thoroughly, and let everything dry.
Does Boiling a Grinder Clean It?
Yes, boiling a grinder can effectively clean it. The high temperature helps dissolve stubborn residues and plant material, making it particularly useful for metal and some plastic grinders.
Just be careful with painted or delicate components to avoid damage. If you simmer it in milk, the fat can absorb THC, enhancing the cleaning process.
After boiling, strain the liquid if you plan to use THC-infused milk. Regular boiling can maintain your grinder’s performance and lifespan.
Elevate Your Grinding Experience with Regular Maintenance
In summary, keeping your grinder clean is essential for peak performance and flavor. Remember, a clean grinder is a happy grinder, ensuring you get the most out of your ingredients.
By following the cleaning methods and maintenance tips outlined, you’ll not only extend the life of your grinder but also enhance your overall experience.
So, don’t let dirt pile up; make cleaning a regular part of your routine to enjoy the best results every time you grind.

