How Do You Make Donuts in a Donut Maker? Easy Steps
To make donuts in your donut maker, start by preparing a smooth, slightly thick batter using warm milk and activated yeast for fluffiness. Preheat and lightly oil your donut maker’s molds, then fill each about three-quarters full with batter using a piping bag or scoop.
Close the lid gently and cook for 3 to 5 minutes without opening too often. Once golden, cool the donuts on a wire rack before decorating or storing. You can explore tips on batter prep, cooking times, and creative finishes next.
Key Takeaways
- Prepare a smooth, slightly sticky donut batter using all-purpose flour, warm milk, yeast, melted butter, and sugar for activation.
- Preheat the donut maker fully and lightly coat the molds with non-stick spray or oil before filling.
- Fill each donut mold about three-quarters full with batter, using a piping bag or scoop for precision.
- Cook donuts for 3 to 5 minutes without frequently opening the lid, flipping halfway if needed for even browning.
- Cool donuts completely on a wire rack before handling, then store in airtight containers or wrap individually for freshness.
Easy Donut Making Table – At a Glance
| Ingredients | Process |
|---|---|
| 2 cups all-purpose flour | Sift the flour into a large mixing bowl to remove lumps and ensure a light texture. |
| ¾ cup warm milk (about 110°F) | Warm the milk and use it to activate the yeast for a fluffy rise. |
| 2¼ teaspoons active dry yeast | Mix yeast with warm milk and 1 tablespoon sugar, let it sit until foamy (about 5–10 minutes). |
| 2 large eggs (room temperature) | Beat eggs lightly and add to the yeast mixture. |
| ¼ cup melted unsalted butter | Melt and slightly cool the butter, then stir into the wet ingredients for richness. |
| ½ cup granulated sugar | Add sugar to the mixture for sweetness and to help yeast activation. |
| ½ teaspoon salt | Mix with dry ingredients to balance flavor. |
| 1 teaspoon vanilla extract | Stir into wet ingredients for aroma and taste. |
| ¼ teaspoon ground nutmeg (optional) | Add for subtle spice. |
| Cooking spray or vegetable oil | Lightly coat donut maker molds to prevent sticking. |
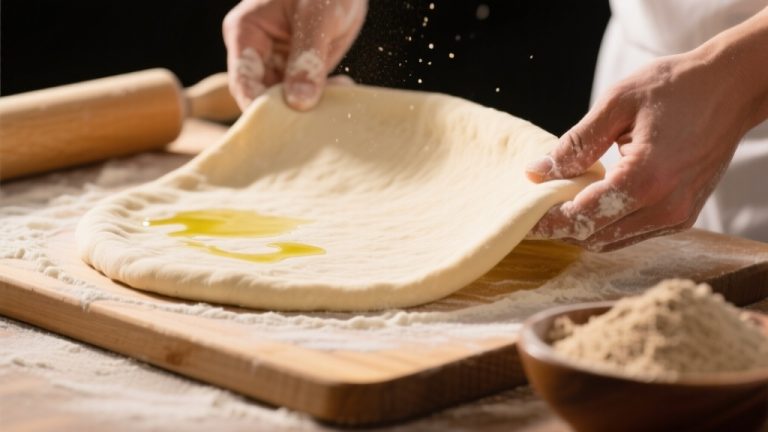
Choosing and Preparing the Donut Batter
To make perfect donuts in a donut maker, you need to start by choosing and preparing the right batter. Use all-purpose flour for a tender texture, combined with warm milk (about 110°F) to activate the yeast effectively.
Melted unsalted butter adds moisture and creates steam during cooking for an airy crumb. Activate 1 to 2 1/4 teaspoons of fresh yeast by mixing it with warm milk and sugar until foamy. Combine this with room-temperature eggs, flour, sugar, salt, vanilla, and nutmeg, then knead until smooth and elastic. Aim for a slightly sticky but workable dough; add flour sparingly if too wet.
Let the dough proof for 50 to 60 minutes, loosely covered, to guarantee ideal rise and texture before cooking. For best results, avoid using whole wheat or self-rising flour as they are not recommended for doughnut dough.
Getting Your Donut Maker Ready
Before you start cooking, verify your donut maker is clean and free of residue to guarantee even heating and prevent sticking. Preheat the appliance fully, watching for indicator lights to signal readiness.
Then, apply a light, even coating of non-stick spray or oil on all mold surfaces to make donut removal effortless. The Babycakes Donut Maker is a family favorite for making mini baked donuts.
Cleaning and Maintenance
Three essential steps guarantee your donut maker stays in top condition: thorough cleaning, careful drying, and routine maintenance.
Always unplug and cool the appliance before cleaning to avoid hazards. Drain used oil safely into a heat-resistant container, then remove residue using soft brushes and mild, food-safe detergents. Avoid harsh chemicals, abrasive tools, or submerging electrical parts.
Detach removable components for separate cleaning, and wipe exterior surfaces with a damp cloth. To prevent oil degradation and maintain consistent frying results, filter the fryer liquid daily prevent oil degradation.
Thoroughly air-dry all parts before reassembly, inspecting seals and gaskets for wear. Ascertain the entire unit is dry to prevent corrosion.
After reassembling, run a test cycle to check for moisture or residue. Follow manufacturer guidelines for regular inspections and oil maintenance to extend your donut maker’s lifespan and maintain consistent donut quality.
Preheating Procedures
Start by securely connecting the polarized power cord to a stable, heat-resistant surface before you begin preheating your donut maker. Make certain the appliance is clean and dry, then plug it into a wall outlet.
Keep the lid open until the indicator light signals preheating has started—usually a red light. Avoid filling the wells before the device reaches the correct temperature to guarantee even cooking. It is beneficial to spray cooking spray on the donut plates before preheating to prevent sticking.
Wait for the ready indicator—often a green light or a change in the red light—to confirm the donut maker is fully heated. This process typically takes a few minutes. Don’t open or disturb the appliance during this time to maintain temperature stability. Always monitor indicator lights closely for best results and safety during preheating.
Applying Non-Stick Coating
Although your donut maker may come with a factory-applied non-stick coating, applying a light layer of cooking spray or oil before each batch is essential to confirm donuts release easily and cook evenly.
After thoroughly cleaning the plates, apply a thin, even coat of food-grade cooking spray or brush lightly with vegetable oil, covering all molds and raised edges. This nonstick coating facilitates cooking with less fat and oil, contributing to better donut texture and easier cleanup.
Avoid heavy oil use to prevent splattering and uneven cooking. Reapply the coating between batches if donuts start sticking or residue builds up. Use soft silicone brushes or parchment for even distribution.
Always clean the plates gently with a soft cloth post-use, never using metal tools or abrasive pads, to protect the coating. Proper non-stick maintenance confirms consistent results and prolongs your donut maker’s lifespan.
Properly Filling the Donut Molds
To fill your donut molds properly, use a batter consistency that’s smooth but not too runny to maintain shape during cooking. Employ precise filling tools like a piping bag or ice cream scoop, and fill each mold about three-quarters full to prevent overflow.
Ideal Batter Consistency
Achieving the ideal batter consistency is essential for properly filling donut molds and ensuring your donuts hold their shape. Your batter should be thick enough to hold form without spreading uncontrollably, resembling a slightly thicker pancake batter. If too thin, the batter will overflow and produce flat, misshapen donuts.
Mix ingredients smoothly—avoid lumps by sifting dry components before combining, but don’t over-mix to keep donuts tender. Rest the batter 20-30 minutes to hydrate flour and thicken naturally. Using a resting time of about 30 minutes has been shown to significantly improve batter consistency and donut shape batter resting time. Use room-temperature batter for better flow into molds.
Adjust thickness by increasing flour or reducing milk slightly. Maintaining consistent batter volume per mold, about 1 to 2 tablespoons, prevents overflows and uneven cooking, helping your donuts bake evenly and rise properly in the donut maker.
Filling Techniques
Properly filling donut molds requires careful technique to maintain the donut’s structure and guarantee even distribution of filling.
After cooking and cooling, poke a hole about three-quarters through the donut using a skewer or chopstick—avoid edges to prevent rupture. It is helpful to let the donuts cool completely and handle them gently to avoid tearing during this step.
Choose a piping bag with a narrow tip, inserting it fully into the hole to reach the interior. Squeeze filling gently and steadily until you feel resistance or see slight filling emergence, indicating fullness. Using a thicker filling like cream or custard can help maintain consistency and prevent leakage.
Avoid overfilling to prevent bursting or leakage. Use thicker fillings like cream or custard for better control.
Handle the donut carefully during filling to prevent tearing, and wipe off any residue afterward. Allowing the donuts to rest briefly after filling helps the filling stabilize and enhances the overall texture.
Let filled donuts rest briefly to stabilize the filling before serving or decorating.
Avoiding Overflow Mess
When you fill donut molds, controlling the batter amount is essential to prevent messy overflow and guarantee even cooking. Overfilling causes batter to spill, stick, and cook unevenly. To avoid this, fill each mold only up to two-thirds or the recommended line, allowing space for expansion.
Use measured tools like spoons or small ladles for accuracy. Prepare molds with a light coating of oil or non-stick spray to ease donut removal and reduce overflow. Applying cooking oil evenly on the pan ensures easy release of donuts. Maintain proper batter consistency and preheat the donut maker to set batter quickly.
- Fill molds only up to 2/3 capacity
- Use measuring spoons or ladles for consistent portions
- Apply light oil or non-stick spray before filling
- Maintain recommended batter thickness and preheat equipment
Cooking Donuts in Your Donut Maker
Start by preheating your donut maker and lightly coating the molds with non-stick spray or vegetable oil to prevent sticking.
Once preheated, fill each mold with about two tablespoons of batter using a piping bag or spoon, avoiding overfilling to prevent spills and uneven shapes.
Close the lid gently without forcing it to avoid deforming the donuts. Cook the donuts for 3 to 5 minutes, monitoring indicator lights or beeps for completion.
Resist opening the lid frequently to maintain even heat. Some models may require flipping donuts halfway for uniform browning, as turning the donuts halfway through cooking provides even browning.
If donuts appear pale or undercooked, extend cooking time slightly but watch closely to prevent burning. Use batter with the right consistency—smooth yet thick enough to hold shape—for best results.
Handling Donuts After Cooking
Once your donuts have finished cooking, let them cool completely before touching or packaging. This prevents steam from causing sogginess and preserves texture. Proper cooling also helps maintain the donut’s texture and taste.
Place them on a wire rack to cool evenly and avoid condensation buildup underneath. Avoid direct sunlight or heat sources to maintain their surface and flavor.
When handling your donuts, keep these tips in mind:
- Use tongs or clean hands to gently handle donuts without deforming them.
- Wait until donuts reach room temperature before placing in airtight containers.
- Store in a cool, dry place to maintain freshness and avoid melting glazes.
- Wrap individual donuts in plastic wrap to prevent air exposure and moisture loss.
Cleaning and Maintaining Your Donut Maker
Proper cleaning and maintenance of your donut maker are essential to guarantee its longevity and consistent performance.
Always unplug and allow it to cool completely before cleaning to avoid burns or damage. Mini Donut Maker does not disassemble for cleaning, so use a soft cloth or pastry brush with non-abrasive, food-safe cleaners to wipe cooking plates and interiors, avoiding metal tools that can scratch non-stick surfaces.
Unplug and cool completely before gently cleaning with a soft cloth; avoid metal tools to protect non-stick surfaces.
For hardened batter, apply a bit of cooking oil, let it sit five minutes, then gently wipe away. Never immerse the appliance or electrical parts in water.
After cleaning, air-dry all parts fully and inspect seals and wiring for wear. Condition cooking plates with a light oil coat before each use and regularly check heating elements and cords. Use plastic, nylon, or wooden utensils to protect non-stick surfaces during use.
Store your donut maker in a dry, shaded area, free from heavy stacking to preserve its components.
Decorating and Serving Your Donuts
Although baking perfect donuts is essential, how you decorate and serve them truly defines their appeal. Start by glazing warm donuts with smooth, even coats of chocolate, vanilla, or fruit-based glazes, letting excess drip off. It is important to cool donuts completely on a wire rack before applying glaze to prevent melting.
Use piping bags with royal icing to add intricate designs or layer cream cheese frosting for richness. While the icing is wet, sprinkle colorful toppings like nuts, sprinkles, or edible glitter for texture and visual interest.
Finally, present your donuts on tiered stands or decorative trays, serving them fresh alongside complementary beverages such as coffee or tea.
- Dip warm donuts briefly for smooth glaze coverage and let it set on a cooling rack
- Apply precise piped designs with royal icing or buttercream for varied textures
- Add toppings while icing is wet to guarantee adhesion and vibrant presentation
- Serve promptly on attractive displays to maintain freshness and appeal
Frequently Asked Questions
Can I Use Gluten-Free Flour in a Donut Maker?
You can definitely use gluten-free flour in a donut maker. Choose a blend without bean flours—almond or rice-based blends work best.
Mix your wet and dry ingredients separately, then combine gently to avoid dense donuts. Grease the molds well to prevent sticking. Bake for about 3-4 minutes, watching carefully to avoid dryness.
Adding xanthan gum or nut flours can improve texture, giving you tasty, gluten-free baked donuts every time.
How Do I Prevent Donuts From Sticking Without Oil?
Like a dancer gliding smoothly across a stage, your donuts shouldn’t stick. To prevent sticking without oil, dust your donut molds with cornstarch or flour before pouring batter.
Use a high-quality non-stick donut maker and maintain steady, moderate heat. After cooking, cool donuts thoroughly on a wire rack to avoid moisture buildup.
Lightly dusting cooked donuts with powdered sugar can also reduce tackiness and enhance release without adding grease.
What Is the Best Way to Store Leftover Donuts?
You should store leftover donuts in airtight containers to maintain moisture and prevent staleness.
Layer them with parchment paper to avoid sticking when stacking. For short-term storage, ziplock bags work if you press out the air.
Keep cream-filled donuts refrigerated, while plain or glazed ones stay best at cool room temperature.
For longer storage, wrap donuts individually and freeze them. Always remove wrapping before reheating to keep texture intact.
Can I Freeze Donuts Made in a Donut Maker?
Yes, you can freeze donuts made in a donut maker.
First, let them cool completely to avoid sogginess. Then, freeze them in a single layer on a tray to prevent sticking.
Once frozen, transfer them to airtight freezer bags or containers.
When you’re ready to eat, reheat them gently in the microwave or oven to restore softness.
Avoid refreezing thawed donuts to maintain their quality and safety.
Are Mini Donut Makers Suitable for Kids to Use?
Yes, mini donut makers are suitable for kids to use, especially with adult supervision.
They feature safety handles, cool-touch exteriors, and automatic shut-off to prevent burns and accidents. Their simple plug-in setup, non-stick surfaces, and indicator lights make operation easy and mess-free for children.
You should always guide kids during use, ensuring they understand safety precautions while enjoying a fun, creative baking experience together.
Transform Simple Ingredients into Donut Magic
Now that you’ve mastered each step, you might wonder if using a donut maker really saves time without sacrificing quality. The truth is, it does—allowing you to create perfectly shaped, delicious donuts quickly and with minimal mess.
By preparing your batter well, filling molds correctly, and maintaining your machine, you guarantee consistent results every time. So, go ahead and enjoy homemade donuts with ease, knowing your donut maker is a smart and efficient choice.