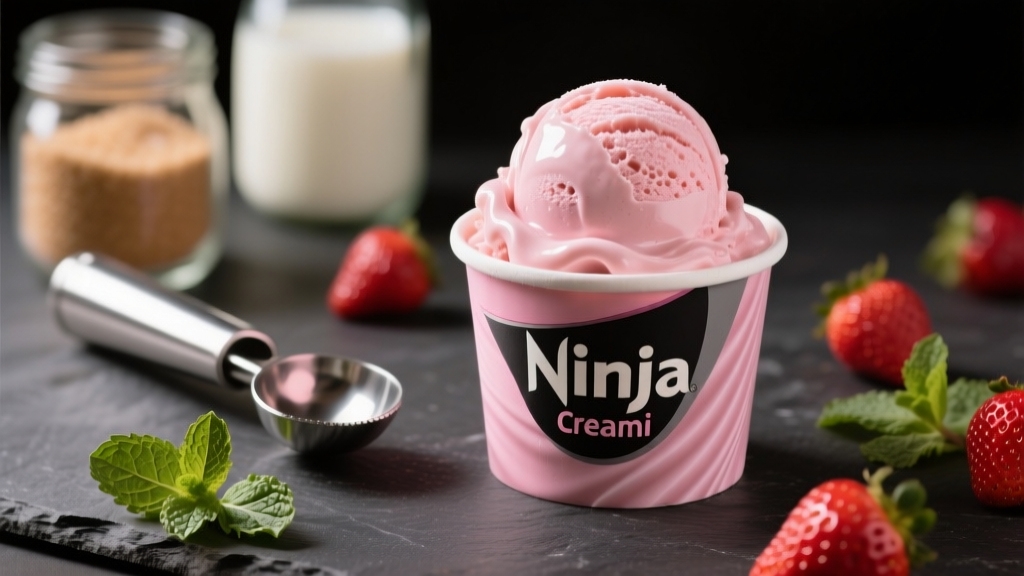
Ninja Creami Gelato Recipe: Tips for Smooth, Dense Texture
You’ll start by making a rich custard with heavy cream, whole milk, egg yolks, sugar, and corn syrup, then cook it gently until silky thick. After cooling the mixture thoroughly, pour it into Ninja Creami pints and freeze solid for at least 24 hours.
Use the Creami’s Gelato program to churn a dense, creamy treat, and add your favorite flavors or mix-ins afterward. Keep exploring to discover tips for perfect texture and tasty variations.
Key Takeaways
- Prepare a custard base with heavy cream, whole milk, egg yolks, sugar, and light corn syrup for smooth gelato texture.
- Cook custard gently to 165°F, then cool quickly in an ice bath to prevent ice crystals.
- Freeze the custard in Ninja Creami pints at 9°F to -13°F for at least 24 hours for proper solidification.
- Use the Ninja Creami’s “Gelato” program to churn frozen custard into dense, creamy gelato, respinning if needed.
- Add mix-ins like nuts or flavor extracts after churning to customize your gelato’s flavor and texture.
Step-by-Step Ninja Creami Gelato Recipe Guide
| Ingredients / Tools | Steps / Actions |
|---|---|
| 1 cup heavy cream | Heat with milk, sugar, and corn syrup until ~120°F |
| 2/3 cup whole milk | Stir continuously to dissolve sugar (do not boil) |
| 4 large egg yolks | Whisk in separate bowl, temper with hot dairy mix |
| 1/4 cup + 1 tbsp granulated sugar | Add into heated dairy for balanced sweetness |
| 1 tbsp light corn syrup | Prevents ice crystals, improves scoopability |
| 1 tsp vanilla extract (or bean) | Infuse flavor during custard heating |
| Saucepan & whisk | Cook custard gently to 165–175°F, stirring constantly |
| Strainer & ice bath | Strain custard, cool quickly to preserve texture |
| Ninja Creami pint containers | Pour custard, seal lids, freeze level for 24 hrs |
| Freezer (9°F to -13°F) | Solidify base completely for proper churning |
| Ninja Creami machine | Use “Gelato” program (3–4 minutes) to churn |
| Optional: nuts, extracts, fruit curds, mix-ins | Add after churning using Mix-In cycle or by hand |
Ingredients Needed for Gelato Base
Although gelato might seem simple, getting the base just right requires a careful balance of ingredients. You’ll use heavy cream, about 1 cup, to add richness and smoothness, paired with roughly 2/3 cup whole milk for texture and fat balance. Regular maintenance of the base ingredients is crucial for safety and quality.
Four large egg yolks are essential; they thicken the mixture, stabilize it during freezing, and enhance that custard-like creaminess you expect.
For sweetness, granulated sugar at about 1/4 cup plus a tablespoon ensures perfect flavor without overpowering.
A touch of light corn syrup prevents ice crystals and improves scoopability. Classic flavoring usually involves vanilla extract or a scraped vanilla bean, infused into the base before chilling.
This precise blend of dairy, eggs, sugar, and flavor sets the stage for silky, dense gelato you’ll love. To ensure the best texture, cook the mixture on medium heat until it reaches between 165°F and 175°F, but avoid exceeding 175°F to prevent curdling.
Preparing and Cooking the Custard
Once you’ve gathered your ingredients, start by gently heating the heavy cream, milk, sugar, and any corn syrup in a saucepan over medium-low heat. Stir continuously to dissolve the sugar fully without letting the mixture boil, aiming for a frothy, slightly thickened texture.
It is important to heat the mixture until it reaches around 120°F before tempering the egg yolks to ensure proper incorporation and prevent cooking the eggs prematurely. Regularly monitoring the temperature helps maintain the optimal cooking range for custard preparation.
Meanwhile, whisk your egg yolks separately. Temper them by slowly adding a few tablespoons of the hot dairy mix into the yolks while whisking constantly—this prevents scrambling.
Then, combine the tempered yolks back into the saucepan. Cook the custard over low heat, stirring constantly, until it thickens and reaches about 165°F, coating the back of a spoon. Be careful not to exceed 175°F to avoid curdling.
Once ready, remove the custard promptly from heat to preserve its smooth, creamy base perfect for gelato. This step is followed by straining the custard into an ice bath to cool it quickly and maintain its smooth texture.
Cooling and Freezing the Gelato Base
After cooking the custard, you’ll want to cool it thoroughly before freezing to preserve its smooth texture and prevent ice crystals from forming prematurely.
Using a heat-resistant utensil can help scrape the mixture efficiently without compromising texture. Once cooled, pour the base into Ninja Creami pints, seal with lids, and freeze on a level surface. It is important to ensure the pints are fully frozen before processing to achieve the optimal creamy consistency.
Aim for at least 24 hours at 9°F to -13°F (-12°C to -25°C) to ensure complete solidification. This step is critical for achieving that creamy gelato texture.
| Freezing Aspect | Recommendation |
|---|---|
| Minimum Freeze Time | 24 hours |
| Freezer Temperature | 9°F to -13°F (-12°C to -25°C) |
| Pint Handling | Level surface, sealed lids |
Using the Ninja Creami Machine for Churning
When you’re ready to transform your frozen gelato base into creamy perfection, the Ninja Creami machine takes center stage. First, secure your pint container with the frozen base, frozen for at least 24 hours without a lid, onto the machine’s base, ensuring the paddle is properly attached and the chute latch locked.
Select the “Gelato” program for that dense, smooth texture you want. The machine churns for about 3–4 minutes, softening and aerating your gelato. This process creates small servings, about one pint per batch, which is ideal for portion control. Using ingredients with a high fat content can help achieve a richer mouthfeel and smoother consistency during churning.
If the texture is crumbly or icy, simply scrape down the sides and run a “Respin” cycle to enhance creaminess. Remember, letting your pint sit briefly at room temperature before churning can help the process.
After churning, your gelato will be ready to enjoy, boasting a perfect balance of richness and smoothness. Proper storage in an airtight container helps maintain the gelato’s texture and flavor longer.
Flavor Variations and Mix-in Ideas
Though the base gelato recipe provides a creamy foundation, experimenting with flavors and mix-ins lets you customize every pint to your taste. Try classic variations like pistachio enhanced with chopped nuts or coffee gelato boosted by chocolate-covered espresso beans.
Start with a creamy base and personalize each gelato pint by adding your favorite flavors and mix-ins.
For a bright twist, lemon gelato with lemon curd or lime curd shines. You can also mimic cake batter or butter pecan flavors by adding cake mix or pecans and butter extract.
When adding mix-ins, incorporate them after churning to keep textures intact. Use the Ninja Creami’s mix-in cycle for even distribution or fold in softer ingredients gently by hand.
Don’t hesitate to experiment with extracts like vanilla or mint to amplify your gelato’s flavor profile, ensuring each batch is uniquely yours. Proper temperature control during the freezing and churning process is essential to achieve the ideal creamy texture.
Frequently Asked Questions
Can I Use Pasteurized Eggs Instead of Fresh Eggs?
Yes, you can definitely use pasteurized eggs instead of fresh eggs. They’re safer, especially if your recipe involves raw or lightly cooked eggs, and won’t compromise the gelato’s texture or flavor.
Pasteurized eggs substitute 1:1 without needing adjustments. Plus, they simplify prep by removing the worry about food safety.
While whipping might be slightly less voluminous, the difference is minimal and won’t affect your final creamy result.
How Do I Clean the Ninja Creami Machine After Use?
Don’t beat around the bush—clean your Ninja Creami right after use! Remove the container, paddle, lid, and blades carefully since they’re sharp.
Hand wash with warm, soapy water, using a small brush for blades and gasket. You can also place parts on the top rack of your dishwasher.
Wipe the motor base with a damp cloth. Never submerge it.
Dry everything thoroughly to keep your machine running smoothly and flavors pure.
What Is the Best Way to Store Leftover Gelato?
The best way to store leftover gelato is to level it smoothly in your pint container, seal it tightly with the lid to prevent air exposure, and place it immediately in the coldest part of your freezer.
Label it with the date and flavor, and avoid overfilling.
When ready to enjoy again, let it soften briefly, then re-spin in your Ninja CREAMi for a creamy texture. This keeps your gelato fresh and delicious longer.
Can I Double the Recipe and Freeze in Larger Containers?
Think of your gelato like a delicate symphony; it needs the right space to play perfectly. You shouldn’t double your recipe in larger containers because the Ninja Creami is designed for single pint sizes. Overfilling risks uneven freezing and blade damage.
Instead, freeze your doubled batch in two separate pint containers. This way, you make certain of even texture, proper churning, and keep your gelato delightfully creamy every time.
Is It Possible to Make Dairy-Free Gelato With This Method?
Yes, you can definitely make dairy-free gelato using this method. Just choose creamy plant-based milks like coconut, cashew, or oat milk to get that rich texture.
Blend your ingredients smoothly, freeze them well, then process in the machine. Adding ingredients like dairy-free pudding mix or a splash of non-dairy milk during re-spin helps perfect the texture.
You’ll enjoy a creamy, flavorful gelato without any dairy at all!
Experiment With Flavors and Create Your Signature Gelato
Now that you’ve mastered the Ninja Creami gelato recipe, you’re ready to enjoy creamy, homemade gelato anytime. Did you know that gelato typically contains 25-30% less fat than traditional ice cream? This means your delicious treat is not only rich in flavor but also a bit lighter.
With endless flavor variations and mix-ins, you can customize every batch to your taste. So go ahead—have fun experimenting and savor your perfect scoop.