Chicken Pupusa Recipe: Flavorful Chicken and Cheese Filling
To make chicken pupusas, start by preparing soft, pliable masa dough with masa harina and warm water. Sauté and shred seasoned chicken thighs, mixing in melty cheese like queso fresco. Flatten dough balls, place a hearty scoop of filling in the center, then carefully seal and shape them.
Cook on a hot skillet until golden brown and crispy. Serve them with tangy curtido and salsa roja for a savory, authentic experience. Explore more tips to perfect this beloved Salvadoran dish.
Key Takeaways
- Prepare masa dough by mixing masa harina with warm water and salt to form a soft, pliable dough for shaping pupusas.
- Cook and shred seasoned chicken thighs, mixing with melty cheese like queso fresco or mozzarella for a flavorful filling.
- Flatten dough balls, place about 1/3 cup of chicken filling in the center, then seal edges tightly to prevent leaks during cooking.
- Cook pupusas on a preheated, lightly oiled skillet for 3-6 minutes per side until golden brown and crispy.
- Serve hot with traditional curtido (fermented cabbage slaw), salsa roja, and lime wedges for an authentic Salvadoran experience.
Complete Chicken Pupusa Recipe Guide
| Ingredients | Quantity | Preparation | Tips |
|---|---|---|---|
| Masa harina | 2 cups | Mix with salt, add warm water gradually | Keep dough soft and pliable, not sticky |
| Salt | 1 tsp | Whisk with masa harina | Ensures even flavor distribution |
| Warm water | 1½ cups | Add gradually while mixing | Temperature helps achieve ideal texture |
| Boneless chicken thighs | 2-3 lbs | Season and cook until golden | Thighs are juicier than breast meat |
| Salt & black pepper | To taste | Season generously | Essential for flavorful filling |
| Oregano, paprika, cumin | 1 tsp each | Mix with other seasonings | Creates authentic Salvadoran flavor profile |
| Garlic (fresh or powder) | 3 cloves/1 tsp | Add for pungency | Fresh garlic provides better aroma |
| Chicken bouillon | 1 cube | Dissolve in cooking liquid | Adds savory depth to filling |
| Yellow onion (diced) | 1 medium | Finely dice for even cooking | Enhances filling texture and flavor |
| Green bell pepper | ½ cup diced | Sauté until tender | Adds freshness and crunch |
| Roma tomatoes | 2 small | Dice for moisture and acidity | Small tomatoes work best for filling |
| Queso fresco or mozzarella | 1½ cups | Crumble or shred | Mix cheeses for optimal melt and flavor |
| Monterey Jack (optional) | ½ cup shredded | Blend with other cheese | Creates creamy, stretchy texture |
| Vegetable oil | 2 tbsp | Use for sautéing and griddle | Lightly oil hands when shaping dough |
| Prepared dough balls | 2 oz each | Form uniform balls | Keep covered to prevent drying |
| Chicken-cheese filling | ⅓ cup per pupusa | Center filling on flattened dough | Avoid overstuffing to prevent bursting |
| Cast iron skillet | Medium heat | Cook 3-6 minutes per side | Golden brown and slightly crispy exterior |
| Curtido (pickled slaw) | As desired | Serve alongside pupusas | Adds tangy crunch and authentic flavor |
| Salsa roja | As desired | Provide for dipping | Balances richness with spicy kick |
Ingredients Needed for Chicken Pupusas
When you prepare chicken pupusas, choosing the right ingredients is essential to achieve that perfect balance of flavor and texture.
Start with boneless, skinless chicken thighs for juicy, flavorful filling, or opt for lean chicken breast if you prefer. You’ll typically need 2–3 pounds to make enough stuffing. Remember that using a sharp knife when preparing ingredients improves safety and efficiency.
Season the chicken with salt, black pepper, oregano, paprika, cumin, and adobo seasoning, adding garlic—fresh or powdered—for pungency. Don’t forget chicken bouillon for a savory boost. Enhance the filling’s aroma and texture with finely diced onions, minced garlic, and green bell peppers.
For moisture and acidity, include small tomatoes like Roma. Mix in crumbled queso fresco or shredded mozzarella to bind the filling, and sauté everything in a tablespoon of vegetable oil until golden and fragrant. After cooking, allow the chicken to rest for at least 20 minutes before shredding to retain moisture and tenderness.
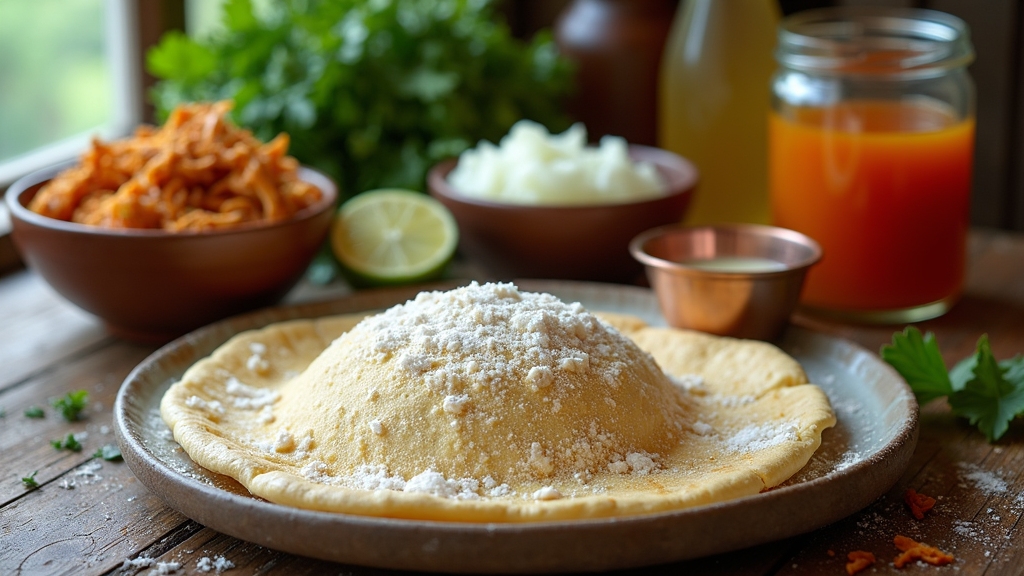
Preparing the Masa Dough
Although masa harina is a simple ingredient, mastering its transformation into the perfect dough is key to making delicious chicken pupusas. Start by whisking masa harina with salt for even flavor. This process is similar to how material durability is crucial when selecting kitchen sinks to ensure long-lasting performance.
Gradually add warm water, stirring first with a spoon, then knead by hand until the dough is soft and pliable but not sticky. The warmth of the water helps achieve the ideal texture, so adjust as needed. It is important to achieve a soft, playdough-like consistency to ensure proper shaping and cooking.
Portion the dough into two-ounce balls, keeping them covered to prevent drying. When shaping, moisten your hands with a water-oil mix to avoid tearing. Gently flatten each ball into a palm-sized circle, ready to encase the filling.
Handle the dough with care to maintain its structure, ensuring your pupusas cook evenly with tender interiors and crispy edges.
Making the Chicken and Cheese Filling
Once your chicken is cooked and shredded to tender perfection, it’s time to pick the right cheese that melts smoothly, like mozzarella or queso fresco. The traditional Salvadoran pupusa often uses quesillo cheese, known for its creamy texture and mild flavor, which pairs beautifully with chicken.
You’ll want to mix these ingredients carefully to create a balanced, flavorful filling that’s moist but not soggy. Combining the chicken and cheese just right guarantees your pupusas stay deliciously creamy inside without leaking during cooking.
This attention to authentic Salvadoran fillings helps honor the cultural roots of the dish. Using tools with ergonomic design can also improve your preparation experience and comfort.
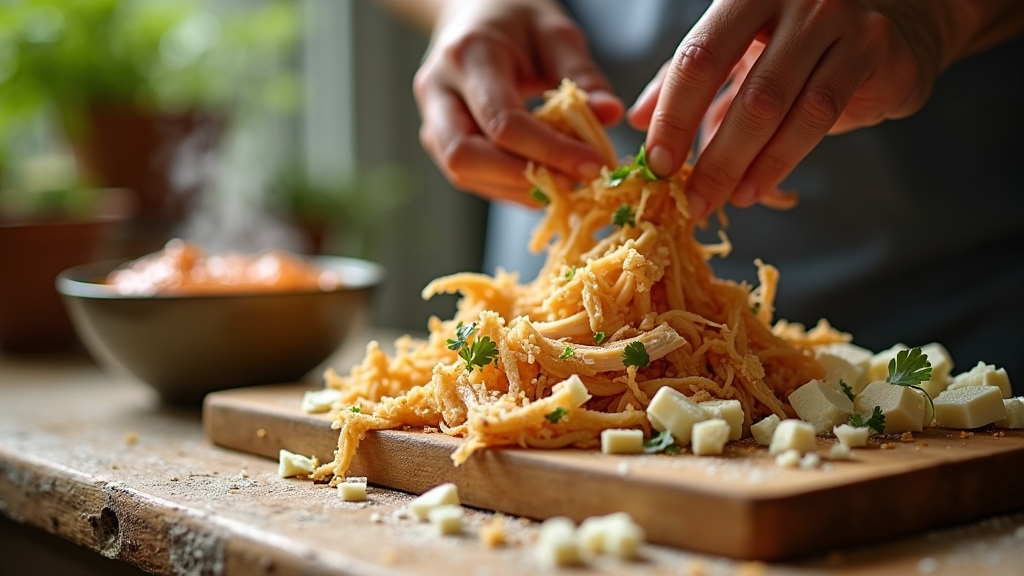
Shredding Cooked Chicken
Because the texture of your chicken filling can make or break your pupusas, shredding cooked chicken properly is essential. You want shreds that hold together yet blend smoothly with the cheese. Start with warm, boneless, skinless chicken. Thighs offer juicier results.
For best results, use boneless cuts like breasts or thighs, as they are easiest to shred and provide consistent texture. Using the right material for your cooking surface can also impact the overall flavor and texture of the chicken filling.
Then choose your shredding method based on time and texture needs. Here are three effective options:
- Pull apart with your hands for chunkier, controlled shreds.
- Use two forks to shred on a cutting board for a traditional, hands-on approach.
- Employ a stand or hand mixer on low speed for quick, uniform shredding.
Avoid overprocessing with food processors to prevent mushy texture. Achieving the right shred size enhances both flavor distribution and pupusa texture, so take your time!
Choosing Cheese Types
When you’re crafting the perfect chicken and cheese filling for your pupusas, the type of cheese you choose plays a crucial role in both flavor and texture.
For authentic Salvadoran taste, quesillo offers a soft, stretchy melt that creates that signature gooey pull, while queso fresco crumbles lightly, adding a fresh, slightly tangy bite. Mozzarella or Oaxacan cheese make great substitutes, melting smoothly and blending well with shredded chicken’s mildness.
Remember that pupusas are typically filled with a variety of ingredients such as cheese, refried beans, or shredded chicken, highlighting the versatility of fillings you can incorporate alongside chicken and cheese. Using waterproof labels for your storage containers can help keep track of your fillings when freezing or refrigerating.
If you want a twist, sharp cheddars or gouda introduce bold flavor bursts but change the traditional feel. Mixing a melty cheese with crumbly queso fresco balances creaminess and brightness perfectly. Keep in mind, sourcing authentic cheeses can be tricky, so blend what’s available to achieve that ideal harmony in your filling.
Using a cookie scoop for uniform size can also help when portioning your dough to ensure even cooking and filling distribution.
Mixing Filling Ingredients
As you prepare the chicken and cheese filling for your pupusas, focus on balancing flavors and textures to create a harmonious blend.
Start by cooking your seasoned chicken until golden and fully cooked, then shred or dice it uniformly. Marinating chicken beforehand enhances the flavor and tenderness, giving your filling a richer taste. Using the right equipment like a cheese melter can help achieve the optimal cheese melt and texture in your filling.
Mix the warm chicken thoroughly with your chosen cheese, ensuring the filling binds well without becoming too moist. Too much moisture can tear the dough later. You can also sauté onions, green peppers, or tomatoes to add moisture and depth.
Keep in mind these key points:
- Use well-seasoned, cooked chicken for rich flavor.
- Mix filling while warm or cooled to bind ingredients well.
- Avoid over-moistening to maintain dough integrity during assembly.
Shaping and Stuffing the Pupusas
Start by dividing your dough into uniform balls to guarantee even cooking and easy handling. This traditional method of preparation involves skillful hand-patting, which is essential for shaping authentic pupusas.
Next, create a small pocket in each disc to carefully place your chicken and cheese filling without overstuffing. Finally, seal the edges tightly to keep the filling secure and shape your pupusa into a smooth, flat disc ready for the griddle.
Dough Ball Formation
Although the dough for pupusas lacks gluten, you’ll want to handle it gently to form smooth, uniform balls about two inches in diameter. Start by lightly oiling your hands to prevent sticking, then take equal portions of dough and roll them into tight spheres. Using durable construction techniques when shaping can help maintain the dough’s integrity and prevent tearing.
These balls should feel firm enough to hold their shape but soft enough to gently press a pocket for stuffing later. Keep the edges slightly thicker to help encase the filling securely. Remember these key points when forming your dough balls:
- Use lightly oiled hands to reduce sticking and tearing.
- Aim for consistent ball sizes to ensure even cooking.
- Avoid overhandling; just enough to blend moisture and shape.
After shaping, it’s important to let the dough balls rest covered for about 15 minutes with a damp towel or plastic wrap to prevent drying out and help maintain pliability. With these tips, your pupusa dough will be perfectly ready for the next step.
Filling Placement Technique
When you place the filling, keep it centered on the dough disc to guarantee even coverage and prevent spills. Use about a heaping tablespoon or 1/3 cup of chicken filling to avoid overstuffing, which can cause ruptures.
Create a small indentation in the flattened dough to hold the filling securely as you prepare to fold. Work on a smooth, flat surface to reduce tearing or uneven thickness. Masa harina is the main ingredient in the dough, made by mixing corn flour with water to create the perfect consistency. For best results, use even heat distribution during cooking to ensure the pupusas cook uniformly.
Centering the filling helps form a balanced pupusa with sturdy edges less prone to breakage, especially important for moist chicken mixtures. After placing the filling, gently pull the dough edges around it, overlapping carefully to enclose without stretching.
This careful placement and portion control ensure your pupusas cook evenly and hold their savory chicken filling intact.
Sealing Pupusa Edges
After carefully placing the filling in the center of your dough disc, the next step is to seal the edges to keep that savory chicken enclosed. Start by leaving the edges thicker than the center and keep your hands lightly oiled or wet to prevent sticking. Proper sealing is crucial to avoid leaks, especially when using manual slicers to prepare fillings.
Pull the dough sides evenly around the filling, then pinch and press the edges firmly to avoid leaks. You want a smooth, tight seal to maintain that delicious stuffing inside during cooking. Using a dough made from corn dough will give your pupusas an authentic Salvadoran flavor and texture.
Keep these tips in mind for perfect sealing:
- Use a pliable, elastic dough with a playdoh-like consistency
- Pinch edges completely, optionally pressing with fork tines for extra security
- Flatten gently after sealing, maintaining the integrity of the sealed edges
Cooking Techniques for Perfect Pupusas
Mastering the cooking techniques for perfect pupusas starts with understanding the delicate balance of dough preparation and shaping. Once you’ve sealed your filled pupusas, heat a cast iron skillet over medium heat, lightly oiling it to prevent sticking. Using a cast iron skillet helps retain heat evenly, which is essential for achieving consistent cooking results.
Place the pupusas gently on the skillet, cooking each side 3 to 6 minutes until golden brown and slightly crispy. Keep an eye on the heat; medium temperature guarantees the dough cooks through without burning. It is important to cook on medium-high heat to achieve a golden color and ensure the pupusa holds together without falling apart.
Cook pupusas on medium heat, flipping every 3 to 6 minutes until golden and crispy.
Flip frequently for even browning, and reapply oil between batches. This method is similar to how layering ingredients in mason jars ensures even cooking and flavor distribution in soups. Aim for a thickness of about 1/4 to 1/2 inch; this helps fillings melt perfectly while keeping the dough tender.
After cooking, you can keep pupusas warm in a low oven to maintain texture. Using these steps, you’ll enjoy beautifully crisp, evenly cooked pupusas every time.
Serving Suggestions and Traditional Accompaniments
Although chicken pupusas shine on their own, serving them with traditional Salvadoran accompaniments elevates every bite by adding vibrant flavors and textures. You’ll want to serve them hot from the griddle, eating by hand with sides to customize each bite.
To enhance your experience, include these essentials:
- Curtido: tangy, crunchy fermented cabbage slaw that cuts through richness
- Salsa Roja: fresh, spicy salsa adding brightness and heat
- Lime Wedges: a squeeze of lime juice lifts flavors and balances fat
Set small bowls of curtido and salsa roja alongside your pupusas for easy dipping. Pupusas are traditionally eaten with the hands, with toppings spread on top for ease of handling eaten with hands. This combination balances soft masa and savory chicken with acidity and spice, creating an authentic and satisfying Salvadoran meal.
Tips for Customizing Your Pupusas
Pairing your chicken pupusas with traditional sides like curtido and salsa roja brings out their best flavors. You can also make the dish uniquely yours by customizing the pupusas themselves.
Try varying chicken cuts and cheeses, adding spices like cumin or jalapeños for heat, or tweaking dough softness by adjusting masa harina ratios. It is important to use a very hot, iron skillet for cooking to achieve the ideal golden brown exterior and thorough cooking of the pupusas.
Experiment with fillings and cooking techniques to find your perfect balance of flavor and texture.
| Aspect | Options | Tips |
|---|---|---|
| Chicken Cut | Thighs, breast | Thighs are juicier; breast is leaner |
| Cheese | Mozzarella, Monterey Jack, vegan | Mix for creamy meltability |
| Spices | Paprika, cumin, adobo, chili | Boost depth and heat |
| Dough Texture | Soft, firm | Adjust masa-to-water ratio; rest the dough |
| Fillings Add-ins | Veggies, herbs, pickled slaw | Add cilantro or lime for brightness |
Nutritional Benefits and Cultural Significance
When you enjoy chicken pupusas, you’re not only savoring a delicious meal but also benefiting from a rich nutritional profile and a deep cultural heritage. This dish provides about 600 calories and 30 grams of protein per serving, fueled by chicken and corn masa, offering energy and supporting muscle growth.
It also supplies essential micronutrients like calcium, iron, and magnesium, which are vital for bone strength and metabolism. The corn masa used in pupusas is a whole grain that provides fiber and micronutrients, contributing to digestive health and sustained energy release.
Chicken pupusas hold cultural significance as a Salvadoran staple, symbolizing identity and community. They’re traditionally shared during gatherings, embodying social bonding and artisanal culinary traditions.
Key benefits include supporting diverse diets through balanced macronutrients, aiding digestion and heart health with high fiber, and helping preserve indigenous traditions and family connections.
Frequently Asked Questions
Can I Freeze Uncooked Pupusas for Later Use?
Yes, you can freeze uncooked pupusas for later use. Just arrange them on a parchment-lined tray so they don’t stick, freeze until solid, then transfer to an airtight container.
When you cook them frozen, expect a couple of extra minutes per side. This method preserves their texture and flavor well, making meal prep super convenient. Just avoid overstuffing to prevent bursting, and you’ll have delicious pupusas ready anytime.
What Is the Best Type of Cheese for Melting Inside Pupusas?
You’ll want to use mozzarella or Monterey Jack cheese for the best melt inside pupusas. These cheeses have just the right moisture and fat content, giving you that gooey, stretchy texture without becoming oily.
Mixing in some queso fresco adds a subtle tang and crumbly contrast, but since it melts less, keep it balanced. This combo melts smoothly, complements masa’s mild flavor, and delivers that creamy, irresistible filling you’re craving.
How Do I Prevent Pupusas From Cracking During Cooking?
You might think high heat prevents cracking by sealing the dough quickly, but actually, cooking pupusas over medium heat works best. It ensures even cooking without burning or drying the dough.
Keep the dough soft, rest it well, and avoid overfilling. Seal edges tightly and flatten gently. Use a lightly greased skillet, and don’t flip too soon. This balance prevents cracking and keeps your pupusas perfectly tender and intact.
Can I Make Pupusas Gluten-Free Without Changing the Texture?
Yes, you can make pupusas gluten-free without modifying the texture by using certified gluten-free masa harina, which mimics traditional corn flour perfectly. To keep that authentic chewiness, blend masa with tapioca or potato starch for elasticity.
Knead the dough with warm water until smooth, rest it briefly, and add fats like butter to enhance softness. These steps ensure your pupusas stay tender, pliable, and delicious, just like the original.
What Beverages Traditionally Pair Well With Chicken Pupusas?
You’ll want to try traditional beverages like Atol de Elote, a warm, sweet corn drink that complements chicken pupusas perfectly. Hot coffee or hot chocolate also enhance their savory flavors, especially during breakfast.
For something invigorating, go for an agua fresca—hibiscus or tamarind flavors balance the richness nicely. If you prefer something fizzy, a cold Coca-Cola pairs well, cutting through the savory dough and filling for a satisfying meal.
Take Your Chicken Pupusa Recipe to the Next Level
Making chicken pupusas is like crafting a vibrant tapestry—each step weaving flavors and traditions into a warm, satisfying whole. As you shape the dough and seal in the cheesy chicken, you’re folding history and culture into every bite.
Cooking them to golden perfection is like watching a masterpiece come alive. So, embrace this culinary art, and let every pupusa you make be a delicious story shared from your kitchen to the world.