Two Ingredient Biscuits Yogurt: Steps for Golden-Brown Perfection
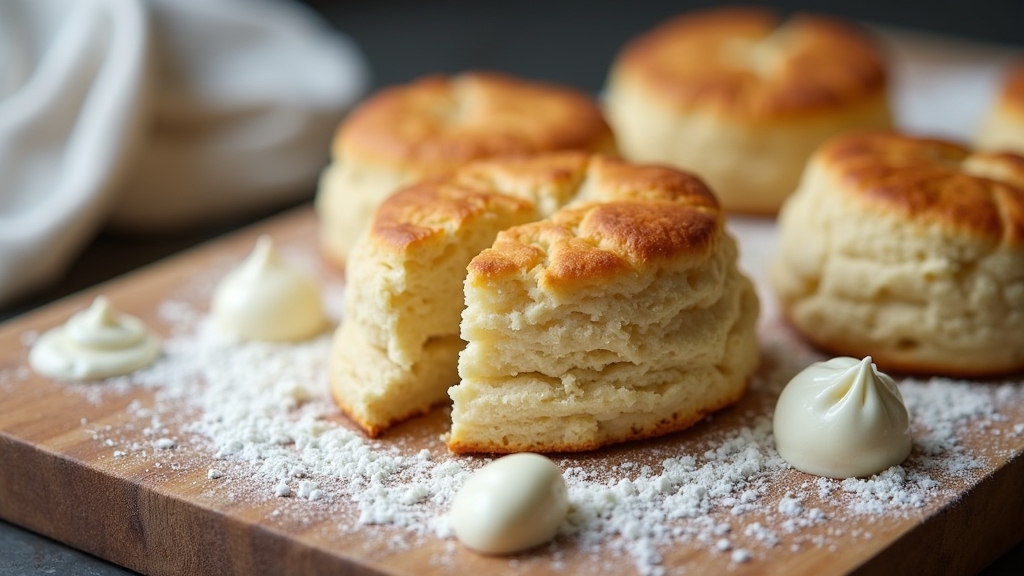
You can whip up fluffy two-ingredient biscuits using just self-rising flour and Greek yogurt. Mix equal parts of each, stirring gently until combined, then knead lightly about 20 times for a tender, flaky texture.
Shape the dough into rounds, bake at 400°F until golden brown, and enjoy warm with butter or jam. This simple method yields quick, delicious biscuits, and with a few extra tips, you’ll master perfect batches every time.
Key Takeaways
- Two-ingredient biscuits use equal parts self-rising flour and Greek yogurt for simple, quick preparation.
- Gently mix and lightly knead the dough about 20 times until cohesive but not sticky.
- Shape dough into ½ to 1-inch thick rounds or drop spoonfuls onto a baking surface.
- Bake at 400–425°F for 8–19 minutes depending on size, until golden brown.
- Serve warm with butter, jam, or gravy; store leftovers covered at room temperature or freeze.
Ingredients and Preparation

Although the recipe calls for just two main ingredients, understanding their roles is key to making perfect biscuits. Self-rising flour acts as your leavening agent, containing baking powder and salt, so you don’t need extra yeast or butter.
Greek yogurt provides moisture and binds the dough while adding tenderness and protein. You can use dairy-free yogurt for vegan versions, but texture may vary. Start with equal parts flour and yogurt—usually one cup each—and adjust if needed.
Using Greek yogurt ensures a natural rise and a slight tangy flavor that enhances the biscuit’s taste. Mix gently until just combined to keep your biscuits flaky. Knead lightly about 20 times until the dough is cohesive but not sticky.
Proper mixing is essential for texture and flakiness in the final product. You can drop spoonfuls directly or roll and cut for neat shapes. Lightly flour surfaces to prevent sticking and preserve that tender crumb you’re aiming for.
Baking and Serving Tips
Now that you’ve combined your flour and yogurt into a tender dough, it’s time to focus on baking techniques that bring out the best texture and flavor in your biscuits.
Preheat your oven to around 400–425°F for a golden crust and fluffy interior. Using a flat surface can help you shape the dough evenly for consistent baking. Preheat your oven to 400–425°F for biscuits with a golden crust and tender, fluffy inside.
Shape your dough about ½ to 1 inch thick, using a biscuit cutter or glass for even baking. Bake smaller drop biscuits for 8–10 minutes, thicker ones for 15–19 minutes, on parchment paper or an ungreased cast iron skillet to prevent sticking. For best results, avoid overmixing the dough to maintain flakiness and tenderness.
Serve your biscuits warm, brushing melted butter on top for extra shine and flavor. Proper maintenance of your baking tools, such as knives, ensures smooth preparation and safety in the kitchen.
Sweet toppings like strawberry jam or savory gravies pair wonderfully. Store leftovers covered at room temperature for three days, or freeze for longer freshness, reheating gently to maintain softness.
Frequently Asked Questions
Can These Biscuits Be Made Gluten-Free With Alternative Flours?
Yes, you can make these biscuits gluten-free by swapping in gluten-free self-rising flour or a homemade blend with baking powder and salt. Just remember, gluten-free flours behave differently—they might need slight adjustments in yogurt amount to get the right dough consistency.
Handle the dough gently and bake at a high temperature to help them rise and stay tender. Using full-fat Greek yogurt really boosts moisture and flavor in your gluten-free biscuits.
How Does Yogurt Fat Content Affect Biscuit Texture?
Yogurt fat content directly influences your biscuit’s tenderness and crumb richness. Higher fat levels add lubrication, making dough softer and biscuits more tender with a richer mouthfeel.
Lower-fat yogurt increases moisture and acidity but can reduce that smooth, tender texture you want. Fat also helps suppress leavening, so balancing yogurt fat guarantees your biscuits have a fine, delicate crumb and just the right amount of rise and softness.
What Is the Best Way to Store Leftover Biscuits?
The best way to store leftover biscuits is to let them cool completely, then wrap them tightly in plastic wrap or foil to keep moisture in. For short-term use, keep them at room temperature in an airtight bag, but refrigerate if you want them to last longer.
If freezing, wrap each biscuit individually to avoid freezer burn. When reheating, use the oven or microwave with a damp towel to restore softness without drying them out.
Can I Freeze the Dough Before Baking?
Yes, you can freeze biscuit dough before baking! Shape your dough into biscuits and place them on a parchment-lined sheet. Freeze them solid for a few hours to prevent sticking, then transfer to an airtight bag.
When ready, bake straight from frozen, adding a few extra minutes to the bake time. This method keeps your biscuits fresh and flaky, so you can enjoy homemade goodness anytime without the rush!
Are These Biscuits Suitable for Vegan Diets Using Plant-Based Yogurt?
Yes, you can absolutely enjoy these biscuits on a vegan diet if you use plant-based yogurt. Just make sure your yogurt doesn’t contain any hidden animal ingredients like honey or gelatin.
Plant-based yogurts made from almond, coconut, or soy provide that creamy texture and acidity needed for tender, fluffy biscuits. With the right vegan yogurt, your biscuits will rise well and have a delicious, dairy-free flavor that fits perfectly into a vegan lifestyle.
Golden Biscuits in Minutes: Simple Ingredients & Big Flavor
Now, picture pulling those golden, warm biscuits from your oven—the soft, tangy aroma of yogurt mingling with the buttery crust. With just two simple ingredients, you’ve crafted a delight that’s fluffy, tender, and perfect for any meal.
Whether slathered with honey or paired with savory dishes, these biscuits bring comfort and ease to your kitchen. Keep this quick recipe close—it’s your secret to effortless, delicious baking every time.


