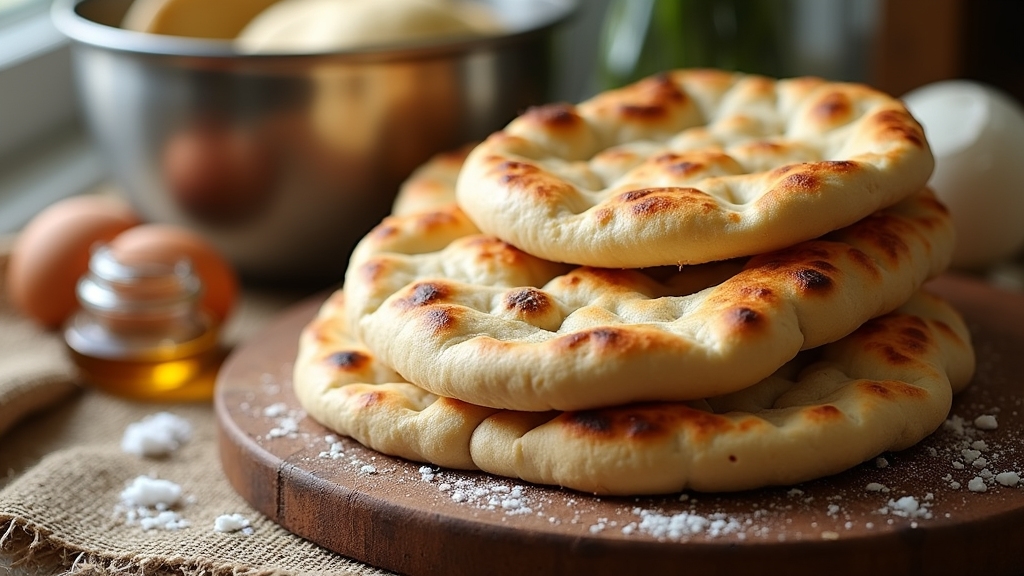
Bread Machine Naan Bread Recipe: Soft, Fluffy Naan Made Easy
You can make soft, fluffy naan easily with your bread machine by combining all-purpose flour, active dry yeast activated in warm water, yogurt for moisture, and oil for tenderness.
Let the machine knead and rise the dough, then divide it into equal balls, roll to about ¼ inch thick, and cook on a hot skillet or under a broiler for that perfect char.
Add garlic or herbs for extra flavor. Keep exploring to master every step and variation.
Key Takeaways
- Use all-purpose flour with yogurt, warm water, oil, sugar, salt, and active dry yeast for a soft, flavorful naan dough in the bread machine.
- Select the dough cycle on your bread machine to knead and proof the naan dough for 1 to 1.5 hours without baking.
- Divide the risen dough into equal portions, shape into balls, rest briefly, then roll each to about ¼ inch thickness on a floured surface.
- Cook naan on a preheated heavy skillet or use an oven broil with a pizza stone for authentic blistered, charred results.
- Brush naan with melted butter or oil before cooking, and add toppings like garlic or herbs for extra flavor and moisture.
Key Steps for a Foolproof Bread Machine Naan Dough
| Ingredients / Tools | Steps / Actions |
|---|---|
| All-purpose flour | Add wet ingredients first, then dry ingredients into the bread machine following your model’s recommended order. |
| Active dry yeast | Activate yeast in warm water (~110°F) to ensure proper rise before mixing. |
| Warm water | Check dough texture 5–15 minutes into mixing; adjust with water or flour to achieve a smooth, slightly tacky feel. |
| Plain yogurt | Yogurt adds moisture and softness—ensure it is fully blended during the dough cycle. |
| Oil or melted butter | Enhances tenderness and prevents dryness during cooking. |
| Sugar + Salt | Sugar feeds the yeast; salt strengthens gluten and balances flavor. |
| Bread machine (dough cycle) | Select Dough Cycle and allow 1–1.5 hours for kneading and rising. |
| Floured surface | After the dough cycle, divide dough evenly (use a scale if possible) and shape into smooth balls. |
| Rolling pin | Roll each dough ball gently to ~¼-inch thickness; aim for oval or teardrop shapes. |
| Skillet, griddle, or oven broiler | Cook on a very hot surface until bubbles form; flip for charred spots or broil for blistered texture. |
| Butter, ghee, garlic, or herbs | Brush naan before or after cooking; add toppings like garlic, cilantro, or seeds for extra flavor. |
| Damp cloth or plastic wrap | Cover resting dough pieces to prevent dryness while shaping. |
Essential Ingredients for Perfect Naan Dough
Although naan bread seems simple, getting the dough just right requires choosing the essential ingredients carefully.
You’ll want to start with all-purpose flour for that perfect gluten network that gives naan its chewy texture. Mixing in some bread flour can boost elasticity and help the bread puff beautifully.
For leavening, active dry yeast is your go-to, creating those soft, fluffy bubbles. Warm water around 110°F wakes it up perfectly. It’s important to measure water temperature with a thermometer to ensure the yeast activates properly.
Yogurt adds moisture and a slight tang, enriching the softness.
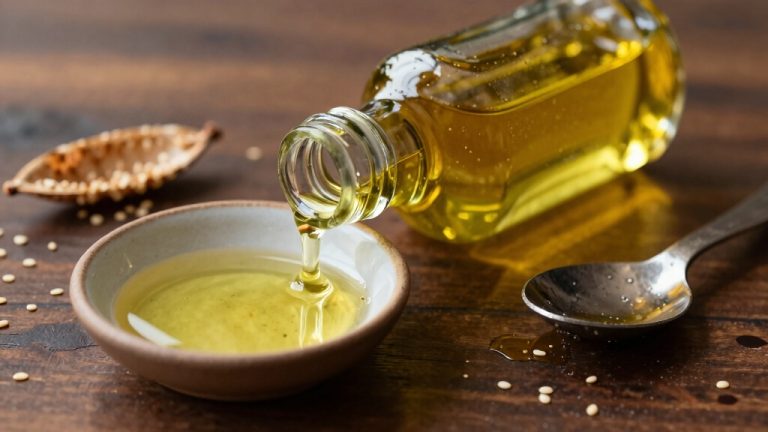
A touch of oil or melted butter keeps the dough pliable and browning nicely.
Don’t forget a little sugar to feed the yeast and salt to balance flavors and strengthen gluten.
Preparing Naan Dough Using a Bread Machine
Now that you’ve gathered the right ingredients to craft perfect naan dough, it’s time to put them to work in your bread machine.
Begin by adding wet and dry ingredients in the order your machine recommends to guarantee proper mixing and yeast activation. Using consistent measurements ensures the dough’s texture remains ideal throughout the process.
Select the “dough cycle,” designed to knead and let the dough rise without baking. This cycle usually lasts 1 to 1.5 hours.
During mixing, check the dough’s texture around 5–15 minutes; if it’s too sticky, add flour, or if too dry, add water until it’s smooth and slightly tacky.
Yogurt and oil enrich the dough’s softness and elasticity.
After the dough cycle completes, the dough can be left to rise further in a warm environment if needed to achieve the ideal proofing time.
When the cycle finishes, promptly remove the dough to prevent over-proofing and prepare for the next steps.
Dividing and Shaping the Dough for Uniform Naan
To get uniform naan, you’ll want to start by dividing your dough into even pieces. This is super important because it helps each naan cook evenly, which we all want, right? Using even lighting in your kitchen can help you see the dough better as you work, improving consistency.
When you’re rolling them out, just remember to be gentle. A lightly floured surface will do wonders to keep the dough soft and elastic. Use the dough setting on the bread machine for mixing and rising before dividing the dough.
Oh, and don’t skip the resting part! After you divide the dough, let it rest for a bit. This little break relaxes the gluten and makes shaping so much easier. Trust me, it’s worth it!
Portioning Dough Evenly
When you portion your dough evenly, you set the stage for perfectly cooked naan with consistent texture and size. Start by weighing each piece, around 75 grams if making eight, to guarantee uniformity. If you don’t have a scale, lightly mark the dough’s surface and cut with a pastry scraper for clean, precise divisions.
Shape each portion into a smooth, tight ball by rolling it gently between your floured palms, avoiding over-handling to keep the dough soft and elastic. Using bowls made from durable materials can help maintain dough moisture during resting periods.
Let the dough rest briefly after dividing to relax the gluten, then cover the pieces with a damp cloth to prevent drying. This resting period also helps maintain moisture and elasticity in the dough for better shaping and puffing during cooking.
Rolling Techniques Explained
How do you achieve perfectly shaped naan that cooks evenly every time? It starts with dividing your dough into equal pieces on a lightly floured surface, handling them gently to keep air bubbles intact. Using consistent techniques similar to those employed in cheese melters can help maintain optimal texture.
Then, roll each portion with consistent pressure into ovals or tear-drop shapes about ¼ inch thick to ensure even cooking. Keep your rolling pin lightly floured to prevent sticking without toughening the dough. Before rolling, ensure your dough has completed the dough cycle in the bread machine for optimal texture.
Remember these key steps:
Cut dough into uniform portions using a sharp knife or scraper. Rest dough pieces briefly before shaping to relax gluten. Roll evenly from center to edges, rotating for symmetry.
Shape naan between ¼ to ½ inch thick depending on texture preference. Avoid over-rolling to prevent tearing during cooking.
Resting Dough Benefits
Although it might seem like a small step, resting your dough after dividing plays a crucial role in shaping uniform naan. This brief 5–10 minute pause lets the gluten relax, making the dough easier to stretch and shape without snapping back.
It reduces elasticity, so your dough won’t shrink or tear during rolling, helping you achieve consistent thickness and size for each naan. Dividing the dough beforehand ensures even cooking and browning, while resting enhances softness and tenderness in the final bread.
Skipping this step risks tough, chewy spots or uneven puffing. By giving your dough this short rest, you’re setting yourself up for perfectly pliable rounds that bake into naan with that traditional, fluffy texture and balanced crispness you’re aiming for.
Techniques for Rolling and Adding Toppings

Mastering the techniques for rolling your naan dough and adding toppings can elevate your bread from good to unforgettable. Start by dividing the dough into equal portions and rolling each gently on a lightly floured surface to about 8 inches long, maintaining a thickness near 1/4 inch for softness.
Avoid pressing too hard to keep those air pockets intact. Use a rolling pin to shape dough into teardrops or ovals without overstretching. Brushing lightly with oil, ghee, or butter before cooking adds moisture and flavor while helping to prevent sticking, which is especially important to ensure even cooking and texture.
Brush lightly with oil, ghee, or butter before cooking for moisture and flavor. Sprinkle toppings like garlic, cilantro, or nigella seeds evenly to avoid sogginess. Handle dough carefully to preserve elasticity and prevent tearing. Keep dough covered when not rolling to prevent drying out and cracking.
Since the dough can be refrigerated for 2-3 days before cooking, you can prepare it in advance for added convenience and flavor development refrigeration option. These steps ensure your naan is perfectly textured and deliciously topped every time. Be mindful that proper handling and timing in food preparation can also help avoid bacterial contamination and maintain food safety.
Cooking Naan: Oven, Skillet, and Griddle Methods
When you cook naan at home, choosing the right method can make all the difference in texture and flavor.
Using your oven’s broil function with a preheated pizza stone mimics a tandoor’s intense heat, creating blistered bubbles and slight charring without flipping. A heavy skillet offers more control; cook the dough until bubbles form, then flip to develop charred spots.
The griddle or tawa method blends these approaches: cook on a hot griddle, then briefly expose the naan to direct flame for authentic puff and char. High heat (around 450°F) is essential in every method to achieve that signature softness inside and crisp, bubbly exterior. Traditional naan dough often includes leavening agents like yeast or baking soda to achieve its characteristic fluffiness.
Tips for Enhancing Flavor and Texture
To really elevate your naan, it’s all about balancing that tangy richness of yogurt with just the right oil. This combo not only keeps your naan moist but also packs it full of flavor.
And hey, don’t be afraid to get a little creative with toppings! A drizzle of garlic butter or a sprinkle of fresh herbs can add a delightful burst of aroma and taste right as the naan comes off the heat.
Trust me, these simple touches can turn your bread machine naan into a soft, golden masterpiece that’s just begging to be devoured.
For an added nutritional boost, consider incorporating plant-based protein sources into your dough or toppings to improve both flavor and satiety.
Yogurt and Oil Balance
Although yogurt and oil each play distinct roles in naan dough, balancing their quantities is key to achieving the perfect texture and flavor. Yogurt adds moisture, mild tanginess, and tenderness, while oil improves dough extensibility and softness. Understanding the flavor profile of ingredients helps ensure a harmonious dough mixture.
To master this balance, consider these tips:
Use a 2:1 yogurt-to-oil ratio as a starting point for ideal hydration and richness. Choose full-fat plain yogurt for fluffier naan or Greek yogurt for a chewier crumb.
Add oil gradually to avoid sticky dough and adjust flour or water accordingly. Combine yogurt and oil with warm liquids to activate yeast and maintain dough consistency. Yogurt is the essential secret ingredient, providing moisture, tenderness, tanginess, and aiding leavening.
Toppings and Finishing
Since naan’s soft, pillowy texture provides a perfect canvas, choosing the right toppings and finishing touches can elevate its flavor and appeal dramatically.
Start with a brush of garlic butter or melted butter to add richness and softness. Fresh herbs like cilantro or basil bring a burst of brightness, while caramelized onions or sautéed mushrooms add depth and umami. Ensuring your kitchen workspace is clear and organized can make the preparation and topping process smoother and safer, much like clearing pathways when moving a large appliance such as a refrigerator with pathway clearance.
Don’t hesitate to layer cheeses: mozzarella for meltiness or feta for tang to boost creaminess. Sprinkle Za’atar or Everything but the Bagel seasoning to introduce complex, crunchy notes. For a sweet twist, drizzle honey or cinnamon sugar before grilling.
These thoughtful toppings transform your naan from simple bread into a flavorful, versatile dish perfect for snacks, meals, or even desserts. Since naan is often paired with saucy dishes like Chicken Korma or Palak Paneer, adding toppings that complement these flavors can enhance the overall dining experience serving suggestions.
Variations and Dietary Adaptations for Naan
When exploring variations and dietary adaptations for naan, you can easily tailor the recipe to suit your nutritional needs and flavor preferences.
Whether you want to boost fiber, go gluten-free, or embrace vegan options, there’s a way to customize your bread machine naan dough. Properly storing ingredients and finished dough in airtight containers helps maintain freshness and flavor.
Consider these ideas: swap all-purpose flour with whole wheat or gluten-free flours like chickpea, adding binders for texture.
Use plant-based yogurts and oils to replace dairy for vegan or lactose-free naan. Naan bread is traditionally known for its soft, fluffy texture thanks to the use of yogurt in the dough, which you can replicate with dairy-free alternatives.
Add garlic, herbs, or spices such as cumin and chili flakes to elevate savory flavors.
Try cheese toppings or sweet touches like honey and cinnamon for unique naan styles.
Adjust bread machine settings to accommodate ingredient changes, ensuring perfect dough consistency and rise.
Frequently Asked Questions
Can I Freeze Naan Dough Before Cooking?
Yes, you can definitely freeze naan dough before cooking.
Just portion the dough into small balls, wrap them tightly to avoid freezer burn, and store them in an airtight container.
When you’re ready, thaw them slowly in the fridge overnight.
Then let them rest at room temperature before rolling out and baking.
This way, you’ll enjoy fresh, soft naan anytime without sacrificing flavor or texture.
How Do I Reheat Leftover Naan Without Drying It Out?
To reheat leftover naan without drying it out, sprinkle a bit of water on the bread before warming.
Use a microwave covered with a damp paper towel for 30-60 seconds, or heat it wrapped in foil in a 300–350°F oven for up to 10 minutes.
You can also warm it on a skillet, pressing gently and flipping quickly.
These methods keep your naan soft, moist, and delicious every time.
What Is the Best Flour Substitute for Gluten Sensitivity?
When life tosses you gluten sensitivity, brown rice flour steps in like a reliable sidekick, offering sturdy structure and a mild nutty flavor.
Pair it with tapioca starch to add that springy bounce you crave.
Don’t forget a pinch of xanthan gum; it’s the magic thread weaving your dough together.
This combo balances nutrition and texture, keeping your baked goods soft, chewy, and delightfully gluten-free without sacrificing taste or integrity.
Can I Use a Slow Cooker for Cooking Naan Bread?
You shouldn’t use a slow cooker to cook naan bread because it doesn’t get hot or dry enough to create the naan’s signature char and puffiness.
Instead, use a hot skillet, griddle, or oven broiler to get that perfect texture.
However, you can use your slow cooker to warm pre-made naan or prepare delicious curries that pair beautifully with it.
For authentic naan, stick with direct, intense heat methods.
How Long Does Homemade Naan Keep at Room Temperature?
You can keep your homemade naan fresh at room temperature for about 1 to 2 days.
To make it last up to 3 days, be sure to store it in an airtight container or plastic bag to lock in moisture.
Avoid leaving it exposed to air, or it’ll dry out quickly.
For longer storage, consider refrigeration or freezing.
At room temp, keep it wrapped tight and enjoy it soon for the best taste!
Elevate Every Meal With Your Freshly Made Naan
Now that you’ve mastered making naan with your bread machine, you’re part of a growing trend. Did you know homemade bread sales rose by over 30% in the last year alone?
This shows how more people crave fresh, personalized flavors. With these simple steps, you can enjoy warm, fluffy naan anytime, tailored to your taste.
Keep experimenting with toppings and cooking methods to make every bite an unforgettable experience!