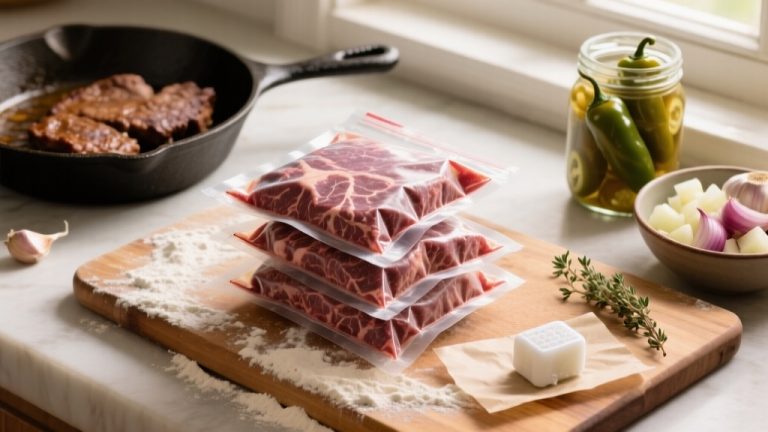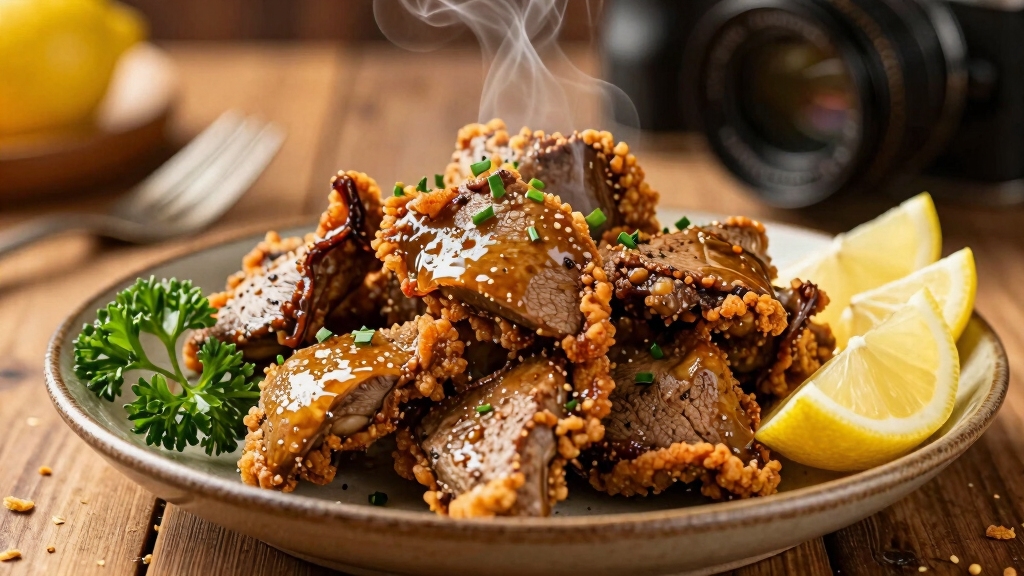
Fried Chicken Liver Recipe: Simple Ingredients, Big Flavor
Trim and rinse livers, pat dry, then dunk briefly in buttermilk to mellow and season.
Double-dredge in a seasoned blend of flour and cornmeal, let the coating set, and fry in 1–2 inches of oil at 360°F in small batches.
Turn often for 2–3 minutes per side until deeply browned and just set. Drain on a rack, rest briefly, and serve with bright acid or mustard.
Keep going for timing, troubleshooting, and sauce ideas.
Key Takeaways
- Trim, rinse, and pat livers dry, removing sinew and green bits before seasoning or soaking.
- Quick soak livers 3–4 minutes in buttermilk or use an egg-hot-sauce wash for deeper seasoning.
- Double-dredge in seasoned flour mixed with 1/4 cup cornmeal per pound for crunch.
- Fry in 1–2 inches of oil at 360°F, 2–3 minutes per side until deeply browned and just set.
- Drain on a wire rack, rest 10 minutes, then serve with acidic condiments or re-crisp leftovers in a hot oven.
Quick Fried Chicken Livers Recipe Table
| Main Term | Details | Quantity / Time | Notes |
|---|---|---|---|
| Main Ingredient | Chicken livers | 1 lb | Trim sinew and green bits before cooking |
| Soaking Liquid | Buttermilk (or milk / egg-hot sauce wash) | Enough to coat | Quick soak helps mellow strong flavor |
| Soaking Time | Buttermilk soak | 3–4 minutes | Optional longer soak 2–6 hours for tenderness |
| Flour Base | All-purpose or self-rising flour | 1–2 cups per lb | Forms base of the crust |
| Crunch Element | Cornmeal | 1/4 cup per lb | Adds crisp texture |
| Seasonings | Garlic powder, kosher salt, black pepper | To taste | Optional paprika or cayenne |
| Coating Method | Double dredge | 2 coats | Flour → buttermilk → flour |
| Resting Time | Coated livers on rack | 8–12 minutes | Helps coating adhere before frying |
| Frying Oil | Neutral high-smoke oil (canola, peanut, grapeseed, lard) | 1–2 inches depth | Maintains even heat |
| Frying Temperature | Oil temperature | 360°F (≈182°C) | Use thermometer for accuracy |
| Fry Time | First side | 2–3 minutes | Turn for even browning |
| Fry Time | Second side | 1–2 minutes | Total 3–5 minutes |
| Yield | Servings | ~4 servings per lb | Depends on portion size |
| Draining | Wire rack rest | 5–10 minutes | Keeps crust crisp |
| Storage | Refrigeration | Up to 3 days | Store in airtight container |
| Reheating | Oven or air fryer | 375°F for 8–10 min | Avoid microwave to keep crisp |
Quick Fried Chicken Livers Recipe (Ingredients, Cook Times, Yield)

If you want crispy, tender livers fast, this quick fried chicken livers recipe gets you there in about 15–20 minutes from start to finish: trim and rinse the livers, soak them for 3–4 minutes in buttermilk, then double-dredge in a seasoned flour-cornmeal mix and fry at 360°F for 2–3 minutes per side until deeply browned and just set.
Crisp, tender fried chicken livers in 15–20 minutes: buttermilk soak, double-dredge, fry to deep golden perfection.
This yields roughly 4 servings per pound.
You’ll measure 1–2 cups flour per pound plus 1/4 cup cornmeal; season with garlic powder, black pepper, and kosher salt. Reserve a splash of buttermilk to make nubs in the dry mix.
Drain livers well, double-dredge, and rest for 10 minutes on a rack.
Fry in 1–2 inches of oil at 360°F, turning for even color.
Serve immediately.
If you plan to freeze any leftovers, pack them in airtight containers or vacuum-sealed bags and store at 0°F or below to best preserve flavor and texture, especially to avoid freezer burn.
How to Clean and Prep Chicken Livers Safely
Now that you’ve got the quick-fry method down, pay close attention to how you clean and prep the livers so they cook evenly and taste their best.
Rinse livers under cold water, then trim visible sinew, fat and any greenish bits. These spoil flavor and texture.
Keep lobes as large as practical; separate connected pieces so they cook uniformly. Discard tiny fragments that’ll burn.
Briefly dunk each liver in a 30-second salt solution to cleanse and season, then drain thoroughly.
Use a fork to prick several small punctures to prevent popping while frying.
Pat livers dry with paper towels, inspect for remaining membranes, and rest briefly refrigerated before dredging. This helps coatings adhere and keeps the interior tender and savory.
Chill the livers briefly in the freezer for 15–20 minutes to firm them up for more consistent cooking and easier handling, which also aids in achieving a better texture when frying keep meat cold.
Wet Marinades for Fried Chicken Livers: Times and Flavor Tips
Typically, you’ll want a wet marinade that both tenderizes and layers flavor without masking the liver’s rich, iron-forward character. Keep the base simple: buttermilk or milk for quick brightening, or a longer soak with an egg-and-hot-sauce wash for deeper seasoning.
You’ll rinse and trim first, then choose time based on size: 3–4 minutes for a brief mellowing, 2–6 hours for tenderness, overnight only if you trust your livers’ freshness. Whisk gently; don’t pulverize the organ’s texture.
Drain thoroughly and pat dry before dredging so your coating sticks and fries crisp. Respect the livers’ profile: acid, fat, and spice should accent, not erase, that minerally savor.
- Milk-soaked pale lobes glisten
- Pepper flakes suspended in egg wash
- Buttermilk pooling in a shallow pan
- Livers resting on paper towels
- Hot oil waiting, thermometer ready
Selecting the right knife—especially a flexible boning knife—can make trimming and portioning livers safer and more precise.
Dry Coating Blends for a Crisp, Flavorful Crust
Often you’ll build your crust around a simple flour base—self-rising or all-purpose—then layer in texture and seasoning so the coating complements, not buries, the liver.
You’ll mix 1–2 cups flour per pound with 1/4 cup cornmeal for crunch. Then add garlic powder, kosher salt, and black pepper as core notes. Use paprika or cayenne sparingly to respect the organ’s flavor. Oregano or cumin can add depth.
Keep some reserved buttermilk to create little nubs in the dry mix for adhesion without sogginess. Work efficiently so the livers stay cold until frying.
A light adjustment of dairy or flour ratios can help maintain a tender interior while achieving a crisp crust, especially when using self-rising flour as part of the base.
| Texture element | Purpose |
|---|---|
| Cornmeal | Crunch |
| Flour | Base and browning |
| Spices | Flavor lift |
Dredging: The Double‑Coating Method (Step‑by‑Step)
Let’s kick things off by patting your trimmed livers dry. Once that’s done, we’ll dive into a wet-to-dry rhythm. Start by dipping them into some buttermilk. After that, it’s back into the seasoned flour to really build a solid base.
Now, here’s a little tip: let each piece rest briefly between coats. This way, the layers bond well, and trust me, this helps the coating stay put during frying.
Finally, finish things off with a light dusting of the reserved flour. This gives you that perfect, crisp shell while keeping the liver’s texture intact and moisture sealed in. Enjoy the process!
Remember to secure the stove with an anti-tip bracket to enhance kitchen safety while frying.
Wet-To-Dry Layering
Layer the livers carefully: dust each piece in the seasoned dry mix, dunk it briefly into the buttermilk or egg wash, then return it to the flour for a second coating. This wet-to-dry sequence builds a craggy, adhesive crust that clings to the tender organ without suffocating its texture.
You’ll work briskly: shake off excess flour before the dip, let the wet cling just enough, then press the second flour layer into seams and edges. Handle pieces gently to preserve shape; bigger lobes get slightly more coating. This method traps tiny air pockets for crispness and protects the interior from direct oil shock.
- Rough, floury ridges catching spice
- Buttermilk glistening between layers
- Tiny nubs of reserved buttermilk in the crust
- Even, fully coated lobes ready for frying
- Craggy edges that turn golden and crisp
For an even drier, less sticky crust during resting, consider letting the coated livers air-dry briefly on a rack to reduce surface moisture and prevent sticking in dehydrators.
Resting Between Coats
Letting the coated livers rest before frying gives the flour time to hydrate and bond to the buttermilk. This ensures the crust won’t slough off in the oil.
You’ll set pieces on a wire rack, not a flat plate, to let air circulate and avoid sogginess. Ten minutes is effective; longer builds adhesion without over-drying.
Handle gently; don’t stack so each liver holds its double coat. If humidity’s high, shorten the rest slightly; if the kitchen is cold, allow a few extra minutes.
Use this quick checklist to monitor readiness:
| Step | Time | Tip |
|---|---|---|
| Initial rest | 2–5 min | Tacky, sets first coat |
| Full rest | 8–12 min | Coating bonds, ready to fry |
| Final check | 0–2 min | No pooling, lightly dry to touch |
For reliably crisp results, let the coated pieces rest on a wire rack so air can circulate and excess moisture can evaporate before frying, helping achieve a crispy crust.
Final Flour Finish
With the bonded coating rested and tacky to the touch, you’ll move on to the final flour finish. This is where technique preserves the liver’s delicate texture while building a shatteringly crisp crust.
Work confidently: press each piece into the seasoned flour, shake off excess, dip briefly in reserved buttermilk nubbed into flour, then press again into the final dry mix. Aim for even, thin layers; too thick masks the liver, too light won’t protect it.
Let pieces sit on a rack for 10 minutes to set. Handle gently to avoid breaking the lobes.
- golden granules clinging to crevices
- faint steam from tacky coating
- fingers dusted in seasoned flour
- compact, even edges ready for oil
- thin, resilient crust promising crunch
Stand mixers are preferred by bakers for precision and control, particularly for softer mixtures, while food processors are favored by home cooks for versatility in meal prep.
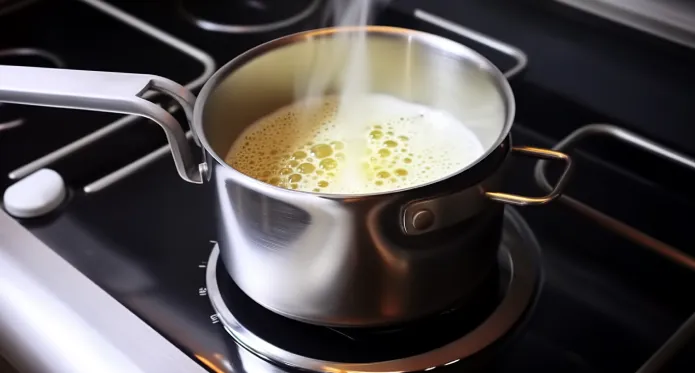
Frying Tips: Which Oil, the Right Temp, and Timing
Choose a neutral, high-smoke-point oil—canola, peanut, grapeseed, or rendered lard. Heat it to about 360°F so the livers brown quickly without absorbing excess fat.
Use 1/2–2 inches of oil depending on pan depth; you want enough for even contact but not to submerge the livers completely in shallow frying.
Maintain 360°F with a thermometer. Temperature drift leads to greasy or overbrowned results. Fry in small batches so the oil recovers rapidly.
Overcrowding drops the temperature and wets the crust. Cook 3–5 minutes total: about 2–3 minutes on the first side, 1–2 minutes after turning, adjusting for piece size.
Turn frequently for uniform color, then drain on a rack to keep the crust intact and the liver honored. After frying, let the pan cool slightly before cleaning and use a non-abrasive brush to protect porcelained surfaces and avoid damage.
Troubleshooting Fried Chicken Livers: Soggy, Burnt, or Undercooked
If your fried chicken livers come out soggy, burnt, or underdone, start by isolating the cause: temperature, coating technique, or piece size. Address it directly by balancing heat, coating, and liver respect.
Raise oil to 360°F for crispness. Trim or combine tiny pieces to avoid burning. Let coatings set on a rack so they adhere.
Check doneness by a slight spring and warm center, not by color alone. Rescue soggy pieces with higher heat and short re-fry. Halt burning by lowering heat and removing dark bits.
Treat livers gently; overhandling knocks off breading and releases moisture.
- golden, bubbling oil kissing a set crust
- steam lifting from a trimmed, plump lobe
- crumbs clinging like armor
- edges bronzed, not blackened
- a tender, slightly yielding center
Also ensure proper air circulation and cleaning to prevent overheating in kitchen equipment and appliances, which can indirectly affect frying conditions and safety by causing blocked vents and heat issues.
Serving Ideas, Sauces, and Make‑Ahead/Storage Tips
When you plate up those fried chicken livers, think about mixing things up! A creamy honey-mustard or a zesty ranch-barbecue sauce can really cut through the richness. And hey, a splash of lemon or a dash of hot sauce? That’s just what you need to wake up your taste buds!
You can serve them over some fluffy mashed potatoes, or pair them with a refreshing crisp slaw or buttery greens. It’s all about balancing textures and celebrating the flavor of the livers.
Got leftovers? No worries! Just cool the livers quickly and pop them in the fridge in a single layer for up to 3 days. If you want to keep them longer, freeze them untouched for about a month. When you’re ready to enjoy them again, just re-crisp in a hot oven or skillet to bring back that crunch!
Sauce Pairing Ideas
Because fried chicken livers balance rich, iron-forward flavor with crisp, savory coating, you’ll want sauces that either cut through the richness or echo the dish’s seasoning without overpowering it.
Choose finishes that respect the organ’s texture: acid to cleanse, fat to amplify, and spice to brighten. Whisk vinaigrettes thinly for dipping, fold tang into creamy bases, and simmer reductions to concentrate aromatics.
For make-ahead, keep sauces chilled in airtight containers; reheat gently to preserve emulsion.
- A zesty sherry-wine vinaigrette dotted with minced shallot and thyme
- Sharp honey-mustard with Dijon and lemon to lift the liver’s iron
- Smoky chipotle-ranch, cooled and hulled for silky coating
- Brown-butter sage sauce with a squeeze of lemon for nuttiness
- Thin pan-gravy made from fond, reduced and strained
Serving Suggestions
Lay out fried chicken livers on a warm rack so they stay crisp while you finish plating. Pair them with sauces and sides that either cut through their iron-rich savor or echo it without smothering the texture.
Serve immediately: their crunch and interior creaminess demand no delay. Offer acidic contrasts like lemon wedges, a bright vinegar slaw, or a mustard-forward honey-mustard to lift richness.
Provide a silky gravy or warmed meat-ranch blend if you want to echo savor without masking liver character. Keep sides restrained: mashed potatoes, coarse cornbread, or simple sautéed greens complement rather than compete.
Plate portions with space so heat dissipates evenly. Garnish sparingly with chives, cracked pepper, or flaky salt to highlight technique and respect the organ’s flavor.
Make‑Ahead Storage Tips
After plating, think about how you’ll keep those crisped livers and their sauces ready without compromising texture or flavor. You want to preserve the sear and avoid sogginess: cool pieces on a rack, separate sauces in airtight jars, and chill rapidly.
When reheating, use a hot oven or skillet to revive crust without overcooking the interior. Label containers with date; use within 2–3 days for best texture. If freezing, flash-freeze single layers on a sheet, then bag them to protect the coating.
- golden lobes resting on a wire rack, steam escaping
- glossy honey‑mustard in a small mason jar
- individual portions wrapped in butcher paper
- flash‑frozen pieces glistening under frost
- reheating in a cast‑iron skillet until edges sing
Frequently Asked Questions
Can I Use Frozen Chicken Livers Straight From the Freezer?
Yes, you can, but you shouldn’t.
You can thaw quickly in cold water to keep texture. You can also thaw slowly overnight in the fridge for deeper seasoning.
Pat dry thoroughly to prevent splatter.
Respect the organ: trim sinew, keep lobes large, and puncture lightly.
Soak briefly, drain completely, and dredge carefully.
Fry at 360°F with frequent turns to achieve a crisp exterior and a tender, even-cooked interior.
Are Chicken Gizzards Cooked the Same Way as Livers?
Not exactly. Gizzards need longer, gentler cooking than livers.
You’ll treat livers fast: trim, soak, dredge, and fry briefly for crispness.
Gizzards are dense and benefit from simmering or braising until tender (45–90 minutes) before any dredge-and-fry step.
You’ll still season, double-dredge, and fry for color, but always cook gizzards to tenderness first so they’re juicy, not tough, and respect their firmer texture.
Can I Make This Recipe Gluten-Free or Keto-Friendly?
Yes, you can. Swap flour or cornmeal for almond flour, Crushed crispy rinds, or coconut flour for keto. Use gluten-free all-purpose flour or rice flour for GF.
Maintain double-dredge, resting, and oil temp at 360°F so coating crisps without overcooking livers. Reduce soaking time in heavy batters to prevent sogginess.
Season boldly, finish with a squeeze of lemon, and serve immediately to respect the liver’s texture and flavor.
How Do I Reheat Leftovers to Keep Them Crispy?
Coincidentally, you’ll revive crispness best by reheating in a 375°F oven or 350°F air fryer.
Pat livers dry, spritz with oil, and space them so hot air circulates. Heat 8–10 minutes, flipping once, until edges re-crisp and centers stay tender.
Avoid microwaves; they’ll steam and ruin texture. Let rest a minute, then finish with a squeeze of lemon or a dusting of flaky salt to honor their rich flavor.
The Final Flip: Mastering Tender, Crispy Fried Livers
You’ve treated livers with respect: clean, brine, double-dredge, and fry. You’ll be rewarded. Remember my grandmother’s skillet; she flipped livers like cards, never overcooking, and turned a humble pan into a small ritual.
90 seconds per side at 350°F often mirrors her touch. Let the crust sing, let the center stay tender. Savor the iron-rich richness, serve immediately, and you’ll turn organ meat into a centerpiece, not just a side.