How to Clean a Meat Grinder: Secrets for a Spotless Shine
To clean a meat grinder, start by unplugging it for safety. Feed 2-3 slices of bread through the grinder to absorb oil and help remove residue.
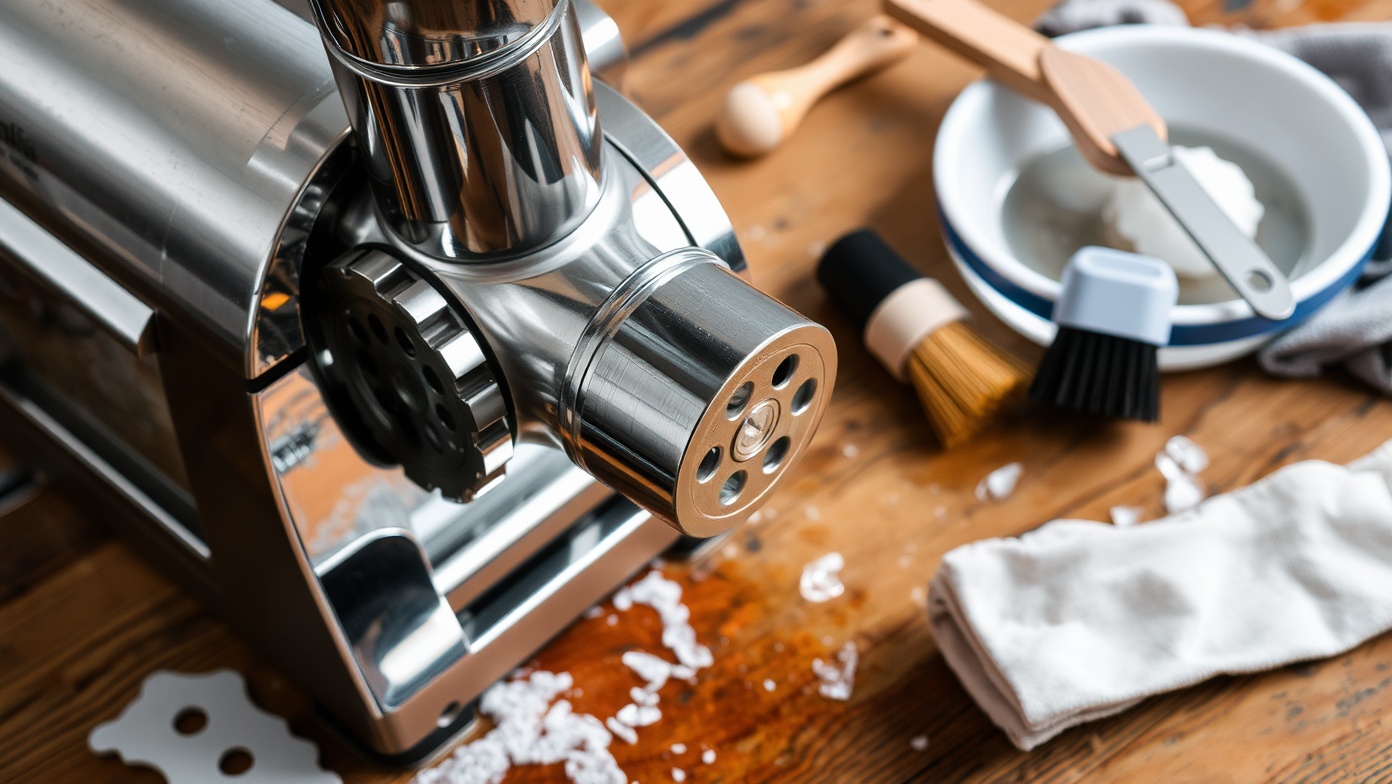
Disassemble the grinder into its parts: pusher, feed tube, screw, blade, and plate. Soak these components in warm, soapy water for 15-30 minutes. Scrub all parts, focusing on crevices, and use a bottle brush for hard-to-reach areas.
Rinse thoroughly under warm water and dry completely to prevent rust. Finally, store the grinder in a cool, dry place. To gain further insights on maintenance and storage practices, you can explore more tips.
Key Takeaways
- Unplug the meat grinder and feed slices of bread to absorb oil and remove meat particles before cleaning.
- Disassemble the grinder into components, including the pusher, feed tube, screw, blade, and plate for thorough cleaning.
- Soak disassembled parts in warm, soapy water or vinegar for 15-30 minutes, then scrub with a brush or sponge.
- Rinse all parts with warm water, dry thoroughly with a towel, and air-dry to prevent rust.
- Store components in a cool, dry place, organizing them in sealable bags with moisture-absorbing rice.
Step-by-Step Guide to Spotless Meat Grinder Cleaning
To clean your meat grinder effectively, follow the steps below for a thorough and efficient cleaning process that ensures your grinder stays in top condition.
Immediate Steps for Cleaning Your Meat Grinder
Immediately after using your meat grinder, it’s crucial to clean it to prevent grease and meat residue from drying and becoming tough to remove.
Start by unplugging the electric grinder for safety. Feed 2-3 slices of bread through the grinder; this helps absorb oil and pushes out any remaining meat particles.
Disassembly of the Grinder
After completing the immediate cleaning steps, you’ll need to disassemble the meat grinder to ensure a thorough cleaning. Start by unplugging the grinder to confirm safety and prevent electrical shocks.
Then, remove the meat tray and feed tube, allowing you to access the internal components easily.
Next, unscrew and detach the metal cover that enables ground meat to exit. Carefully pull out the screw, blade, and cutting plates, taking note of their order to simplify reassembly later.
It’s important to remember the sequence of the grinder’s parts, as this will help maintain peak performance when you put everything back together.
Don’t forget to disassemble other components that come into contact with meat, including the pusher and feed tube.
Soaking and Scrubbing the Grinder Parts
Once you’ve disassembled your meat grinder, it’s time to tackle the soaking and scrubbing of the parts. Start by soaking all disassembled components in a warm, soapy water solution for 15-20 minutes. This helps loosen grease and meat residue effectively.
While the parts are soaking, prepare your cleaning tools. You’ll need:
- A soft-bristled brush or sponge for scrubbing.
- A bottle brush for hard-to-reach areas, like the feed tube.
- Clean towels for drying.
- A wire rack for air drying.
After soaking, use the brush or sponge to scrub each component, paying special attention to the blades and cutting plates where residue tends to cling. For the inside of the feed tube, the bottle brush is particularly useful.
Once you’ve scrubbed all parts thoroughly, rinse them under running warm water to confirm no soap residue remains, which is vital for food safety.
Rinsing and Drying the Meat Grinder Components
With the components thoroughly scrubbed and free of residue, the next step involves rinsing each part to remove any lingering soap.
Hold the components under running warm water, guaranteeing that all surfaces are adequately rinsed. Pay special attention to hard-to-reach areas, as soap can easily hide there.
Utilize a clean sponge or cloth to wipe down these spots, making certain that no water is left standing in the feed tube or plate holes.
Once rinsed, it’s vital to dry all parts with a dry towel to eliminate excess moisture. This step prevents any water from remaining on the components, which could lead to rust and oxidation.
After towel-drying, place the parts on a wire rack or a fresh towel to air-dry completely. Make sure you don’t reassemble the grinder until all components are entirely dry.
Moisture can compromise the longevity of your meat grinder, so checking for any signs of dampness is important before storage.
Additional Methods for Cleaning Your Meat Grinder
To maintain your meat grinder in prime condition, consider incorporating additional cleaning methods that enhance residue removal and hygiene.
Start by disassembling the grinder. For a thorough clean, prepare a vinegar solution using equal parts white vinegar and warm water. Soak the disassembled parts in this solution to loosen grease and make scrubbing easier.
After soaking, you can use crushed saltine crackers or stale bread as an alternative cleaning method. Feed 2-3 slices of stale bread through the grinder; this absorbs excess oil and grease while helping to remove stuck ground meat particles. Crushed saltines work similarly, pushing out meat residues with less mess than raw meat.
Regularly using baking soda as a soaking agent before scrubbing can neutralize odors and break down stubborn residues.
Finally, to disinfect the metal parts, mix 1 tablespoon of bleach per gallon of water in a spray bottle. Apply the diluted solution, let it sit briefly, then rinse thoroughly to verify all parts are clean and hygienic.
Proper Storage Techniques for Your Meat Grinder
Properly storing your meat grinder is essential for maintaining its condition and performance over time. Following effective storage techniques can help prevent rust from forming and guarantee your grinder’s parts stay in prime shape.
- Store the meat grinder in a cool, dry place to protect it from moisture damage.
- Organize all components in a designated storage container to avoid loss or damage.
- Bag each part individually in sealable plastic bags with a handful of rice to absorb any moisture during storage.
- For non-electric parts, consider storing them in the freezer or chilling them for about an hour before use.
Regularly check the stored grinder for signs of wear or rust. Avoid stacking heavy items on top of your grinder, as this can lead to deformation of the parts.
Meat Grinder Maintenance Tips
To ensure your meat grinder operates at peak performance, follow these tips:
Regular Inspection Practices
Regular inspections of your meat grinder are essential for ensuring its longevity and ideal performance.
Here are some key practices to incorporate into your routine:
- Inspect for damaged parts: Look for any worn or broken components that could affect functionality.
- Check blade sharpness: Dull blades can lead to inefficient grinding and potential damage to the grinder, so assess their condition frequently.
- Maintain a maintenance log: Document all cleaning, servicing, and inspection activities to identify patterns or recurring issues.
- Store properly: Keep your grinder in a dry location and periodically examine it for signs of rust or wear.
Lubrication of Moving Parts
Lubricating the moving parts of your meat grinder is vital for maintaining its efficiency and extending its lifespan. To guarantee peak performance, focus on components like the screw and pusher. Use food-grade mineral oil to lubricate moving parts, as it prevents rust and promotes smooth operation.
Apply the oil using a spray bottle for an even coat. Be careful to avoid over-saturating any part, especially electrical components. Regular lubrication should be performed after every few uses or as recommended by the manufacturer. This routine helps maintain the grinder’s functionality and prevents wear over time.
After applying the oil, use a clean cloth to wipe away any excess. This step is significant, as it prevents buildup that could attract dust and debris, which can hinder performance.
Additionally, make it a habit to inspect the grinder regularly for signs of wear. Confirm that all moving parts are adequately lubricated to help extend the appliance’s lifespan.
Optimizing Grinding Process
When you’re looking to optimize the grinding process, temperature control and preparation are key factors.
Keeping your meat cold enhances the texture and quality of the final product, so always pre-chill it before grinding. Warm meat can lead to a mushy consistency, diminishing your results.
Here are some additional tips to guarantee efficient grinding:
- Slice off sinew before grinding to prevent dulling of the blades.
- Use smaller chunks of meat to facilitate easier feeding through the grinder, reducing strain on the motor.
- Regularly check and sharpen the blades to maintain efficiency; dull blades can cause smearing and inconsistent results.
- Keep grinder parts cold by placing them in a bowl of ice, minimizing mess and guaranteeing a smoother operation.
While you work, remember the importance of clean the inside of your grinder. After handling the blade, always clean it thoroughly to avoid cross-contamination.
Frequently Asked Questions
How Often Should a Meat Grinder Be Cleaned?
You should clean your meat grinder immediately after each use to prevent bacteria and residue buildup. If you’re using it multiple times a day, clean it between uses to maintain hygiene and performance.
How Do You Disinfect Meat Grinder Parts?
To disinfect meat grinder parts, mix one tablespoon of bleach with a gallon of water. Spray this solution on all metal components, soak them, then rinse thoroughly to guarantee no bleach residue remains for safe food preparation.
What Is the Easiest Way to Clean a Grinder?
To clean a grinder efficiently, disassemble it and soak the parts in warm, soapy water for 15-20 minutes. Then, scrub each component thoroughly, ensuring they’re completely dry before reassembling or storing to prevent damage.
Should You Oil a Meat Grinder?
You absolutely should oil a meat grinder! Regularly applying food-grade mineral oil to moving parts prevents rust and guarantees smooth operation. Just remember to keep electrical components oil-free for ideal performance and longevity.
Effectively Clean Your Meat Grinder for Lasting Performance
Cleaning your meat grinder isn’t just about hygiene; it’s essential for peak performance. Did you know that a well-maintained grinder can last up to 15 years, compared to only 5 years if neglected?
By following the steps outlined—disassembling, soaking, scrubbing, and properly storing—you guarantee both safety and efficiency.
Regular maintenance not only extends the life of your grinder but also enhances the quality of your ground meat. Keep it clean, and it’ll serve you well for years to come.

