How to Paint Mason Jars from the Inside? A Complete Guide
To paint mason jars from the inside, start by cleaning them with rubbing alcohol, ensuring they’re dry. Pour acrylic or metallic paint into the jar and swirl it around for an even coat.
Allow the jar to dry upside down on parchment paper. Once dry, seal your design with Mod Podge or a clear finish for durability. You’re ready to get creative with colors and techniques. If you want more tips and design ideas, keep exploring.
Key Takeaways
- Clean jars thoroughly with rubbing alcohol and ensure they are completely dry before painting for better adhesion.
- Pour acrylic paint into the jar and swirl it around to evenly coat the interior surface.
- Dry the jars upside down on parchment paper to prevent paint pooling at the bottom.
- Consider using Mod Podge to create a unique finish or combine colors for marbled effects.
- Seal the painted jars with Mod Podge or a clear protective spray once the paint is fully dry.
Preparation and Materials Needed
Before diving into painting your mason jars, there are a few essential preparation steps and materials you’ll need to gather.
Start by cleaning the jars with rubbing alcohol to remove dust and fingerprints, then let them dry completely. Proper cleaning ensures better paint adhesion, which is crucial for a successful project.
Begin by thoroughly cleaning the jars with rubbing alcohol to eliminate dust and fingerprints, then allow them to dry completely.
Choose a suitable paint, like acrylic or metallic, and mix it with Mod Podge to enhance adhesion. Protect your work surface with paper or cloth to catch any spills.
For this project, you’ll need clean, dry mason jars, your chosen paint, Mod Podge, rubbing alcohol, and paper towels. Also, make certain you have paintbrushes, craft sticks for mixing, and disposable cups handy.
Also, remember to work in a well-ventilated area and wear gloves for safety.
Painting Techniques for the Interior
When you’re ready to paint the interior of your mason jars, using acrylic paint is a popular choice due to its ease of application and smooth finish.
Mason jar painting offers various designs and techniques for unique creations. Pour the paint into the jar and swirl it around to coat the interior evenly.
While using a brush can work, it often requires multiple coats, making the process time-consuming. To avoid pooling, dry the jar upside down on parchment paper, allowing excess paint to drip out.
For unique effects, mix colors or thin the paint with a bit of water for a translucent look. If you want a decorative touch, consider metallic or glitter paints.
Safety Precautions While Painting
Painting mason jars can be an enjoyable and creative endeavor, but it’s important to prioritize safety while you work.
Start by guaranteeing your workspace is well-ventilated to avoid inhaling harmful fumes. Always wear gloves, goggles, and a protective apron to guard against skin irritation and eye splashes.
Choose paints free of toxic pigments and preservatives, and steer clear of sodium fluoride and mercury compounds. Additionally, ensure that you use acrylic paint as it is safer for decorative projects.
Store paints in labeled, sealed containers away from heat sources, and dispose of solvent-soaked rags in self-closing waste cans to prevent fires. If you’re using spray techniques, do so in a designated area with exhaust systems.
Design Ideas for Your Mason Jars
Although the possibilities for decorating mason jars are virtually endless, you can easily elevate your home decor or event displays with a few creative design ideas.
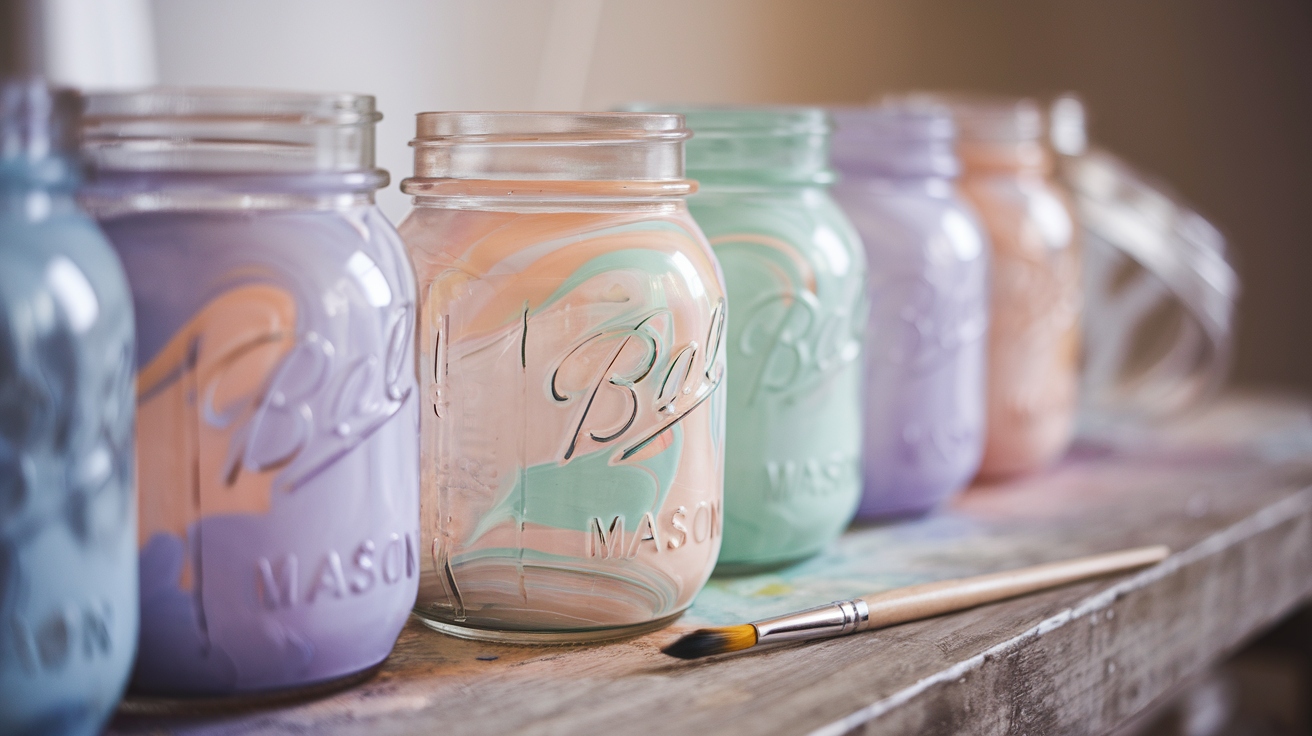
Start by swirling different colors of acrylic paint inside your jars for a stunning marbled effect or use a brush for more precise application.
Consider creating an ombre look by layering colors or a textured finish by adding glitter. You can even use stencils or stickers for fun patterns.
Remember to use appropriate paint types for the best results when painting glass. Additionally, using acrylic paints ensures excellent adhesion and vibrant colors that can bring your designs to life. Don’t forget to incorporate decorative elements; gold leaf or twine can add a stylish touch.
Sealing and Protecting Your Finished Jars
To guarantee your painted mason jars maintain their beauty and functionality, it’s essential to apply a proper sealing method.
You can use Mod Podge to create a protective layer over chalk paint or opt for Minwax Polycrylic for a durable finish. Additionally, consider using different paint types suitable for glass to enhance the aesthetic and longevity of your designs.
For a matte look, Rust-Oleum Matte Clear is a great choice. Remember to let your paint dry completely before sealing to prevent peeling.
Avoid submerging jars in water; instead, clean them gently with a soft cloth and mild soap. If you’re using painted jars for drinks, consider using a straw to minimize contact with the paint.
Frequently Asked Questions
Can I Use Spray Paint for the Inside of the Jar?
You shouldn’t use spray paint inside mason jars. It often leaves streaks and may not dry evenly, creating an undesirable finish.
The fumes can also be hazardous in the enclosed space of a jar. Instead, consider alternatives like acrylic paint or the pouring method for a smoother, more controlled application.
These options are safer and provide better adhesion and finish quality, ensuring your projects look great without the hassle of spray paint.
How Long Will the Paint Last Inside the Jar?
Imagine your painted mason jar as a canvas, waiting to shine for years. If you use high-quality acrylic paint and maintain it well, the colors can last several years, typically around 5-10 years.
Oil-based paints may stretch beyond a decade. Just remember, avoid harsh chemicals and keep it in a cool, dry spot.
While it may not withstand the test of time like a classic painting, it can definitely brighten your space beautifully.
Is It Safe to Store Food in Painted Jars?
It’s not safe to store food in painted jars. Most paints, especially acrylic ones, aren’t food-safe and can leach harmful chemicals into your food.
If you want to use jars for food storage, choose unpainted or jars specifically labeled as food-safe. Painted jars are better suited for decorative purposes. If you must use them, be cautious and avoid direct contact with food to guarantee your safety.
Can I Microwave Painted Mason Jars?
You should avoid microwaving painted mason jars. The paint isn’t designed to withstand microwave heat, and it may not be safe for food contact. Microwaving can cause the paint to break down or the jar to shatter, leading to potential hazards.
Stick to using these jars for decorative purposes only. Always prioritize safety and consider using other containers that are specifically microwave-safe for heating food or liquids.
What Should I Do if the Paint Chips?
When life gives you chips, don’t fret. If the paint on your jar chips, touch up the areas with a small brush and matching paint. For extensive chipping, you might want to repaint the entire jar.
After you’ve fixed the chips, seal the surface again with a clear coat to protect your hard work.
Unleash Your Inner Artist: Transform Mason Jars into Masterpieces
Now that you’ve transformed those plain mason jars into dazzling, colorful masterpieces from the inside, the possibilities are endless.
You’re not just a painter; you’re a magical creator, turning ordinary glass into extraordinary decor. Imagine your friends’ jaws dropping as they marvel at your vibrant creations.
With a little practice, you’ll be the Picasso of mason jars, inspiring a frenzy of DIY enthusiasts. So grab your brushes and paint—your masterpiece is just a stroke away.