How to Seal Mason Jars Without Canner: A Classic Approach
You can seal mason jars without a canner by using methods like hot water baths, vacuum sealing, or wax sealing. For hot water baths, submerge jars in simmering water for the recommended time while guaranteeing the water covers the lids.
Vacuum sealing removes air to extend freshness without heat, ideal for dry foods. Always inspect jars for cracks and verify they’re sterilized. If you want tips on specific techniques, there’s much more to explore on each method.
Key Takeaways
- Clean and sterilize jars and lids with hot soapy water before sealing to ensure safety and prevent spoilage.
- Use the hot water bath method, ensuring jars are submerged by at least one inch of water.
- Preheat water to a simmer (about 180°F) before placing jars and follow precise processing times for different foods.
- Consider alternative sealing methods like vacuum sealing or wax sealing for food preservation without heat.
- Test seals after cooling using the finger test or spoon tap method to ensure jars are properly sealed.
Vacuum Sealing: Understanding Mason Jar Sealing Methods
When it comes to sealing Mason jars, understanding the various methods available is crucial for preserving your food effectively. You can choose from vacuum sealing, non-boiling techniques, or using a hot water bath.
Vacuum sealing devices, like those from FoodSaver or Avid Armor, efficiently remove air from jars containing dry goods, extending their freshness without heat. Additionally, vacuum sealing prolongs storage life by eliminating oxygen, making it an excellent choice for pantry staples.
Alternatively, non-boiling methods, such as wax sealing or using oxygen absorbers, offer a nostalgic touch but may not provide the same preservation quality.
If you opt for a hot water bath, make certain the water level covers the jar lids by at least an inch, allowing a vacuum seal to form as the jars cool. Each method serves unique purposes, so select the one that fits your needs.
Preparing Jars for Sealing
Before sealing your mason jars, it’s crucial to clean and inspect them thoroughly. Start by washing the jars and lids in hot soapy water, and rinsing them well to remove any residue.
Once cleaned, check for any cracks or chips to verify they’re safe for use, and prepare your lids accordingly.
Ensuring the jars are clean is essential for achieving a proper hot water bath seal. Additionally, using BPA-free glass ensures safe food storage during the canning process.
Clean and Inspect Jars
Cleaning and inspecting your Mason jars is essential for successful sealing and preserving. Start by washing your jars with hot, soapy water using a clean sponge. Rinse thoroughly with hot water and let them dry completely on a clean rack or towel.
While cleaning, check for cracks, nicks, or dips on the sealing surface; any damage can compromise the seal. Ascertain the rims are clean and free from contaminants. Confirm the jar size is compatible with your intended use.
Before you begin, make certain your workspace and tools, including dishcloths and jar lids, are clean. For extra safety, consider sterilizing your jars using the boiling water method to eliminate any lingering bacteria.
This method is especially important as sterilization is required for processing under 10 minutes to ensure food safety.
Choose Appropriate Lids
Once your jars are cleaned and inspected, it’s time to choose the right lids for sealing. Selecting the appropriate lids is vital for guaranteeing a proper seal.
Here are some key points to take into account:
- Lid Compatibility: Use lids with rubber or plastic seals specifically designed for Mason jars.
- Seal Types: Opt for lids with plastisol seals that don’t require preheating, making them convenient.
- Preparation: Always wash lids in warm soapy water before use to guarantee cleanliness. Regularly inspecting lids for early signs of rust is crucial to maintain their effectiveness.
Remember to secure the rings just until they feel snug, over-tightening can prevent proper venting. Additionally, it’s important to use new lids for each canning session to ensure a reliable seal.
Regularly inspect lids for damage or wear, as this can compromise the seal’s effectiveness. Choosing the right lids is essential for successful canning and preserving your food safely.
Prepare for Filling
As you prepare to fill your Mason jars, confirming they are properly cleaned and sterilized is essential for achieving a secure seal.
Start by washing your jars in hot soapy water and drying them thoroughly. Sterilize them in boiling water or an oven at 225°F for less than 10 minutes. Inspect each jar for nicks or cracks that could compromise the seal.
Preheat jars in hot water to avoid thermal shock and confirm they can handle hot food. Remember to maintain the correct headspace for your recipe to achieve a reliable seal.
Additionally, using tested recipes ensures the safety and effectiveness of your canning process.
| Step | Action | Purpose |
|---|---|---|
| Cleaning | Wash in hot soapy water | Remove residue |
| Sterilization | Boil or heat jars | Prevent bacterial contamination |
| Preheating | Heat jars in hot water | Prevent thermal shock |
Alternative Techniques for Boiling Water Baths
While traditional boiling water baths are a popular method for sealing mason jars, several alternative techniques can effectively achieve the same results. You can adapt your canning process by using equipment you likely already have at home.
Here are a few options to contemplate:
Explore alternative canning methods using common household items to seal mason jars effectively and easily.
- Normal Stock Pots: Ascertain your pot is deep enough to cover jars by at least two inches of water.
- Rack Alternatives: Create a makeshift rack using wired canning jar rings for better circulation.
- Steam Canning: This method is efficient and ideal for high-acid foods while saving energy. High-acid foods can be safely water-bath canned, making them perfect for beginners.
Always maintain a rolling boil during processing and follow tested recipes to guarantee safety and proper sealing. These alternatives can make your canning experience easier and more accessible.
Utilizing Vacuum Sealing Devices
Utilizing vacuum sealing devices can dramatically enhance your food preservation efforts, especially when it comes to Mason jars. This process involves removing air from the jars, which helps prevent spoilage and extends shelf life.
Additionally, vacuum sealing minimizes exposure to air and light, thereby retaining nutritional content of your preserved foods. You’ll need a vacuum sealer kit, compatible lids, and your Mason jars.
This method is perfect for dry goods like grains and spices, but remember, it’s not a substitute for heat canning; perishable items must be refrigerated or frozen.
To vacuum seal, fill your jars, attach the sealer, and use either a manual pump or an electric machine to remove air. Finally, check that the seal is tight. Store your sealed jars away from sunlight and moisture to keep your food fresh and flavorful.
Hot Water Bath Process Explained
To successfully seal your mason jars, you need to follow specific jar preparation steps before the hot water bath process. This includes inspecting, cleaning, and heating your jars to guarantee they can withstand boiling water.
Once they’re filled and processed, the cooling phase will help create a vacuum seal, crucial for preserving your food safely. Ensuring that the jars are properly prepared for water bath canning will significantly enhance the sealing process.
Jar Preparation Steps
Preparing your jars properly is crucial for a successful hot water bath canning process. Start by selecting jars that are free from chips and cracks, guaranteeing they’re suitable for high temperatures.
Clean your jars thoroughly with hot soapy water, rinse them well, and dry them completely. Preheat the jars to prevent thermal shock by placing them in hot water.
Key steps include:
- Inspect jars for any defects affecting sealing.
- Wash and rinse lids to maintain cleanliness.
- Fill the canner with water, keeping jars covered by at least an inch of water. Ensure that you sterilize jars if the processing time is less than 5 minutes for optimal safety.
Following these guidelines guarantees your jars are ready for the canning process, promoting safe and effective sealing.
Seal Formation Process
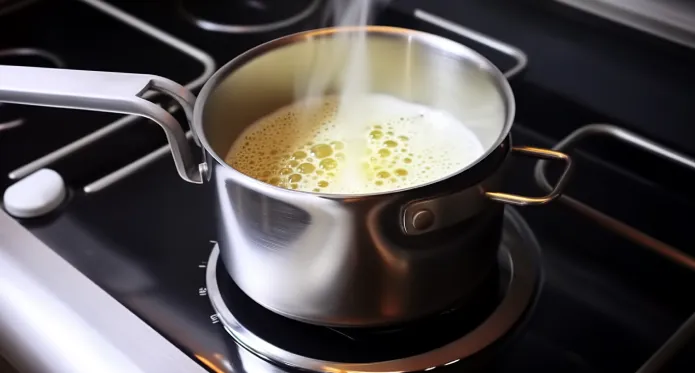
As you begin the hot water bath canning process, understanding how the seal formation works is essential for preserving your food safely.
The basic principle involves using heat to create a vacuum seal in mason jars. Start with a large pot filled with water, ensuring the jars are submerged by 1 to 2 inches. Preheat the water to a simmer (about 180°F) and bring it to a boil before placing the jars inside. High acid foods, like jams, are less prone to botulism, making them safer for this method.
Follow the specific processing time for your food, and once done, let the jars rest for 5 minutes before removing them. Allow jars to cool for 12 to 24 hours. Finally, check seals by pressing the lid; a sealed jar shouldn’t flex, ensuring your food is safely preserved.
Safety Considerations for Canning
When it comes to canning, maintaining safety is paramount to prevent spoilage and foodborne illnesses. To guarantee a successful canning experience, consider the following safety measures:
- Use Quality Jars: Only use standard, home canning jars with self-sealing lids, and inspect them for any damage before starting.
- Sterilize Appropriately: If processing times are shorter than 10 minutes, make sure to sterilize your jars beforehand. Proper canning practices minimize spoilage effects and ensure food safety.
- Monitor Processing: Keep an eye on the temperature and time during the canning process to ensure you kill any harmful microorganisms.
Testing and Ensuring a Good Seal
After guaranteeing safety in your canning process, the next step is to test and confirm that your mason jars have sealed properly.
Start with the finger test; press down in the center of the lid—if it stays firm, you’ve got a good seal. Next, try the spoon tap method; a high-pitched sound indicates a solid seal, while a dull thud suggests otherwise.
Visually inspect the lids for a concave shape, which shows they’re sealed correctly. Waiting until the jars have cooled is essential for ensuring accurate testing results.
For the lift test, remove the screw band and lift the jar by the lid; it should hold firm. Remember to let your jars cool for at least 12 hours before testing to guarantee accurate results.
Storage and Maintenance of Sealed Jars
To guarantee your sealed jars maintain their quality and safety, it’s important to store them properly. Follow these guidelines for ideal storage and maintenance:
Proper storage is essential for maintaining the quality and safety of sealed jars. Follow key guidelines for optimal care.
- Cool, Dark Location: Keep jars in a pantry or cupboard to protect against light and heat.
- Moisture Control: Store jars away from damp areas to prevent mold and seal damage. Proper cleaning and storage can extend jar lifespan to ensure optimal performance. Utilizing oxygen absorbers can further enhance the longevity of your stored foods.
- Regular Inspections: Check jars for signs of spoilage or seal failure, like bubbling or rust.
Additionally, label your jars with contents and dates to promote first-in-first-out usage.
Rotate your stock regularly to maintain freshness and monitor seal integrity, especially for long-term storage. Finally, maintain a clean and dry storage area to deter pests and mold.
Frequently Asked Questions
Can I Reuse Old Mason Jar Lids for Sealing?
You shouldn’t reuse old mason jar lids for sealing. The sealing compound may not provide a tight seal, leading to potential contamination and spoilage of your food. If the lids are damaged or worn, it’s best to discard them.
Most manufacturers, like Ball and Kerr, advise against reusing lids due to safety concerns. To guarantee safe preservation, always use new lids for your canning projects and follow proper guidelines for sealing.
What Types of Foods Can Be Sealed Without a Canner?
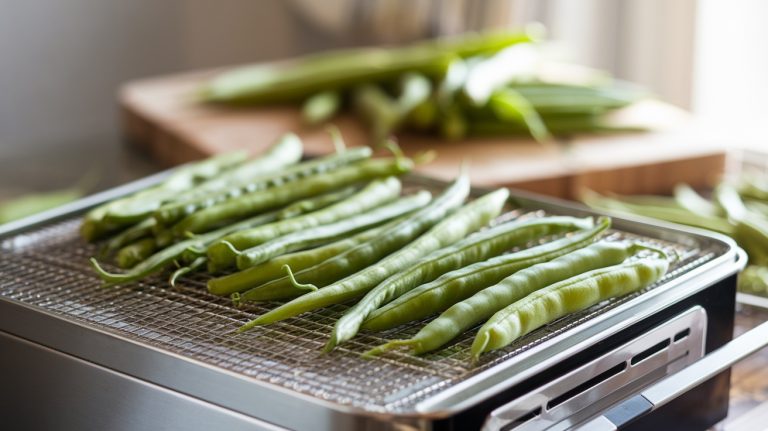
You can seal various types of foods without a canner, including dry foods like dried fruits and spices, low-oxygen foods such as vacuum-sealed nuts and grains, and refrigerated items like cooked sauces and salsas.
Additionally, you can preserve dried legumes like beans and lentils. Just remember, while sealing these foods can extend their shelf life, they still require proper storage conditions to guarantee safety and freshness.
How Long Can Sealed Jars Be Stored?
Storing sealed jars is like keeping treasures in a safe; the right conditions preserve their value.
You can store properly sealed jars for up to a year while maintaining their best quality. Although they may last longer, flavor and nutrition can diminish over time.
Regularly check for signs of spoilage, like mold or rust. Remember to label your jars with dates to track their shelf life and guarantee safety.
Can I Vacuum Seal Liquids in Mason Jars?
Yes, you can vacuum seal liquids in Mason jars using specialized equipment. You’ll need a vacuum sealer with jar attachments designed for liquids. Make sure to use appropriate lids or bottle stoppers to prevent leaks.
This method works well for storing items like wine, olive oil, or juices. However, remember that vacuum sealing isn’t a substitute for canning, so refrigerate these sealed jars for safety if they’re not consumed quickly.
What Should I Do if a Jar Doesn’t Seal Properly?
If a jar doesn’t seal properly, first check the rim for chips or cracks, as these can prevent a tight seal. Inspect the lid for dents or warping, and confirm you used a new lid.
Also, review your canning process—improper headspace or insufficient boiling time can cause seals to fail. If everything looks good, try resealing the jar after addressing any issues, or consider using a vacuum sealer for better results.
Jar Safety First: Inspect, Sterilize, and Seal with Confidence
Sealing mason jars without a canner can be a rewarding adventure, like discovering a hidden treasure in your own kitchen. By preparing your jars properly and utilizing alternative sealing methods, you can preserve your favorite foods safely.
Always prioritize safety and check your seals to guarantee your jars are airtight. With a little practice, you’ll enjoy delicious home-preserved goods that stand the test of time, ready to brighten your meals whenever you need a taste of summer.