How to Use a Gravy Separator: From Pan to Plate
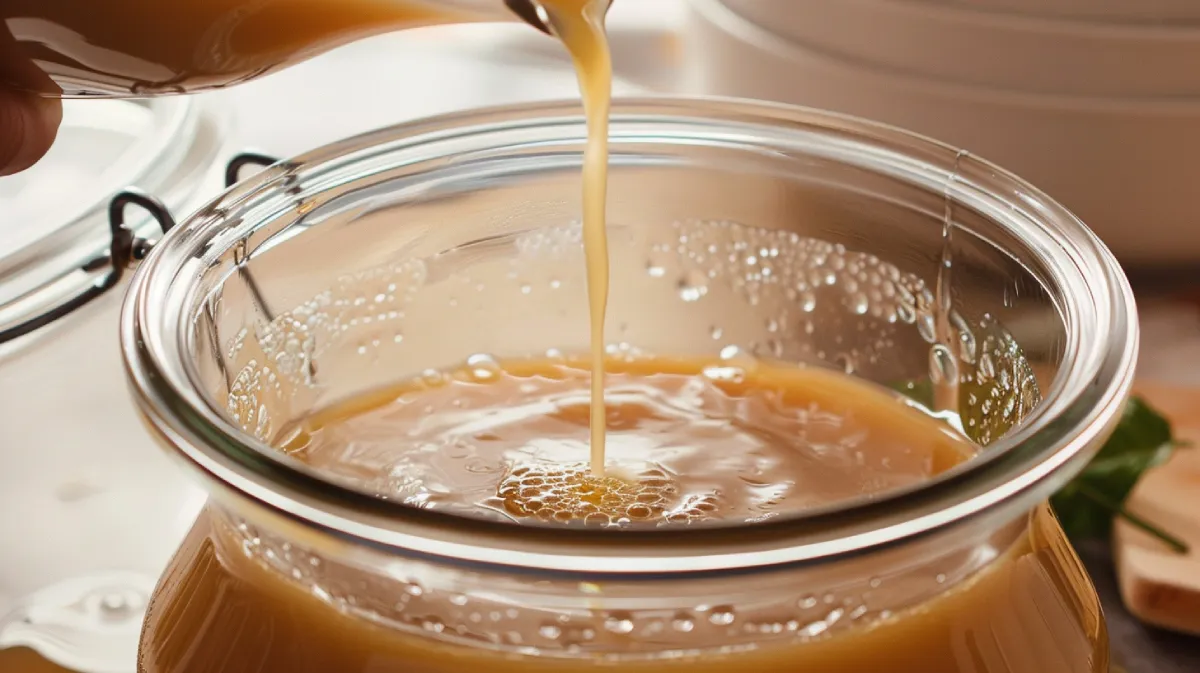
To use a gravy separator, first pour your pan juices into the separator. Let it sit undisturbed for 10-15 minutes to allow fat to rise. If you’re using a spout-style separator, pour slowly from the bottom, stopping before the fat layer reaches the spout.
For a bottom-release type, release the lean juices directly into your saucepan, keeping an eye on the fat level. Make sure to hold the separator steadily to avoid spills. Enhancing your gravy is simple—just add seasonings like herbs, salt, and pepper to the defatted liquid. For detailed techniques and effective results, continue on.
Key Takeaways
- Pour the pan juices into the gravy separator and allow them to settle for 10-15 minutes.
- Use the stopper to prevent fat from mixing with the liquid when pouring.
- Slowly tilt the separator to pour the clear meat juices from the bottom spout into a saucepan.
- Stop pouring before the fat layer reaches the spout to avoid contamination.
- Clean the separator thoroughly after use to maintain efficiency and hygiene.
Benefits of a Gravy Separator
By using a gravy separator, you can efficiently remove excess fat from sauces and gravies, leading to healthier and more flavorful dishes. A fat separator allows you to control the fat content in your recipes with precision. When you pour the hot liquid into the separator, the fat naturally rises to the top while the leaner juices remain below. This separation process guarantees that your sauces and gravies aren’t only healthier but also less greasy.
Utilizing a gravy separator enhances the overall flavor and texture of your dishes. By removing the excess fat, you allow the true flavors of your ingredients to shine through, resulting in a more balanced and nuanced taste. Additionally, the reduction of oiliness improves the mouthfeel, making your gravies smoother and more palatable.
Furthermore, a fat separator greatly enhances the presentation of your meals. A less oily dish appears more appetizing and professional, which can be particularly important for special occasions or when serving guests. By incorporating this tool into your cooking routine, you achieve a more visually appealing and delicious end product, ensuring that your sauces and gravies are both tasty and health-conscious.
Types of Gravy Separators
Exploring the various types of gravy separators will help you select the best tool tailored to your cooking needs and preferences. Spout-style jugs and bottom-release options are the two primary types available. Spout-style jugs allow you to pour the liquid while the fat rises to the top, guaranteeing minimal fat in your gravy. Bottom-release separators dispense the liquid from the bottom, leaving the fat behind for effortless separation.
Some gravy separators feature integrated sieves or strainers. These sieves help you pour pan juices smoothly, catching any solid particles. If you prefer convenience, look for separators with handles, lids, or measuring markings. Handles provide a firm grip, lids prevent spills, and measuring markings secure precise quantities.
Electric gravy separators offer another option for those seeking quick and efficient fat removal. These devices use a motor to separate the fat, allowing you to focus on other cooking tasks. Large-capacity separators are ideal for handling bigger batches, making them suitable for large gatherings or meal prepping.
To secure durability and ease of use, consider gravy separators made of heat-resistant materials. These materials withstand high temperatures without warping, guaranteeing your separator lasts longer and performs consistently.
Preparing the Pan Juices
After roasting your meat, transfer it to a carving board to give the pan juices time to settle before pouring them into the gravy separator. This step is significant for making a smooth and flavorful turkey gravy.
Start by carefully pouring the meat juices from the roasting pan into a container. Be cautious to avoid spills or splashes, ensuring you capture all the flavorful drippings.
Next, choose a gravy separator that best suits your needs. A separator with a strainer will help filter out any solid bits, while one with a spout allows for easy pouring. Look for features like measurement markings, handles, or lids for added convenience. These will enable precise control and ease during the process.
Once you’ve selected your separator, pour the settled pan juices into it. Make sure to leave any large bits of meat or vegetables behind in the pan. The juices will begin to separate, with the fat rising to the top and the meat juices settling below. This separation is necessary for creating a rich and delicious turkey gravy.
Allow the separator to sit undisturbed until the layers are clearly defined.
Using the Gravy Separator
With the fat and meat juices now clearly separated in the gravy separator, you can proceed to the next step of pouring the clear, flavorful meat juices from the bottom spout into a saucepan for further seasoning and thickening. Make sure you’re holding the fat separator steadily to avoid spills and any potential mixing of fat back into the juices.
Carefully position the spout over the saucepan and tilt the separator to allow the juices to flow out smoothly. The built-in strainer in your fat separator will help catch any remaining solids, ensuring only the purest liquids are collected.
While pouring, keep an eye on the fat layer, and stop just before it reaches the spout to maintain the clarity of your meat juices.
Once all the meat juices are in the saucepan, you can enhance the flavor by adding herbs, salt, and pepper. Bring the liquid to a gentle simmer and allow it to thicken to your preferred consistency. This precise process guarantees your gravy is rich and free from unwanted fat, offering a perfect complement to your dish.
Your fat separator has effectively done its job, providing you with a flavorful base for your gravy.
Cleaning the Gravy Separator
To clean your gravy separator, first disassemble all parts, including the strainer and stopper.
Use warm, soapy water to hand wash each component, ensuring you remove all fat residue, especially from hard-to-reach areas with a bottle brush or sponge.
Rinse thoroughly and allow the parts to air dry completely before reassembling.
Disassembling for Thorough Cleaning
Wondering how to maintain your gravy separator in top condition? Start by disassembling all the parts. For a thorough cleaning process, separate the strainer, stopper, spout, and lid from the main body of the fat separator. This guarantees every component is thoroughly cleaned and free from any residue.
Once disassembled, wash each part with warm, soapy water. Use a brush to reach into tight spaces and remove any leftover particles. Pay special attention to the spout and stopper, as these areas can harbor grease and food particles. Cleaning these parts meticulously will help maintain the efficiency and longevity of your gravy separator.
Next, rinse all components thoroughly to remove any soap residue. After rinsing, dry each part completely. You can use a clean towel or let them air dry. Ensuring all parts are dry before reassembling is essential to prevent moisture buildup, which can lead to mold or unpleasant odors.
Removing Stubborn Grease Residue
Have you observed grease that just won’t budge? When cleaning your fat separator, begin by soaking it in hot, soapy water. This aids in loosening any grease residue. Submerge the separator entirely, making certain all parts are covered. Let it soak for at least 15 minutes to effectively break down the grease.
Next, use a bottle brush or sponge to scrub the inside of the separator. Pay particular attention to tight corners and crevices where grease often accumulates.
For stubborn grease that resists initial cleaning, concoct a paste by blending baking soda with water. Apply this paste to the greasy areas and scrub vigorously with the brush or sponge. The abrasive nature of the baking soda will help remove the grease.
After scrubbing, rinse the fat separator thoroughly with hot water to eliminate all soap and baking soda residue. Guarantee no cleaning agents remain, as they can impact the taste and safety of future batches of gravy.
Dishwasher-Safe Components Usage
Utilizing the dishwasher-safe components of your fat separator guarantees efficient and thorough cleaning with minimal effort. The OXO Good Grips 4-Cup Fat Separator is designed for easy maintenance, thanks to its BPA-free, heat-resistant plastic components.
After you’ve finished separating your gravy, disassemble the fat separator into its primary parts: the strainer, stopper, and spout.
Place each component securely in the dishwasher. Make sure the strainer and stopper are positioned in the utensil compartment to avoid any movement during the wash cycle. The spout and main body of the fat separator can be placed in the top rack, where they’ll be safe from intense heat while still receiving a thorough cleaning.
Using the dishwasher not only saves time but also helps maintain the efficiency and longevity of your fat separator. The high temperatures and strong water jets in the dishwasher effectively remove any remaining grease or food particles.
Tips for Effective Use
Make sure you let the meat juices settle in the separator for a few minutes to allow a clear distinction between the fat and the liquid.
When ready to pour, use the stopper in the spout to prevent any fat from mixing with the liquid.
Choose a separator with a spout or strainer for precise and efficient pouring.
Proper Liquid Settling Time
Allow the liquid to settle for at least 10-15 minutes in the gravy separator to achieve the best fat separation. This critical waiting period is essential because it allows the fat to rise to the top, creating a distinct layer. Patience is key here; rushing this process can result in a less effective separation, leading to a greasier final product.
Once the liquid is poured into the separator, allow gravity to do its work. The fat, being less dense, will naturally rise above the denser cooking liquids. This clear separation makes it easier to skim off the fat and guarantees that the remaining liquid is healthier and less greasy.
During the settling time, avoid disturbing the separator. Any agitation can mix the fat back into the liquid, complicating the separation process. It’s tempting to speed things up, but give the fat the necessary time to rise fully. This step is essential for achieving a cleaner, fat-free pour later.
Efficient Pouring Techniques
For efficient pouring, tilt your gravy separator slowly and steadily to secure the fat-free liquid flows out cleanly while leaving the fat behind. Begin by allowing the liquid to settle in the separator, ensuring a clear distinction between the fat and the cooking liquid. Once settled, handle the separator with care to avoid mixing the layers.
When you start pouring, maintain a consistent, slow tilt. This technique secures that the fat remains on top and doesn’t mix back into the liquid. If you notice any remaining fat that hasn’t separated, use a ladle to skim it off before pouring the liquid into the separator.
As you pour, keep an eye on the liquid level. Stop pouring just before the fat layer reaches the spout. This prevents any fat from contaminating your clean liquid.
After you’ve poured out the fat-free liquid, clean the gravy separator thoroughly to sustain its efficiency and avoid cross-contamination in future uses.
Making Gravy With Defatted Liquid
To make gravy with defatted liquid, start by heating an equal amount of fat and flour in a saucepan, whisking continuously to eliminate the raw flour taste. This step is essential for creating a smooth and flavorful base. Once the flour and fat are well combined and slightly browned, gradually add the defatted liquid from your fat separator.
While adding the liquid, continue to whisk vigorously to prevent the formation of lumps. Bring the mixture to a boil, ensuring you maintain a consistent whisking motion. The boiling process helps to thicken the gravy and integrate all the ingredients seamlessly.
If the gravy becomes too thick, slowly incorporate chicken stock to achieve your desired consistency. Adjust the seasoning by adding salt and pepper to taste.
Where to Buy a Gravy Separator?
After mastering the art of making healthier gravy with defatted liquid, you’ll find that purchasing a gravy separator is straightforward with many options available both online and in-store. Retailers like Dunelm, John Lewis, Amazon, and Sainsbury’s offer a variety of fat separators catering to diverse preferences and needs. When selecting a fat separator, consider key features such as measuring markings, handles, and lids for added convenience.
Online platforms like Amazon provide detailed reviews and ratings, helping you make an informed decision. You can compare different types of separators to find one that aligns with your cooking and storage requirements.
In physical stores like Dunelm and John Lewis, you have the advantage of inspecting the product firsthand, ensuring it meets your expectations for size, material, and design.
Fat separators come in various sizes and materials, such as plastic, glass, or stainless steel. Choose one that suits your kitchen’s aesthetic and functional needs. A well-chosen gravy separator enhances your cooking process, ensuring you consistently achieve smooth, defatted gravy.
Whether online or in-store, prioritize functionality and user-friendly features to make your cooking experience seamless and efficient.
Enhancing Your Cooking Experience
Integrating a gravy separator into your kitchen arsenal transforms the way you prepare sauces, guaranteeing each dish is both flavorful and health-conscious. By efficiently separating fat from meat juices, you create gravies and sauces that are rich in taste but lower in unhealthy fats. This tool isn’t just about health; it also enhances flavors by letting the pure essence of the meat juices shine through.
Modern gravy separators come with features like integrated strainers, precise spouts, and ergonomic handles, making them easy to use and highly effective. The OXO Good Grips 4-Cup Fat Separator, for example, is crafted from BPA-free, heat-resistant plastic and includes clear measurement markings for precise cooking.
| Feature | Benefit |
|---|---|
| Integrated Strainers | Separates debris for smoother sauces |
| Heat-Resistant Plastic | Ensures longevity and safety |
| Measurement Markings | Allows for precise ingredient proportions |
Using a gravy separator also means you can collect and store fat for future culinary endeavors, adding an extra dimension to your cooking. Imagine the difference it will make to your Christmas roast, delivering a delicious, well-balanced gravy every time. By incorporating this tool, you elevate your cooking skills, making each meal a gourmet experience.
Frequently Asked Questions
How to Make Gravy With a Gravy Separator?
Pour meat juices into the gravy separator. Let fat rise, then pour the defatted juices into a pan. Add flour, stock, wine, herbs, salt, and pepper. Simmer until thickened. Use separated fat for other cooking purposes.
Do Fat Separators Really Work?
Yes, fat separators work effectively. They allow fat to rise to the top while the liquid settles below. When you pour, the design guarantees only the fat-free liquid is released, resulting in healthier, flavorful dishes.
How Do You Separate Grease From Gravy?
Imagine enjoying perfect gravy. Pour the mixture into a heat-resistant separator with a strainer. Let it settle, then pour the juices from the tapered spout, keeping the fat behind. The measurement markings guarantee accurate portions every time.
How to Use Fat Separator With Bottom Release?
To use a fat separator with bottom release, pour your pan juices in, let the fat rise to the top, then gently release the bottom lever to dispense the fat-free liquid. Disassemble and wash thoroughly after use.
Defatting Your Liquid Gold: Achieve Perfect Gravy Every Time
Imagine a knight preparing for battle, armed with the perfect weapon. Just like that knight, you’re now equipped with the knowledge to conquer your culinary quests using a gravy separator.
This simple tool transforms your efforts into a seamless, flavorful victory. With each step, from defatting your liquid gold to making the perfect gravy, you’ll wield your separator with precision.
Now, take this newfound mastery and elevate every meal, turning your kitchen into a domain of culinary excellence.