Nancy Silverton Pizza Dough Recipe: Secret to Artisan Crust
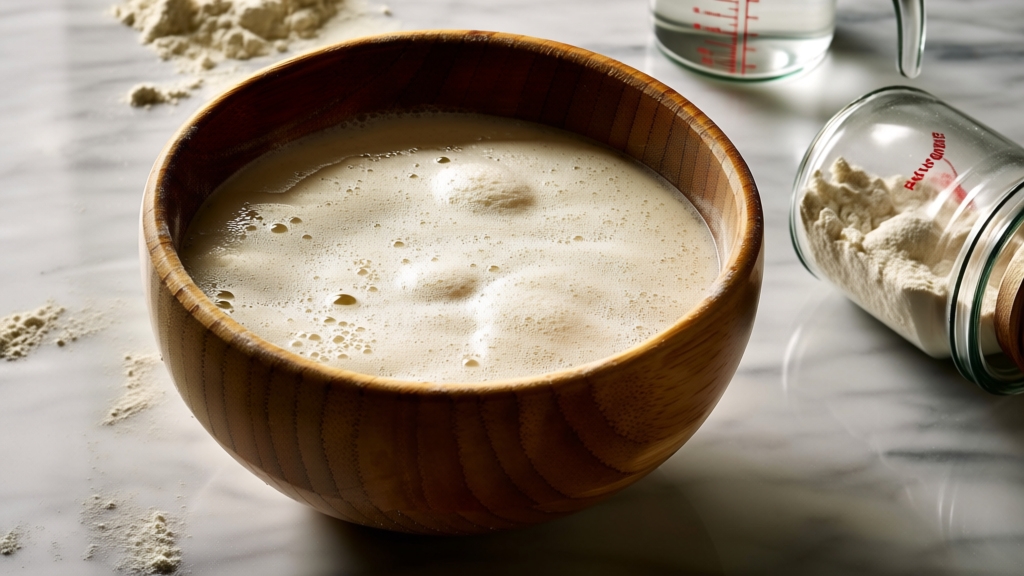
You start Nancy Silverton’s pizza dough by fermenting a sponge made from water, bread flour, yeast, rye flour, and wheat germ at about 70°F for at least 90 minutes. Then, mix in more flour, water, malt syrup, salt, and oil to create a wet, elastic dough.
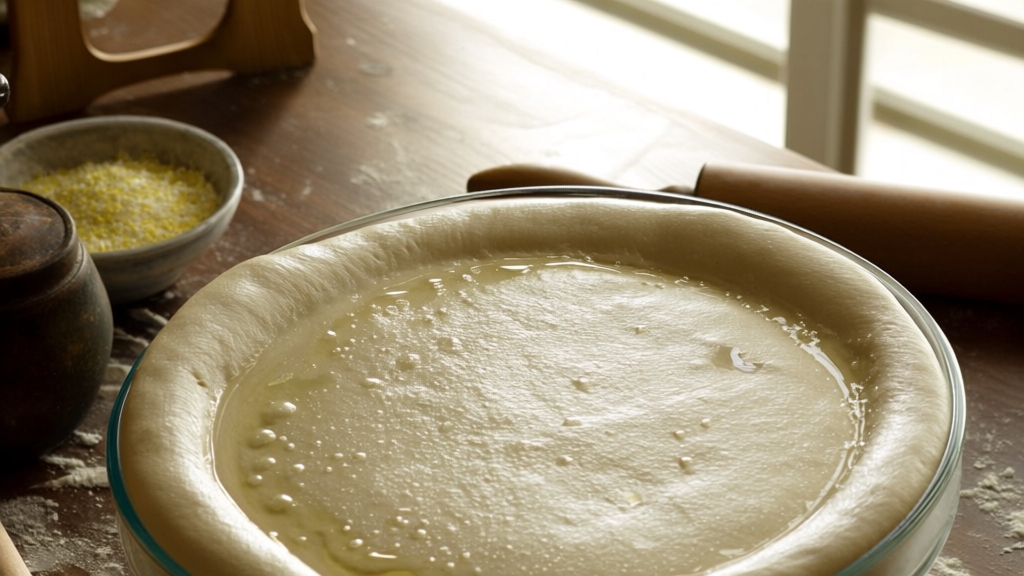
Let it proof slowly ideally up to 72 hours, for a rich flavor and airy texture. Handle the sticky dough gently and bake on a preheated stone at high heat for a crisp, caramelized crust. Explore the full method to perfect your process.
Key Takeaways
- Nancy Silverton’s dough starts with a sponge made from water, half the bread flour, fresh yeast, rye flour, and wheat germ fermented 1.5 hours or overnight.
- The final dough combines the sponge with additional bread flour, water, malt syrup or honey, salt, and oil, mixed for 6-8 minutes until elastic and wet.
- Proof the dough at 68–70°F for 24-72 hours (cold-proof at 39°F for up to 3 days) to develop flavor and airiness before shaping.
- Handle the high-hydration dough gently with floured hands, shape into balls, rest at least 1 hour, and keep covered to maintain moisture.
- Bake on a preheated 500°F pizza stone for a crisp, caramelized crust, using flour or semolina on the peel to prevent sticking.
Complete Nancy Silverton Pizza Dough Recipe: Ingredients & Method
| Stage | Ingredient/Process | Amount/Temperature | Duration | Key Notes |
|---|---|---|---|---|
| Sponge | Water (room temperature) | 15 oz | – | Dissolve yeast first |
| Sponge | Fresh yeast | Small amount | – | Activates fermentation |
| Sponge | Unbleached bread flour | 13 oz | – | Half of total flour |
| Sponge | Dark/medium rye flour | 1 tbsp | – | Adds earthy complexity |
| Sponge | Wheat germ | 1½ tsp | – | Nutty flavor & nutrition |
| Sponge Fermentation | Temperature control | 68-70°F | 90+ minutes | Until flabby with large bubbles |
| Final Dough | Unbleached bread flour | 26 oz | – | Strong gluten network |
| Final Dough | Warm water | 7 oz | – | Feeds yeast activity |
| Final Dough | Barley malt/honey | Small amount | – | Enhances browning |
| Final Dough | Kosher salt | To taste | – | Add after initial mixing |
| Final Dough | Neutral oil | Small amount | – | Creates crispy texture |
| Mixing | Stand mixer (low speed) | – | 2 minutes | Until dough pulls from sides |
| First Proof | Room temperature | 68-70°F | 2.5-3 hours | Nearly doubles in size |
| Cold Fermentation | Refrigerator (optional) | 39°F | 24-72 hours | Maximum flavor development |
| Dividing | Dough portions | 7 oz each | – | Use kitchen scale |
| Final Proof | Room temperature | 68-70°F | 1-2 hours | Passes poke test |
| Baking | Pizza stone preheated | 500°F | 50+ min preheat | Quick bake for crispy crust |
Ingredients for Sponge Phase
When you begin the sponge phase of Nancy Silverton’s pizza dough, you’ll combine 15 ounces of water with about half of the total bread flour—roughly 13 ounces—and a small but essential amount of fresh yeast to kickstart fermentation.
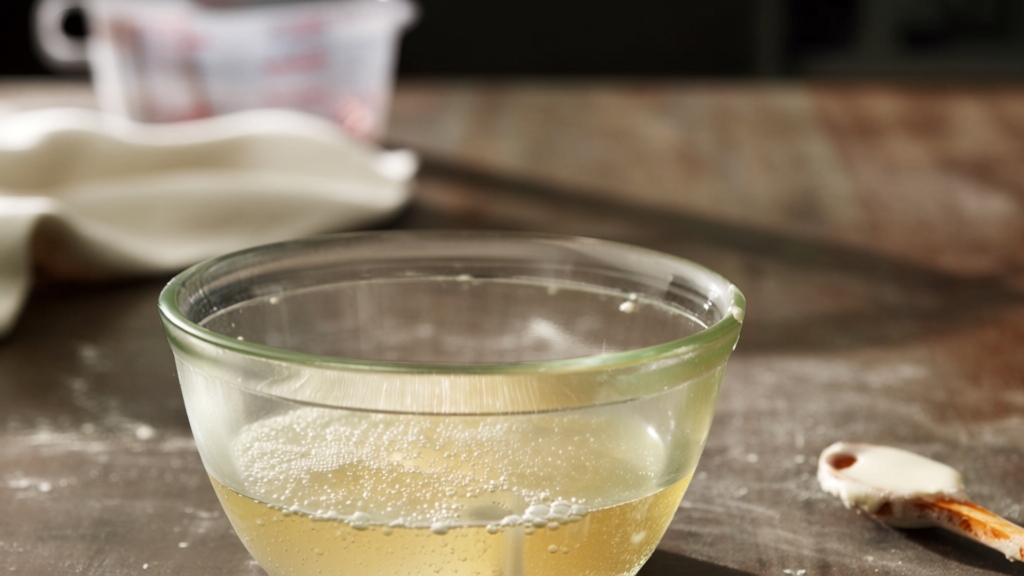
You’ll dissolve the yeast in room-temperature water first to activate it evenly. Proper temperature control during this step ensures optimal yeast activation and fermentation.
To deepen flavor and enhance fermentation, add a tablespoon of dark or medium rye flour and 1½ teaspoons of wheat germ, which also contribute subtle earthiness and nutrition. Use unbleached bread flour for ideal gluten development and structure. Avoid salt here, as it can inhibit yeast activity.
Cover the sponge with plastic wrap, securing it with kitchen twine, and proof at about 68–70°F for at least 1½ hours, allowing the mixture to develop a rich, aromatic base essential for the final dough. This sponge sits at room temperature for 1.5 hours to allow the yeast to fully activate and develop flavor.
Final Dough Ingredients
To complete Nancy Silverton’s pizza dough, you’ll blend the sponge with 26 ounces of unbleached bread flour, a touch of rye flour, and wheat germ. Then add fresh yeast, warm water, barley malt syrup or honey, kosher salt, and a neutral oil.
The bread flour builds the dough’s strong gluten network for elasticity, while rye flour and wheat germ add subtle, nutty complexity. You’ll incorporate about 7 ounces of warm water to fully hydrate the mixture and feed the yeast with malt syrup or honey, enhancing flavor and crust browning.
Adding salt at this stage regulates fermentation and strengthens gluten without hindering early yeast activity. A neutral oil tenderizes the dough and helps crisp the crust. Precise weighing and thorough mixing ensure a smooth, elastic dough ready for proofing.
Proper mixing also ensures the dough cleans the bowl sides and develops gluten effectively. Maintaining consistent performance during mixing and proofing helps achieve optimal dough texture and flavor.
Preparing the Sponge
Although the sponge forms only part of Nancy Silverton’s pizza dough, it plays a crucial role in developing flavor and texture. It combines half the bread flour with water, fresh yeast, rye flour, and wheat germ.
You start by dissolving yeast in 15 ounces of water. Then add the rye flour, wheat germ, and 13 ounces of bread flour. Mix gently to avoid overworking the gluten. Using a cheese melter can help achieve the perfect melt for cheese toppings on your pizza.
Cover the bowl tightly with plastic wrap to create a sealed environment for fermentation at 68–70°F. Let it ferment for at least 1.5 hours or refrigerate overnight for deeper flavor. The sponge should become flabby and soft, with large air bubbles forming, indicating flavor development.
| Feature | Emotional Impact |
|---|---|
| Slow fermentation | Builds anticipation |
| Rye flour | Adds rustic warmth |
| Wheat germ | Invokes wholesome comfort |
Mixing the Final Dough
Once the sponge has fully fermented, you’ll add the remaining water and bread flour. Along with these, include a touch of barley malt or honey to deepen the dough’s flavor and encourage a golden crust. Using a stand mixer provides better control for baking tasks and helps maintain the dough’s consistency.
Use a stand mixer fitted with a dough hook to blend these ingredients on low for 2 minutes. This ensures gentle incorporation without overworking the dough. Next, sprinkle kosher salt evenly while the mixer runs. Increase the speed to medium to help develop the gluten structure.
Mix until the dough pulls away from the bowl’s sides, showing elasticity without excessive stickiness. This indicates the dough is properly developed. For best results, remember that the dough should be very wet and sticky, which benefits the final texture but requires careful handling.
Key steps to mixing the final dough:
- Add 7 oz water and 13 oz bread flour to the sponge.
- Incorporate barley malt or honey for flavor and color.
- Sprinkle 1 tablespoon kosher salt during mixing.
- Mix 6-8 minutes until dough is tacky and elastic.
Proofing the Dough
When proofing your dough, keep the temperature around 68-70°F to guarantee the yeast activates just right. Proper lighting in your kitchen can aid visibility during this process, especially when monitoring dough texture in dark corners.
You’ll want to follow specific timing guidelines—about 90 minutes for the sponge and roughly 2.5 hours for the final dough at room temperature—to achieve ideal rising. As the dough proofs, notice how its texture becomes smoother and more elastic. This change in texture signals that it’s ready for shaping.
For enhanced flavor and flexibility, many bakers prefer to let the dough proof longer in the refrigerator, a technique Nancy Silverton recommends for her artisanal pizza dough recipe proofing recommendation.
Optimal Proofing Temperature
If you want your pizza dough to rise perfectly, controlling the proofing temperature is essential. The ideal range for quick proofing is between 20°C and 38°C (68°F to 100°F), where yeast activity peaks, producing maximum gas and texture. Consistent temperature control is as crucial as the temperature control used in food dehydration for maintaining quality.
Cooler temperatures, around 4°C (39°F), slow fermentation, enhancing flavor complexity and dough handling. This slower process helps develop a richer taste and a better crust texture.
Cold-proofing durations typically range from 24 to 48 hours, allowing greater control over the dough’s final flavor and texture. This method is especially beneficial for various dough types, including levain and commercial yeast blends, as it extends fermentation time.
Keep these key points in mind:
- Maintain consistent temperature; fluctuations disrupt yeast activity and dough quality.
- Higher temperatures speed proofing but risk overproofing and sour flavors.
- Lower temperatures extend proofing time, improving flavor and crust texture.
- Use plastic wrap to prevent drying during cold proofing at refrigerator temperatures. Proper storage, similar to airtight containers used for dehydrated blueberries, helps maintain moisture balance.
Proofing Duration Guidelines
Controlling the temperature during proofing sets the stage, but understanding how long to proof your dough shapes its final texture and flavor.
For Nancy Silverton’s pizza dough, aim for a minimum of 24 hours at room temperature, with 48 to 72 hours ideal to develop complexity and airiness. Proofing duration depends on factors like dough hydration and flour type, which influence fermentation speed and flavor development.
If you choose cold proofing, refrigerate the dough for 18 to 30 hours, extending up to 72 hours if frozen.
Keep final proofing consistent, ideally 8 to 12 hours at room temperature, allowing the dough to expand about 1.5 to 2 times and hold an indentation when pressed. Using the poke test during this stage helps ensure the dough is properly proofed by indicating the right level of fermentation.
Avoid proofing above 85°F to prevent overproofing, which weakens dough structure. Watching for size increase and a slight yellow tint helps you know when your dough is perfectly proofed and ready to bake.
Dough Texture Changes
As the dough rests during proofing, you’ll notice its texture transform from sticky and dense to smooth, elastic, and slightly tacky. These changes are signs that gluten networks are strengthening and gas bubbles are developing within.
Initially sticky, the dough cleans the bowl’s sides when properly hydrated, signaling readiness for folding. Folding during proofing redistributes yeast and gas, strengthening the dough’s structure and reducing surface stickiness.
During this stage, grease the bowl to prevent sticking when turning out the dough for folding. Proper temperature control also aids in consistent gluten development. You’ll see the dough nearly double in volume as CO2 inflates the gluten network, creating a lighter, airier texture ideal for pizza crust.
Keep these key points in mind:
- Avoid adding flour early; let gluten develop naturally.
- Fold dough twice at 45-minute intervals for elasticity.
- Maintain room temperature and cover to preserve moisture.
- Watch for a smooth, slightly tacky texture before shaping. Proper heat distribution ensures optimal fermentation and dough consistency.
Dividing and Shaping Dough Balls
When you divide the dough, doing so into equal portions guarantees your pizzas cook evenly and maintain consistent sizes. Use a kitchen scale to measure each piece—Nancy Silverton suggests six segments of about 7 ounces each.
Employ a sharp dough scraper to cut cleanly without tearing. Lightly flour your work surface to prevent sticking, but avoid excess flour that can toughen the dough.
Use a sharp scraper and just a light dusting of flour to cut dough cleanly without toughening it.
Shape each piece into a smooth, taut ball by folding edges underneath, creating surface tension vital for a good rise and crust. Dust your hands lightly to handle the dough gently, preserving air bubbles that enhance texture.
Resting the dough balls for at least one hour improves their stretchability and handling. Place the dough balls spaced apart on a floured tray, then cover them with plastic wrap or a damp towel to retain moisture during resting and proofing.
Handling Wet Dough Techniques
Although Nancy Silverton’s pizza dough is famously wet and sticky, mastering its handling techniques is key to achieving that signature airy crust and chewy texture.
To manage the high hydration dough, you’ll want to keep your hands and work surface lightly floured. This helps prevent excessive sticking without drying out the dough. It’s also important to clean your tools properly after use to maintain their performance, similar to how regular maintenance benefits kitchen equipment.
Use gentle fingertip taps to flatten the dough. This preserves the delicate gas pockets that are essential for a light, airy crust. Incorporating a preferment or sponge into the dough development process enhances its flavor and suppleness.
Patience is crucial; if the dough feels too slack to shape easily, refrigerate it. This firms up the dough, making it easier to handle. When stretching the dough, always work from the center outward. This technique helps maintain the dough’s structure and ensures an even thickness.
Here are four essential handling tips:
- Lightly flour hands and surface
- Use gentle tapping motions
- Refrigerate between shaping steps if needed
- Stretch dough from center outward for even thickness
Essential Tools and Equipment
Mastering the handling of Nancy Silverton’s wet dough sets the stage for selecting the right tools that make the process smoother and more efficient.
You’ll need precise measuring devices like a digital kitchen scale and sturdy bowls for mixing and fermentation. For kneading, a stand mixer with a dough hook is invaluable, while a bench scraper helps manage sticky dough.
Since the recipe calls for a stand mixer with dough hook, investing in or borrowing this tool is crucial for best results. Using ergonomic kitchen tools can significantly reduce hand fatigue during dough handling.
Baking surfaces like a pizza stone or steel ensure even heat distribution, while a pizza peel allows safe transfer to the oven. Don’t forget essentials like plastic wrap for fermentation and a pastry brush for applying oils or toppings.
| Tool Category | Key Items | Purpose |
|---|---|---|
| Measuring & Mixing | Digital scale, mixing bowl, wooden spoon | Accurate measurement, initial mixing |
| Baking Surfaces | Pizza stone, baking steel, pizza peel | Heat distribution, dough transfer |
| Dough Handling | Bench scraper, pastry brush, flour | Shaping, topping application |
Temperature and Timing for Fermentation
You’ll want to ferment the sponge at room temperature between 68 and 79°F for about 90 minutes. This helps develop flavor and gluten properly. Maintaining proper temperature control during fermentation is crucial for dough consistency.
After mixing the final dough, let it proof at around 68 to 70°F for 2.5 to 3 hours. Allow it to roughly double in size during this time. For optimal flavor, it is recommended to refrigerate the sponge overnight to enhance the dough’s complexity and taste.
Managing these temperatures and timing precisely guarantees a strong dough structure. It also ensures a rich taste in your pizza crust. This technique is inspired by Nancy Silverton’s sponge method, which is key to achieving the signature bubbling, well-stretched pizza crust.
Optimal Sponge Fermentation
When you control both the temperature and timing of sponge fermentation, you set the stage for developing rich, complex flavors and an ideal dough texture. Aim for a room temperature range of 68°F to 79°F (20°C to 26°C), with 70°F (21°C) being perfect for home baking.
You can ferment the sponge for at least 90 minutes to activate the yeast and develop flavor. Alternatively, extend it overnight in the refrigerator at about 40°F (4°C) for deeper complexity.
Remember to tightly seal the container to maintain hydration and stable temperature. This helps prevent drying and keeps the fermentation environment consistent. Key points to optimize fermentation:
- Keep temperature steady around 70°F for 90+ minutes or refrigerate overnight.
- Use a tightly sealed bowl to prevent drying.
- Stir sponge just enough to combine.
- Avoid drafts and direct sunlight.
Final Proofing Duration
Although final proofing might seem straightforward, controlling both temperature and timing is essential to achieving the perfect dough rise and flavor development. Ideally, you want to proof your dough at 68°F to 70°F (20°C to 21°C) for 2 to 3 hours. This allows the yeast to ferment evenly and develop flavor without over-proofing.
If you opt for cold fermentation at 39°F (4°C), extend proofing up to 3 days. This slows fermentation and deepens the dough’s complexity. Remember to bring refrigerated dough to room temperature for 45 minutes to 1.5 hours before shaping. This step makes the dough easier to handle and improves oven spring.
| Temperature Range | Proofing Duration | Effect on Dough |
|---|---|---|
| 68°F-70°F (20°C-21°C) | 2-3 hours | Ideal rise and flavor |
| 39°F (4°C) | Overnight to 3 days | Enhanced flavor, slower proof |
| >79°F (26°C) | <2 hours (risky) | Over-proof risk, off flavors |
| Room Temp after fridge | 45 min – 1.5 hours | Easier shaping, better oven spring |
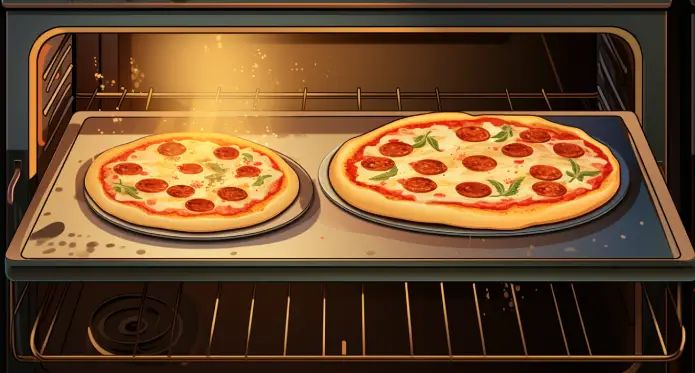
Baking Tips for Perfect Pizza Crust
Since achieving the perfect pizza crust hinges on both technique and environment, careful attention to dough preparation, oven setup, and handling is vital. First, preheat your pizza stone or heavy baking sheet on the lowest rack for at least 50 minutes at 500°F to ensure intense heat for a crisp crust.
Preheat your pizza stone on the lowest rack at 500°F for 50 minutes to achieve a perfectly crisp crust.
Next, stretch your dough gently, preserving a 1-inch edge to trap air and toppings. Use flour or semolina on your peel so the dough slides in without sticking. Finally, bake quickly to maintain high oven heat and encourage caramelization without sogginess.
Key tips:
- Proof dough covered at room temperature until relaxed.
- Use a digital scale for precise hydration.
- Brush crust edges with olive oil for browning.
- Handle dough minimally to preserve air pockets.
Frequently Asked Questions
Can I Substitute Rye Flour With Whole Wheat Flour?
Yes, you can substitute rye flour with whole wheat flour, but you’ll need to adjust your recipe. Whole wheat absorbs more liquid, so increases hydration by about 10-20%.
Expect a denser, nuttier dough with a firmer texture. Let the dough rest before kneading to help gluten develop. Also, watch the dough’s consistency carefully since whole wheat creates stiffer dough, and adjust liquids as needed for the best results.
How Do I Store Leftover Dough for Later Use?
To store leftover dough, lightly oil it to prevent sticking, then wrap it tightly in plastic wrap. Place the wrapped dough in the refrigerator for up to three days, allowing slight loosening after the first day for air exchange.
For longer storage, freeze the dough in a sealed bag. When ready, thaw it in the fridge for two days, then let it rest at room temperature for about two hours before shaping and baking.
What Is the Best Way to Reheat Leftover Pizza?
To reheat leftover pizza perfectly, you absolutely must use a cast-iron skillet or nonstick pan on medium heat. This method crisps the crust to golden perfection while melting cheese just right—it’s like reviving a culinary masterpiece.
Avoid microwaves unless you’re in a rush; they’ll turn your crust into a soggy mess. For convenience and even heating, an oven at 375°F or an air fryer at 350°F works wonders, preserving flavors and textures beautifully.
Can I Freeze Shaped Dough Balls Before Baking?
Yes, you can freeze shaped dough balls before baking. Make sure to freeze them after their first rise, when they’ve roughly doubled in size, to preserve yeast activity and texture.
Lightly oil each ball to prevent sticking, freeze them individually on a tray, then store in sealed bags. When ready, thaw in the fridge for 6–24 hours, then let them rest at room temperature before baking for best results.
How Does Honey Affect the Dough’s Fermentation Flavor?
Honey can speed up fermentation by providing simple sugars that yeast devours directly, often cutting proof time by up to 30%. This quickens flavor development but means you might miss out on deeper, complex sour notes that slow fermentation creates.
Instead, you’ll get a milder sweetness that balances tanginess, plus enhanced crust browning and caramelization. So, expect a softer, subtly sweet dough with floral hints and less pronounced sourness in your pizza crust’s flavor.
Transform Your Pizza Game with Nancy Silverton’s Method
Now that you’ve mastered Nancy Silverton’s pizza dough, you’re on the brink of something extraordinary. The secret isn’t just in the ingredients or timing—it’s in your hands, your intuition.
As the dough rises and bubbles with life, so does your potential to create a crust that’s perfectly airy, crisp, and full of flavor. Keep experimenting, feel the texture, and trust the process—because the best pizza is always just one perfect bake away.