
Low Calorie Flatbread Recipe: Soft, Healthy & Easy to Make
You can make low-calorie flatbread by using oat fiber or almond flour blended with low-fat Greek yogurt to keep calories between 16 and 40 per 6-inch piece.
Adjust the flour-to-yogurt ratio to balance texture and calorie count. More yogurt softens dough and lowers calories, while more flour firms it.
Roll dough evenly and rest to improve puffiness and moisture. Add herbs for flavor without extra calories.
Explore these steps to achieve light, nutritious flatbreads with versatile cooking options.
Key Takeaways
- Use oat fiber or oat-based flours to reduce calories while maintaining a bread-like texture in flatbread dough.
- Combine almond flour with psyllium husk for a high-protein, low-carb, keto-friendly flatbread option.
- Mix 6 tablespoons of plain flour with 2 teaspoons of low-fat Greek yogurt to yield about 28 calories per 6-inch flatbread.
- Roll dough evenly to 1/4-inch thickness and cook on medium heat in a non-stick pan without oil for low-calorie results.
- Add herbs and spices directly into dough or on top before cooking to enhance flavor without adding calories.
Complete Low Calorie Flatbread Quick Recipe Table
| Recipe Detail | Information |
|---|---|
| Main Term | Low Calorie Flatbread Recipe |
| Recipe Type | Bread |
| Cuisine | Mediterranean / Healthy |
| Difficulty Level | Easy |
| Prep Time | 15 Minutes |
| Rest Time | 1 Hour |
| Cook Time | 5–12 Minutes |
| Total Time | About 1 Hour 30 Minutes |
| Cooking Method | Pan-Cooked or Baked |
| Main Ingredients | Oat Fiber or Almond Flour, Low-Fat Greek Yogurt |
| Optional Flour Choices | Coconut Flour, All-Purpose Flour, Psyllium Husk |
| Seasonings | Salt, Baking Powder, Herbs & Spices |
| Dough Thickness | About ¼ Inch |
| Pan Cooking Time | 2–3 Minutes Per Side |
| Baking Temperature | 400°F (200°C) |
| Baking Time | 10–12 Minutes |
| Calories Per 6-Inch Flatbread | Approximately 16–40 Calories |
| Serving Suggestions | Wraps, Sandwiches, Pizza Base, Dips |
| Storage | Airtight Container with Parchment Between Layers |
| Refrigerator Shelf Life | 3–5 Days |
| Freezer Storage | Up to 3 Months |
| Reheating | Skillet (1–2 Minutes Per Side), Microwave (20–30 Seconds), or Oven (300°F for 5–7 Minutes) |
Choosing Low-Calorie Flours for Flatbread

When you choose low-calorie flours for your flatbread, you directly impact both the nutritional profile and the texture of the final product.
Opt for oat fiber blended with all-purpose flour to reduce calories without sacrificing a bread-like texture.
Choosing oat fiber with all-purpose flour cuts calories while keeping that classic bread texture intact
Almond flour combined with psyllium husk creates a high-protein, keto-friendly dough with minimal glycemic impact, ideal if you want to limit carbs.
Coconut flour serves as a suitable substitute for almond flour in keto variations, maintaining low calorie density.
Replacing standard wheat flour with oat-based flours markedly lowers calories per serving.
These choices allow you to hit calorie targets ranging from 16 to 40 calories per 6-inch flatbread, depending on your exact flour and yogurt ratios.
Select flours based on your desired calorie count and dietary needs for best results.
Dehydrating homemade pasta can serve as a useful preservation method for dry dough products and long-term storage benefits, but monitor humidity levels during drying to avoid spoilage.
Mixing and Kneading Techniques for Perfect Dough
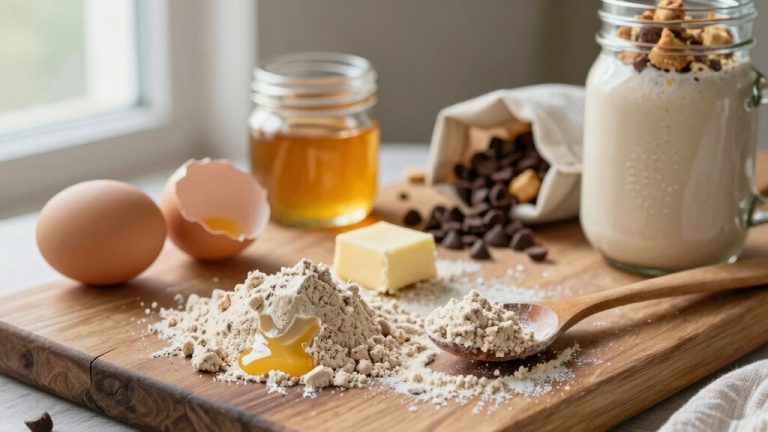
Start by thoroughly combining your dry ingredients: flour, baking powder, and salt. This guarantees even distribution before adding warm water. It assures consistent hydration and activates the baking powder uniformly.
Knead the dough for 1–2 minutes until it’s smooth and elastic. Then let it rest for 5 minutes. This rest period improves gluten development, resulting in a pliable dough that rolls out evenly and bakes perfectly.
Additionally, before moving or storing the dough, always clear the surrounding area and protect surfaces to prevent damage or mess, keeping in mind pathway clearance.
| Step | Emotion | Result |
|---|---|---|
| Mix dry ingredients | Confidence | Even texture |
| Add warm water | Anticipation | Proper hydration |
| Knead briefly | Focus | Elastic dough |
| Rest dough | Patience | Puffed, soft flatbread |
These techniques optimize dough consistency for low-calorie flatbread without adding fat or excess calories.
Balancing Flour and Yogurt Ratios for Low-Calorie Flatbread
To make a low-calorie flatbread, it’s all about finding the right balance between flour and yogurt. If you use 6 tablespoons of plain flour and mix in 2 teaspoons of low-fat Greek yogurt, you’ll end up with a flatbread that has roughly 28 calories.
But remember, tweaking those proportions can really change the texture and nutrition of your flatbread. So, it’s super important to measure carefully!
Greek yogurt also helps bind and tenderize the dough, similar to how self-rising flour and yogurt combine in quick biscuit recipes.
Flour To Yogurt Ratios
Achieving the right balance between flour and yogurt is essential for creating low-calorie flatbreads that maintain structure without excess calories. Typically, a higher flour-to-yogurt ratio yields firmer dough but adds calories. More yogurt softens the dough and reduces calorie density.
For example, using 6 tbsp plain flour with 2 tsp low-fat Greek yogurt results in about 28 calories per 6-inch flatbread. Adjusting ratios impacts texture and calorie count, so precise measurement is key. Proper tools and techniques help maintain consistent results, including attention to knife and cutting tool quality for preparation; consider ice-hardening as an indicator of durable blade performance.
| Flour (tbsp) | Yogurt (tsp) | Approx. Calories per 6-inch Flatbread |
|---|---|---|
| 5 | 3 | 24 |
| 6 | 2 | 28 |
| 7 | 2 | 32 |
| 8 | 1.5 | 36 |
| 9 | 1 | 40 |
Calorie Impact Considerations
When you adjust the flour-to-yogurt ratio in your flatbread recipe, you directly influence its calorie content and texture. Increasing yogurt reduces overall calories and adds protein. More flour thickens dough but raises calories.
Finding the right balance keeps the bread light yet pliable. For example, 6 tablespoons plain flour with 2 teaspoons low-fat Greek yogurt yields about 28 calories per 6-inch flatbread.
Consider these calorie-impact factors:
Substituting oat fiber for flour lowers calories without sacrificing texture. Using 0% fat yogurt replaces higher-fat ingredients, cutting calories.
Almond flour with psyllium husk creates keto-friendly, low-carb options. Portion sizing, like slicing a 12-inch flatbread into seven pieces, controls calories per serving.
Adjust ratios thoughtfully for low-calorie, satisfying flatbreads. A dehydrator can help extend the shelf life of flatbread snacks by removing moisture and preventing spoilage with low-temperature drying.
Rolling Flatbread Without Sticking or Tearing
Prevent dough from sticking or tearing by rolling it between two sheets of parchment paper. This creates a smooth surface and eliminates the need for additional flour.
This method maintains the dough’s moisture, preventing dryness that often leads to cracks. Before rolling, divide your dough into equal portions to guarantee uniform thickness and cooking.
Keep the dough ball covered and rested briefly to improve elasticity, making it less prone to tearing. Use gentle, even pressure when rolling to achieve a consistent 1/4-inch thickness, avoiding thin spots vulnerable to ripping.
Parchment paper also allows easy transfer of the flatbread to your cooking surface without distortion. This technique is proven to produce smooth, intact flatbreads ideal for low-calorie recipes without adding extra calories from flour dusting. Consider using parchment paper because it’s heat-resistant and non-stick, making it suitable for rolling and transferring dough.
Resting Dough to Get a Fluffy, Puffy Texture
After rolling your dough between parchment sheets to maintain its integrity, letting it rest covered with a towel at room temperature for about an hour enhances its elasticity and hydration.
This rest period allows the gluten network to relax and absorb moisture evenly, which is essential for achieving a fluffy, puffy texture when cooked.
During resting, the dough’s structure strengthens, enabling light air pockets to form.
You’ll notice:
- A smoother surface that resists tearing
- Increased pliability for easy shaping
- Improved moisture retention for softness
- Enhanced puffing as trapped steam expands
Scientific studies confirm that adequate resting time balances hydration and gluten relaxation, which directly impacts texture.
Skipping this step often results in flat, dense flatbread rather than light, airy pieces you want.
Cooking and Baking Flatbread for Low-Calorie Results
You know, one great way to keep those calories in check is by cooking flatbread over medium heat in a non-stick pan.
This way, you can get that nice brown color without needing to add any oil.
Pretty neat, right?
If you’re in the mood for a different method, try baking it at 400°F for about 10 to 12 minutes.
This gives you a lovely golden crust and makes it super easy to control your portions—just slice it up after baking!
Ultimately, whether you choose to pan-cook or bake really comes down to what kind of texture you like and your calorie goals.
It’s all about finding what works best for you!
For best results, consider using a heavy-gauge aluminum or cast iron tawa for even heat distribution and consistent browning.
Heat Control Techniques
Mastering heat control is essential when cooking or baking low-calorie flatbread to achieve a light, evenly browned crust without adding oil. You want to maintain medium heat to prevent burning while ensuring the bread cooks through.
Pay close attention to the flatbread’s surface for visual cues like bubbles and puffing, which signal when to flip. Consistent heat distribution promotes a balanced texture, avoiding soggy or overly dry spots.
Cook on a non-stick pan over medium heat to encourage light browning. Toast each side for 2–3 minutes until golden spots appear. Press the edges gently while cooking to trigger soft interior puffing. If baking, set your oven at 400°F and bake for 10–12 minutes for a crisp crust.
This precise heat control preserves low calories by eliminating the need for added fats. Use a heavy-bottomed pan with even heat distribution to prevent hot spots and ensure uniform cooking.
Baking Versus Pan-Cooking
Although both baking and pan-cooking produce low-calorie flatbreads, each method offers distinct benefits that impact texture, cooking time, and ease of preparation.
When you bake flatbread at 400°F for 10–12 minutes, you get a consistently golden crust with a firmer texture, ideal for slicing into multiple low-calorie portions. Baking also allows even cooking under toppings without added fat.
Conversely, pan-cooking on a non-stick surface over medium heat takes less time, about 2–3 minutes per side, and creates light brown spots with a soft, slightly puffed interior. This method requires no oil, preserving low-calorie content.
Pan-cooking offers flexibility and speed, while baking excels in uniformity and volume. Choose based on your texture preference, time constraints, and whether you plan to add toppings before cooking. For a crisper base when baking, consider preheating a pizza stone in the oven to 475°F for at least 30 minutes to improve heat transfer to the dough (see preheated stone for details).
Flavoring Flatbread Without Adding Extra Calories
Frequently, enhancing the flavor of flatbread without adding extra calories involves incorporating natural seasonings and spices that contribute taste without density.
Enhance flatbread flavor effortlessly by adding natural seasonings without increasing calories or density.
You can boost flavor by mixing in herbs and spices directly into the dough or sprinkling them on top before cooking. These add complexity without extra fat or sugar, keeping calorie counts low.
Try these flavoring ideas:
- Garlic powder or chicken powder for savory depth
- Dried oregano or rosemary for herby aroma
- Crushed red pepper flakes for mild heat
- Ground cumin or coriander for earthy warmth
Each option adds distinctive notes without increasing calories, allowing you to enjoy tasty flatbread that aligns with your dietary goals.
Using water as the primary binder guarantees no hidden fats, and avoiding oils maintains the bread’s low-calorie profile.
Wax paper should be avoided at higher cooking temperatures because its paraffin coating can melt or transfer to food, so use alternatives like parchment or silicone sheets when cooking above safe limits for wax paper.
Serving Size Tips to Keep Flatbread Calories Low
When you control your flatbread serving size, you directly manage calorie intake without sacrificing satisfaction.
Aim for a 6-inch flatbread portion, which typically contains between 16 and 40 calories depending on the flour and yogurt ratios used.
Dividing a 12-inch flatbread into seven slices can reduce each serving to roughly 5.7 calories.
Use portioning to keep your meal balanced; smaller pieces allow you to enjoy variety without overeating.
Rolling dough to an even 1/4-inch thickness guarantees consistent cooking and calorie distribution per serving.
Avoid oversized flatbreads, as calories add up quickly.
Measuring ingredients precisely and cutting flatbread into uniform pieces helps maintain accurate calorie tracking, supporting your low-calorie goals efficiently.
Storing Flatbreads to Maintain Freshness and Texture
Controlling your flatbread portions is only part of managing calories. How you store leftovers plays a key role in preserving freshness and texture.
To maintain your flatbreads’ quality, separate each piece with parchment paper to prevent sticking and moisture buildup. Store them in an airtight container or resealable bag at room temperature if consuming within a day.
For longer storage, freeze flatbreads individually wrapped to avoid freezer burn and condensation. When stacking, make sure parchment paper layers remain intact to preserve texture.
- Use parchment paper squares between flatbreads.
- Store airtight at room temperature for short-term freshness.
- Freeze with individual wrapping for extended storage.
- Avoid stacking without separation to prevent clumping.
These steps help keep your flatbreads soft yet firm, ready for reheating without compromising calorie control.
Reheating Flatbreads for Best Taste and Softness
Although flatbreads can lose moisture and become tough after storage, reheating them properly restores softness and enhances flavor. To achieve the best results, use a non-stick pan over medium heat, heating each flatbread for about 1–2 minutes per side. This method reactivates moisture without drying the bread.
Alternatively, wrap flatbreads in damp paper towels and microwave for 20–30 seconds. This traps steam, softening the texture effectively. Avoid prolonged microwave exposure, which can make flatbreads rubbery.
If you prefer an oven, wrap flatbreads in foil and heat at 300°F for 5–7 minutes to evenly warm without crisping excessively. Store flatbreads separated by parchment paper to prevent sticking and guarantee uniform reheating.
These practices maintain the bread’s pliability and optimize the low-calorie flatbread’s fresh taste and texture.
Frequently Asked Questions
Can I Freeze Low-Calorie Flatbread Dough for Later Use?
Yes, you can freeze flatbread dough for later use.
Divide it into portions, wrap each tightly in plastic wrap, and store them in an airtight container or freezer bag.
When ready, thaw the dough overnight in the fridge.
Then let it rest at room temperature for about an hour before rolling out.
Freezing may slightly affect elasticity, so knead gently to restore texture before cooking.
This method preserves freshness without adding calories.
What Are the Best Utensils for Cutting Flatbread Evenly?
You’ll get the best results using a sharp pizza cutter or a 6-inch round lid to cut flatbread evenly. A pizza cutter guarantees smooth, continuous slicing without tearing the dough.
A round lid helps you trace perfect circles before cutting with a knife. For straight slices, a sharp chef’s knife on a sturdy cutting board works well.
Using parchment paper underneath prevents sticking and keeps edges clean.
How Long Can Homemade Flatbread Be Stored in the Fridge?
You can store homemade flatbread in the fridge for up to 3 to 5 days. To keep it fresh, separate each piece with parchment paper and place them in an airtight container or resealable bag.
This prevents moisture buildup and sticking. Before reheating, let the flatbread come to room temperature or warm it gently on a non-stick pan to restore softness without drying it out.
Are There Gluten-Free Low-Calorie Flour Alternatives?
You might expect gluten-free flours to be high-calorie, but several low-calorie alternatives exist. Oat fiber and coconut flour dramatically reduce calories compared to traditional wheat flour.
Almond flour, combined with psyllium husk, not only stays gluten-free but also offers keto-friendly, low-carb benefits with minimal glycemic impact.
These substitutions help you maintain a low-calorie profile while avoiding gluten. They make your flatbreads both healthier and suitable for gluten sensitivities.
Can I Substitute Yogurt With Non-Dairy Options in the Recipe?
Yes, you can substitute yogurt with non-dairy options like coconut yogurt or almond-based yogurt in your flatbread recipe.
Choose unsweetened, low-fat varieties to keep calories low and maintain moisture and texture. Non-dairy yogurts with similar protein and acidity help replicate dough elasticity and flavor.
Be mindful that differences in water content and fat may slightly alter consistency. Adjust warm water amounts when mixing the dough for best results.
Enjoy Fresh, Guilt-Free Flatbread at Home
By choosing low-calorie flours and mastering dough techniques, you create flatbreads that are both light and satisfying.
Balancing ingredients like yogurt guarantees a tender texture without extra calories, while proper resting and rolling prevent tearing.
Flavoring smartly keeps your bread tasty yet healthy, and mindful serving sizes help control intake.
Like a well-tuned instrument, each step harmonizes to produce flatbreads that stay fresh and soft. This makes your low-calorie choice both practical and delicious.