
Egg White Pizza Crust Recipe: Easy High-Protein Pizza
You’ll love how whipped egg whites create a light, airy crust that crisps perfectly with golden edges while staying tender inside.
Whip them to stiff peaks with clean tools, spread half an inch thick on parchment-lined pans, and bake at 375°F–400°F until just set.
Adding almond flour or cheese boosts flavor and structure, making it low-carb and high-protein.
Top with your favorites, then bake again until bubbly.
Discover how to master each step to make this crust outstanding.
Key Takeaways
- Whip egg whites to stiff, glossy peaks using clean, grease-free bowls for a light, airy crust base that holds toppings well.
- Combine whipped egg whites with almond or coconut flour and Parmesan cheese for a low-carb, flavorful, and sturdy crust.
- Line a baking pan with parchment paper, lightly coated with avocado oil, and spread egg white mixture evenly about 0.5 inches thick.
- Bake the crust at 375°F–400°F for 10–15 minutes until golden edges form and the surface is matte and dry before adding toppings.
- After topping and reheating, cool crust 2–5 minutes before slicing; store leftovers refrigerated up to 3 days in an airtight container.
Complete Egg White Pizza Crust Recipe Table
| Recipe Detail | Information |
|---|---|
| Main Term | Egg White Pizza Crust Recipe |
| Recipe Type | Low-Carb Pizza Crust |
| Cuisine | American |
| Difficulty Level | Easy |
| Prep Time | 15 Minutes |
| Bake Time | 10–15 Minutes (Crust) + 5–12 Minutes (With Toppings) |
| Total Time | 25–30 Minutes |
| Cooking Method | Baking |
| Main Ingredients | Egg Whites, Almond Flour, Parmesan Cheese |
| Optional Binders | Coconut Flour, Cream of Tartar, Cornstarch |
| Pan Preparation | Parchment Paper with Light Avocado Oil Spray |
| Crust Thickness | About ½ Inch |
| Baking Temperature | 375°F–400°F |
| Texture | Crispy Edges with a Soft, Tender Center |
| Best Toppings | Pizza Sauce, Mozzarella, Vegetables, Pepperoni, Fresh Herbs |
| Cooling Time | 2–5 Minutes Before Slicing |
| Storage | Airtight Container in Refrigerator |
| Refrigerator Shelf Life | Up to 3 Days |
| Reheating | Bake at 350°F for 5–7 Minutes |
Why Egg Whites Work So Well for Pizza Crust?

Although traditional pizza crusts rely on wheat flour for structure, egg whites offer a surprisingly effective alternative that you’ll love once you try it.
When you whip egg whites to stiff peaks, you create a light, airy foam that acts as a natural scaffold for your crust. This foam traps air, giving your pizza a tender yet sturdy texture that holds toppings without collapsing.
Whipping egg whites to stiff peaks creates a light, airy foam that supports a tender, sturdy pizza crust.
You’ll notice how the whites bake into a crisp, golden foundation, delivering a delightful contrast between crunchy edges and a soft center. Plus, egg whites are nearly flavorless, so they let your seasonings and toppings shine through.
Once you master whipping them just right, you’ll appreciate how egg whites transform a simple crust into something uniquely satisfying and low-carb. Using egg whites also reduces moisture content, which can help with longer shelf life when storing leftovers.
Best Flours and Binders for Low-Carb Crusts
Explore how choosing the right flours and binders can transform your egg white pizza crust into a delicious low-carb masterpiece.
Using alternative flours and smart binders not only keeps carbs low but also guarantees your crust stays crisp and sturdy.
Here are four excellent choices to enhance your crust:
- Almond Flour: Nutty flavor and excellent texture, perfect for a tender bite.
- Coconut Flour: Absorbs moisture well, adding lightness without heaviness.
- Parmesan or Mozzarella Cheese: Acts as a binder while boosting flavor and crispiness.
- Cream of Tartar or Cornstarch: Stabilizes whipped egg whites, preventing collapse during baking.
Combine these thoughtfully, and you’ll create a crust that’s both satisfying and low-carb! Additionally, consider prepping and slicing toppings on a sustainably sourced hardwood cutting board to keep prep safe and eco-friendly.
Whip Egg Whites to Stiff Peaks Easily
To whip egg whites to stiff peaks, start with bowls and beaters that are completely clean and grease-free. This is super important for getting that perfect whip!
Begin whipping at a low speed. This helps gently build volume without splattering everywhere. Once you see some foam forming, you can turn it up a notch. Keep an eye on the texture as you go. You’re looking for that glossy, tall peak that doesn’t droop—kind of like marshmallow cream. When you reach that stage, you know you’re good to move on! Use slow, controlled movements and maintain consistent angle while keeping the tool stable to ensure safety.
Clean Equipment Importance
When whipping egg whites to stiff peaks, using perfectly clean, dry equipment makes all the difference in achieving that glossy, stable foam.
Even a tiny trace of grease or moisture can prevent the whites from whipping properly, leaving you with a flat, runny mixture.
To guarantee success, you want your bowl and beaters spotless.
Here’s what you can do:
- Wash your bowl and beaters thoroughly with hot, soapy water, then rinse well.
- Dry everything completely; any water droplets can weigh down the whites.
- Avoid plastic bowls; opt for glass, stainless steel, or ceramic as they hold less residue.
- Resist touching the inside of the bowl or beaters with oily hands.
Following these steps helps you whip egg whites effortlessly to those perfect, stiff peaks. You can also air dry your equipment after washing to preserve the materials and prevent shrinking.
Whipping Speed Techniques
Once your equipment is spotless and dry, the next step is mastering how to whip egg whites at the right speed.
Start slow; begin whisking at a low speed to gently break up the whites and build small, stable bubbles.
As the foam forms and thickens, gradually increase to medium speed, allowing the mixture to gain volume without overworking it.
Finally, crank up to high speed for the last few minutes to achieve those stiff, glossy peaks that hold their shape.
This gradual speed progression guarantees you build a stable meringue without risking graininess or collapse.
Pay attention to how the whites change texture under your whisk.
With practice, whipping egg whites to perfection will become second nature, setting a strong foundation for your egg white pizza crust.
Also, periodically monitor temperature during use to ensure your equipment doesn’t overheat and affect results.
Peak Consistency Indicators
Although whipping egg whites to stiff peaks can seem tricky at first, recognizing key visual and tactile cues makes it much easier to master.
When you whip perfectly, the egg whites hold structure without collapsing or becoming grainy.
Here’s what to watch for:
- Glossy and smooth texture: Your whites should shine, not look dull or dry.
- Peaks stand straight: When you lift the whisk, peaks don’t droop or fold over.
- Stable foam: The mixture stays firm in the bowl, not sliding around.
- No liquid pooling: No watery separation at the bottom, showing full aeration. Wiping the bowl and ensuring it’s free of grease helps achieve stable foam.
Preparing Your Pan and Shaping the Egg White Crust
First things first, let’s get your pan ready! Line it with parchment paper—that way, your crust won’t stick, and cleanup will be super easy. You can also give the paper a light brush with avocado oil or some nonstick spray. This little trick will give you a nice, slippery surface.
Next up, grab that whipped egg white mixture and spread it evenly in the pan. Don’t forget to gently push up the edges! This will help form a nice, defined crust that holds its shape while it bakes. You got this! For best results, use a wide-mouth pan or dish to make spreading and shaping the crust easier.
Pan Lining Essentials
To get your egg white pizza crust off the pan without a hitch, line your baking sheet or skillet with parchment paper. This simple step guarantees your crust won’t stick and makes cleanup a breeze.
Before spreading your fluffy mixture, lightly coat the parchment with avocado oil or nonstick spray, helping the egg whites glide smoothly.
Use a 15-inch cast iron skillet or a 9×13-inch pan for the perfect shape. Then, evenly spread the mixture about half an inch thick, gently pushing the edges up to create a defined crust border.
- Line pan with parchment paper
- Lightly oil the parchment
- Choose a suitable pan (cast iron or rectangular)
- Spread mixture evenly, shaping edges
This prep sets your crust up for success! Parchment paper is ideal because it helps produce crisp edges and prevents sticking while withstanding typical baking temperatures.
Applying Oil Evenly
Coating your parchment paper evenly with oil guarantees your egg white crust releases effortlessly after baking and crisps up beautifully.
Use a light hand with avocado oil or a nonstick spray, spreading it uniformly to avoid oily spots that can sog your crust. This step is vital for that perfect golden crisp.
Here’s a quick guide:
| Oil Type | Application Tip |
|---|---|
| Avocado Oil | Use a brush for even spread |
| Nonstick Spray | Spray from 6-8 inches away |
| Olive Oil | Apply thinly with a cloth |
| Butter | Melt and brush lightly |
| Coconut Oil | Warm slightly before use |
Cast iron and stainless steel tools both benefit from even weight distribution to ensure consistent pressure and results.
Shaping Crust Edges
While your oven preheats, you’ll want to prepare your pan and shape the crust edges carefully to give your egg white pizza a perfect structure.
Start by lining your chosen pan with parchment paper. Lightly coat it with avocado oil or nonstick spray to prevent sticking.
Spread the whipped egg white mixture evenly, about half an inch thick, assuring consistency. Next, gently push the mixture toward the edges of the pan to create a defined crust border that holds toppings well and crisps nicely.
- Line pan with parchment for easy removal.
- Lightly oil the parchment for nonstick benefits.
- Spread egg whites evenly, 0.5 inches thick.
- Shape edges by pushing mixture upward slightly.
This prep assures a sturdy, crispy crust every time. Be sure to work on a clean, sanitized surface to reduce contamination risk and keep your tools and linens free of bacteria by following basic sanitization steps.
Baking Egg White Pizza Crust: Temperature and Timing
Baking your egg white pizza crust requires careful attention to temperature and timing to achieve that perfect balance of crispiness and tenderness.
Preheat your oven to between 375°F and 400°F for an ideal bake. Spread your crust evenly about half an inch thick on a parchment-lined pan, then slide it into the oven.
Preheat the oven to 375°F–400°F and bake an evenly spread, half-inch thick crust on parchment.
Watch closely as it bakes for 10 to 15 minutes. You’re aiming for a matte, dry surface with golden edges starting to pull away from the parchment.
The center should still feel slightly soft to the touch.
This initial bake sets the foundation, locking in structure without over-drying. Timing may vary if your crust is thicker or thinner, so trust your eyes and touch.
This step is essential before adding your toppings.
Adding Toppings and Finishing Your Egg White Pizza
Once your crust has baked to a perfect matte finish with golden edges, it’s time to pile on your favorite toppings.
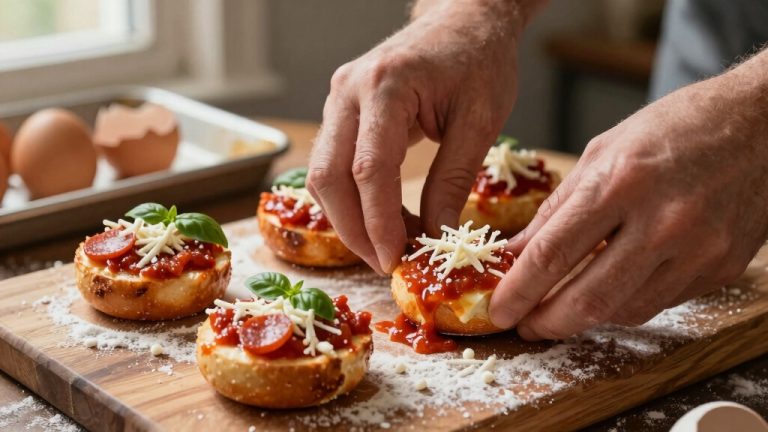
Start by spreading a generous layer of pizza sauce all the way to the edges, letting it soak into the crust.
Next, sprinkle shredded mozzarella or Parmesan cheese evenly over the sauce, creating a melty, flavorful base.
Then, add your choice of toppings, such as pepperoni, veggies, or meats, arranged just the way you like.
Finally, return the pizza to the oven for 5 to 12 minutes until the cheese bubbles and the toppings heat through.
Here’s a quick topping checklist:
- Spread pizza sauce edge to edge
- Layer shredded cheese evenly
- Add your favorite toppings
- Bake until cheese melts and bubbles
You’ll love the delicious finish!
Nutritional Benefits of Egg White Pizza Crust
The appeal of egg white pizza crust goes beyond its unique texture and flavor. It offers impressive nutritional benefits that make it a smart choice for health-conscious eaters.
You get a high-protein, low-carb base without the gluten found in traditional crusts. This is perfect if you’re watching your carb intake or managing dietary restrictions.
The egg whites provide lean protein that supports muscle maintenance and keeps you feeling full longer. Plus, by swapping wheat flour for almond or coconut flour, you add healthy fats and fiber.
This boosts heart and digestive health. This crust is naturally low in calories and free from dairy if you skip the cheese, making it ideal for keto, vegan, or gluten-free lifestyles.
Choosing this crust means fueling your body smartly without sacrificing flavor or satisfaction.
Serving and Storing Your Egg White Pizza Crust
Enjoying the full benefits of your egg white pizza crust means knowing how to serve it just right and store any leftovers properly.
After baking, let your crust cool for 2 to 5 minutes so it firms up, making slicing easier without crumbling. Serve your pizza warm, garnished with fresh herbs for a burst of flavor.
Allow your crust to cool briefly for perfect slices, then serve warm with fresh herbs for added flavor.
When it comes to storing leftovers, follow these simple steps:
- Let the crust cool completely before storing.
- Wrap tightly in plastic wrap or place in an airtight container.
- Refrigerate for up to 3 days to maintain freshness.
- Reheat in the oven at 350°F for 5–7 minutes to restore crispiness.
This way, every bite stays delicious and ready for your next meal!
Frequently Asked Questions
Can I Use Whole Eggs Instead of Just Egg Whites?
You shouldn’t use whole eggs instead of just egg whites because the whipped egg whites create that essential light, airy structure.
Yolks add fat and moisture, which weigh down the mixture, preventing it from forming stiff peaks and a firm crust.
If you want a fluffy, crispy base, stick to egg whites whipped to stiff peaks.
Whole eggs will make your crust denser and less stable, so it won’t hold together as well.
How Do I Prevent My Egg White Crust From Tasting Eggy?
You don’t want your crust to taste like a carton of eggs, right? To avoid that, add garlic powder, Italian seasoning, or oregano to mask the eggy flavor.
Incorporate Parmesan or mozzarella to bring richness and depth, turning blandness into savory delight.
Make sure you whip the whites perfectly. Stiff peaks lock in lightness, so the egg flavor doesn’t overpower.
Your crust will taste fresh, not like breakfast leftovers.
Is It Possible to Make This Crust Ahead and Freeze It?
Yes, you can make your egg white crust ahead and freeze it!
Just bake it fully, cool completely, then wrap it tightly in plastic wrap and foil to avoid freezer burn.
When you’re ready, thaw it in the fridge overnight, add your toppings, and bake again.
This way, you save time without compromising texture or taste.
Freezing is a smart move to enjoy a quick, delicious pizza anytime you want!
What Are Common Mistakes When Whipping Egg Whites for Crust?
One common mistake you’ll want to avoid is using a bowl or beaters that aren’t completely clean and dry. Any grease or moisture will stop the whites from whipping properly.
Also, don’t rush the process; start slow and gradually increase speed to build stable peaks.
Overwhipping can make the whites dry and grainy, while underwhipping leaves them too soft to hold shape.
Patience and precision really pay off here!
Can I Add Herbs Directly Into the Egg White Mixture?
You know what they say: “Too many cooks spoil the broth.”
Adding herbs directly into the egg whites can weigh down the delicate foam, making it harder to reach stiff peaks.
Instead, gently fold finely chopped herbs in after whipping to maintain volume and texture.
This way, you get that fresh, aromatic flavor without compromising the airy structure that makes your crust light and crispy.
The Secret to a Delicious Low-Carb Pizza
You might worry that an egg white crust won’t have that satisfying chew or flavor.
Imagine biting into a light, crisp base that holds your favorite toppings perfectly.
No sogginess, just pure, clean taste.
With the right flour and careful whipping, you create a crust that’s both low-carb and deliciously sturdy.
Give it a try, and you’ll discover a fresh, protein-packed twist on pizza that’s as fun to make as it is to eat.