
How to Cook Bone Marrow in Pan: Easy Step-by-Step Guide
Start by selecting clean-cut marrow bones about 2 to 3 inches long. Soak them in salted ice water for 12 to 24 hours to remove impurities.
Pat them dry, brush with olive oil or butter, and season with salt, pepper, and fresh herbs.
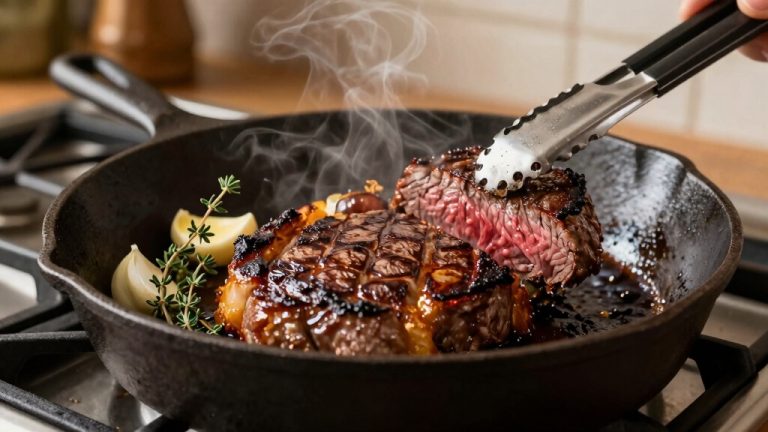
Heat a heavy-bottomed skillet over medium-low heat, add a light oil coating, and sear bones cut side down for 2 to 3 minutes until golden and marrow is soft yet holds shape.
Keep going to discover how to perfect this process and serve it beautifully.
Key Takeaways
- Cut marrow bones into 2- to 3-inch pieces and soak in salted ice water for 12-24 hours to remove impurities.
- Preheat a heavy-bottomed skillet over medium-low heat and lightly coat with oil or butter to prevent sticking.
- Place bones cut side down and cook 2-3 minutes per side until golden-brown crust forms and marrow bubbles gently.
- Use tongs to turn bones carefully, avoid overcrowding, and cook in small batches for even heat distribution.
- Serve immediately on toasted bread with sea salt, fresh herbs, and use a small spoon to scoop out the soft marrow.
Select and Cut Marrow Bones for Pan Cooking

When preparing marrow bones for pan cooking, you should choose bones that are cut into 2- to 3-inch pieces to guarantee even cooking and easier handling.
Select marrow bones with a clean cut surface exposing the marrow, as this maximizes flavor release during cooking.
Avoid pieces that are too large, which cook unevenly, or too small, which can dry out quickly.
If the bones are frozen, thaw them fully before cutting to reduce splintering and ensure a smooth cut.
Use a sharp butcher’s saw or heavy knife for precise, clean cuts.
Handle the bones carefully to keep the marrow intact.
Properly cut marrow bones will fit comfortably in your skillet, allowing even heat contact on the exposed marrow for peak cooking results.
High-quality, razor-sharp knives with good blade flexibility and ergonomic handles make cutting marrow bones safer and more precise.
Safe Handling, Soaking, and Storage of Marrow Bones
Although marrow bones can be cooked straight away, soaking them in salted ice water for 12 to 24 hours is essential to remove blood and impurities. This ensures a cleaner flavor and appearance.
Soaking marrow bones in salted ice water for 12 to 24 hours removes impurities for a cleaner flavor and appearance
Use enough cold water to fully submerge the bones and keep them refrigerated during soaking. Afterward, drain the bones thoroughly and pat dry before cooking to prevent excess moisture in your pan.
Store any unused soaked bones in the fridge, tightly wrapped, and use within 24 hours for peak freshness. If you need to keep them longer, freeze the bones after soaking, wrapped securely to avoid freezer burn.
Always handle raw marrow bones with clean hands and utensils to maintain food safety and prevent cross-contamination in your kitchen. For added cleanliness, wash any cheesecloth or strainers used during prep following proper cleaning techniques to avoid stains and contamination.
Season Bone Marrow for Pan Cooking
Enhance the natural richness of bone marrow by seasoning it simply yet effectively before pan cooking.
Begin by patting the marrow bones dry with a paper towel to guarantee seasonings stick well. Lightly brush or rub each bone with olive oil or melted butter to prevent sticking and add flavor.
Sprinkle sea salt evenly over the exposed marrow, followed by freshly ground black pepper for a balanced taste. If you want a herbal note, finely chop fresh rosemary or thyme and gently press the herbs onto the marrow surface.
Avoid heavy seasoning since marrow’s fatty richness shines best with minimal additions. Season both the marrow and the cut bone sides to guarantee every bite is flavorful.
This straightforward seasoning step prepares the marrow for even cooking and an enhanced, savory finish. For a glossy finish and to help seasoning adhere, consider brushing the marrow with a small amount of melted butter before cooking, which also promotes even heat and browning.
Choose the Right Pan and Heat for Cooking Marrow
Select a heavy-bottomed skillet to guarantee even heat distribution when cooking bone marrow. Thinner pans can cause uneven cooking and scorching.
Preheat your pan over medium or medium-low heat to gently render the marrow without burning it. Avoid high heat, which can quickly overcook the marrow’s delicate fats.
Lightly coat the pan with oil or butter to prevent sticking and enhance flavor.
| Pan Type | Heat Level | Reason |
|---|---|---|
| Cast Iron Skillet | Medium | Retains heat evenly |
| Stainless Steel | Medium-Low | Avoids hot spots |
| Nonstick | Medium | Prevents sticking, easy clean |
Use moderate heat and a sturdy pan for perfectly cooked, creamy marrow. Gradually heating the pan helps prevent thermal shock and reduces the risk of warping.
Pan-Cook Bone Marrow: Step-by-Step
Alright, let’s dive into cooking some delicious pan-cooked bone marrow! First things first, grab your marrow bones and cut them into 2- to 3-inch pieces. Don’t forget to sprinkle a little salt and pepper on them for that extra flavor.
Now, while you’re prepping the bones, go ahead and preheat a heavy-bottomed skillet over medium heat. Once it’s nice and warm, add a thin layer of oil or butter to the pan. This will help prevent the bones from sticking.
When the skillet’s ready, place the bones in there and let them cook for about 2 to 3 minutes on each side. You want to keep an eye on them until the marrow starts to soften and the outside gets that lovely golden-brown color. It’s going to smell amazing! Enjoy the process!
For easier cleanup and to prevent sticking during cooking, consider using a reusable non-stick dehydrator sheet under the bones.
Preparing Marrow Bones
Begin by trimming the marrow bones to 2- to 3-inch segments if they aren’t already cut. This size guarantees even cooking and easy handling.
Next, soak the bones in salted ice water for 12 to 24 hours to remove blood and impurities. Then drain and refrigerate them until ready.
Before cooking, pat the bones dry to prevent excess moisture in the pan.
Focus on these three key preparation steps:
- Cut bones into 2- to 3-inch lengths for ideal heat exposure.
- Soak in salted ice water to clean and improve flavor.
- Dry thoroughly to avoid splattering and uneven cooking.
These steps set the foundation for perfectly cooked marrow, ready for the pan without compromising texture or taste. Fast freezing at 0°F can help preserve marrow quality if you plan to store bones before cooking, so consider freezing them at 0°F or below to maintain freshness.
Cooking Techniques and Tips
Heat up a heavy-bottomed skillet over medium to medium-low heat before adding the marrow bones.
Lightly coat the pan with butter or olive oil to prevent sticking and enhance flavor.
Place 2- to 3-inch marrow bones cut side down, using tongs for safety.
Cook each side for 2 to 3 minutes until you see a golden-brown crust forming.
Turn carefully to brown all cut surfaces evenly, avoiding overcrowding to ensure even heat distribution.
Watch for bubbling marrow as it softens and separates from the bone.
Remove the bones when the marrow is hot, creamy, and spreadable but not overly melted.
Season with sea salt and freshly ground black pepper just before serving.
Rest briefly to let the marrow firm slightly for easier spreading.
A hot skillet helps create a flavorful crust similar to Maillard reaction when browning the marrow.
How to Tell When Bone Marrow Is Perfectly Cooked?
You’ll often notice bone marrow is perfectly cooked when its exterior turns a golden-brown crust while the center remains creamy and soft.
To tell if it’s done, watch for these clear signs:
- The surface develops a light crust with a rich golden-brown color, indicating proper caramelization.
- You’ll see gentle bubbling on the marrow’s surface, signaling it’s heated through but not overcooked.
- When you press lightly with a utensil, the marrow should feel soft and spreadable, separating easily from the bone.
These cues help you confirm doneness without cutting into the marrow.
Perfectly cooked marrow offers a balance between a crispy exterior and a luscious, buttery interior, ready to be enjoyed immediately.
For serving, consider pairing with toasted bread and a sprinkle of flaky salt to enhance the rich flavor and texture, similar to how adding a crunchy topping can elevate buttery baked goods.
Avoid Overcooking and Greasy Pans
Although bone marrow benefits from thorough cooking to achieve softness, overcooking can cause it to melt excessively and lose its rich, buttery texture. To avoid this, monitor the cooking time closely, generally 2 to 3 minutes per side on medium heat. Watch for a golden-brown crust with bubbling marrow surface as a doneness cue. Remove the bones promptly once the marrow softens but still holds shape.
To prevent greasy pans, avoid overcrowding by cooking only a few bones at a time. This allows for even heat distribution. Use a heavy-bottomed skillet and a light coating of butter or oil to minimize sticking without excess fat buildup. Frequently drain excess grease if needed, ensuring the marrow cooks cleanly and maintains its appealing texture.
If you’re concerned about pan performance, consider using heavy-bottomed pans to reduce the risk of warping and promote even heating.
Serve Pan-Cooked Bone Marrow With These Ideas
How should you serve pan-cooked bone marrow to highlight its rich, buttery flavor?
Serve it immediately after cooking to enjoy its soft, creamy texture at the perfect temperature. Use crusty bread or toasted baguette slices as a base to spread the marrow, much like butter.
For ease, use small marrow spoons or similar tools to scoop the marrow cleanly.
To elevate your serving, consider these three ideas:
- Spread marrow on warm, toasted bread and sprinkle with sea salt and freshly ground black pepper.
- Serve alongside a grilled steak or roasted vegetables for a rich, complementary side.
- Add fresh herbs like rosemary or thyme on top for an aromatic garnish that enhances savoriness.
These simple steps guarantee marrow’s buttery flavor shines.
Frequently Asked Questions
Can Bone Marrow Be Cooked Directly From Frozen Without Thawing?
You shouldn’t cook bone marrow directly from frozen; it’s best to thaw it first.
Thawing guarantees even cooking and prevents the marrow from melting unevenly or overcooking on the outside while staying frozen inside.
For best results, thaw marrow bones in the refrigerator overnight or use a cold water bath if short on time.
This assures a consistent texture and flavor when you pan-cook the marrow.
What Type of Bread Pairs Best With Pan-Cooked Bone Marrow?
Crusty bread like a baguette or sourdough pairs best with pan-cooked bone marrow.
You’ll want slices toasted until golden and crisp to provide a sturdy base that holds the rich, soft marrow without becoming soggy.
The bread’s texture contrasts nicely with the creamy marrow, enhancing the eating experience.
Lightly rubbing the toast with garlic or drizzling olive oil before serving adds extra flavor that complements the marrow’s richness perfectly.
How Do I Clean Marrow Bones Before Soaking?
To clean marrow bones before soaking, start by rinsing them under cold running water to remove any residual blood or bone fragments.
Use a brush or your fingers to gently scrub the surface, especially the cut ends.
Pat them dry with paper towels. This prep helps eliminate impurities, ensuring cleaner marrow extraction during soaking.
Once cleaned, place the bones in salted ice water for 12 to 24 hours as recommended.
Can I Reuse the Pan Drippings From Cooking Marrow?
Yes, you can reuse pan drippings from cooking marrow to add rich flavor to sauces or gravies.
Since marrow fat is highly flavorful and about 80% fat, carefully strain drippings to remove solids and store them in the fridge for up to three days.
Reheat gently to avoid burning. Use them to elevate dishes like roasted vegetables or steak, but always make certain the drippings haven’t gone rancid before reuse.
Is Bone Marrow Safe to Eat Raw or Only Cooked?
You shouldn’t eat bone marrow raw because it can contain harmful bacteria and parasites. Cooking it properly kills these pathogens, making it safe to consume.
Always soak raw marrow bones in salted ice water for 12 to 24 hours to remove impurities before cooking. Then, cook until the marrow is soft, hot, and golden-brown. This guarantees safety and enhances flavor.
Avoid raw marrow to prevent foodborne illness.
The Secret to Rich, Silky Bone Marrow Flavor
Now that you’ve mastered pan-cooking bone marrow, you might ironically find it’s the easiest gourmet dish you’ve ever made.
Just remember: select good bones, season well, and keep a close eye to avoid greasy disasters. If you overcook, you won’t get that silky texture you crave.
So, don’t underestimate this humble ingredient. It’s deceptively simple but rewards your attention with rich, melt-in-your-mouth flavor every time. Enjoy impressing yourself and others!